- Welcome to the Ford Mustang forum built for owners of the Mustang GT350, BOSS 302, GT500, and all other S550, S197, SN95, Fox Body and older Mustangs set up for open track days, road racing, and/or autocross. Join our forum, interact with others, share your build, and help us strengthen this community!
You are using an out of date browser. It may not display this or other websites correctly.
You should upgrade or use an alternative browser.
You should upgrade or use an alternative browser.
Shelby GT350 Build..."HAN SOLO"
- Thread starter50Deep
- Start date
This site may earn a commission from merchant affiliate links, including eBay, Amazon, and others.
More options
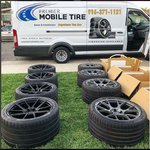
Who Replied?Ran into a logistical nightmare with trying to move all these wheels and tires. Luckily we have a solid option here in Sacramento thanks to Wade at Premier Mobile Tire. He came to the house to do the mounting/balancing. Cost me about $340 out the door, and even had black wheel weights for the black wheels. A little more than I pay at my local tire shop, but well worth it considering my time savings. He got all this mounted up in about an hour and didn't scratch any of the wheels.
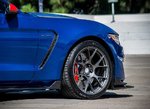
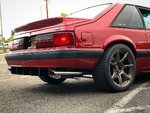
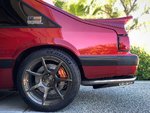
These are the new Track Series SV503 and Precision Series SV702 mounted up on the car. The SV503 are wrapped in 305 continentals and will be a track wheel. The SV702 will be my winter setup and on a 305/325 MPSS setup. Both are built with anti slip bead knurling so I can put on a slick if I get that advanced. But everything is for sale.
Very happy with both, but wondering which one you guys like more.
1) SV503 - GT350R Spec - Gloss Gunmetal

I used Wade’s services for my wife’s car. The service was great., and he really took the time to explain things to my wife. The best part is the convenience!
Sent from my iPad using Tapatalk
- Thread starter
- #363
50Deep
Jockin' GT350's
Regrets, we all tend to have them. I am going to share with you my most recent. This is a tale of a set of wheels that came and went before their prime. Sent off to live a life of tracking and fun with Jason Kanarky. I didn’t really appreciate them until they were gone.
In my quest to debut every set of wheels on the GT350 for potential customers I ordered a set of our Signature Wheel Precision Series SV702. Until now they had only been built for Bobby Ramser’s S197 Roush and Greg Hildebrand’s S550. Beautiful cars, however, I wanted to test some new offsets and get technical data for everyone.
This wheel was ordered in the GT350R spec, but with modified offsets to reduce the rear poke, and make the fronts more concave. The new concave profile adds about 1lb to the front. Happy to report no rubbing with the new rear specs, even with the wider tire. The new owner has also tracked them, done burnouts, and driven the Tail of The Dragon without issue.
I finally got around to editing the photos I took and really started to love the look. It rekindled a love for black wheels, but In the end I still like some brighter finishes. May end up ordering another set at some point. Here is the skinny:
Signature Wheel Precision Series SV702
Matte Black
Anti-Slip Bead Knurling
19x11 - 305/30/19 MPSS
19x11.5 - 325/30/19 MPSS
Front Wheel Data
Front wheel weight - 24.11 lbs
Front tire weight- 29.03 lbs
Combined wheel/tire weight 53.14 lbs
Rear Wheel Data
Rear wheel weight- 19.31 lbs
Rear tire weight- 35.05 lbs
Combined wheel/tire weight - 54.36 lbs


- Thread starter
- #364
50Deep
Jockin' GT350's
One of my buddies Chris Gonzales is a tinkerer. He owns a tracked out S550 and knows his way round an LED board. He developed some custom rear LED lights to replace the reflectors in the S550 rear valence. Pretty slick when I saw them for the first time, and asked him to build me a set. As far as I know these were the first set to be installed on a car that wasn't his.
The install process took me about 3 hours, but it was because I was being a dunce. The rear valence on the GT350 has some added bracing in the way of removing the one nut that bolts the reflector in place. Once I figured out I could push things around to get my swivel in place the removal was pretty easy. Chris wrote up some instructions based on my experience, and even added heat wrap to block the wires from the exhaust. The only thing you need to remove on the GT350 is the lower diffuser, but that comes off easy enougt.
Here is a short video of them in operation. They work as a running light, brake light, turn signal, and hazard. You can also disconnect certain wires to make them work how you want.
50Deep. I admire your attempt to do stuff like this! Not in my "wiring".Continue on with your adventures...."Ignorance is Bliss but stupidity is measured"...I don't know who said that, but I 'm sure they learned the hard way.Best of luck with future endeavors!!!!!!!!!!!!!!Haven't seen a Stang I didn't love.........Yours included!!!!!!!!!!I was being a dunce.
Last edited:
- Thread starter
- #366
50Deep
Jockin' GT350's
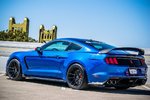
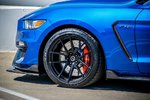
Some updated shots of my GT350R on the SV302S. This is the answer to the OEM 2019 GT350 wheel if that is what you are after. This is a great spec for stock ride height, lowered, street, and track use. You can also see how clean the Exhibitions Of Speed Titanium Lug nuts install with the package. Oh, and this wheel setup is currently for sale 


- Thread starter
- #367
50Deep
Jockin' GT350's
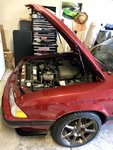
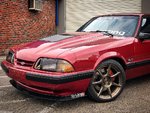
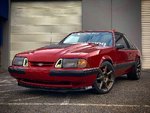
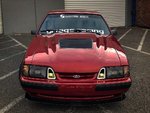
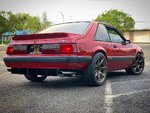
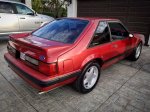
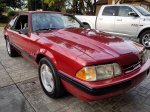
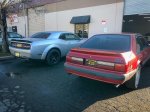
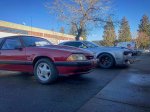
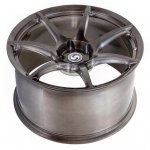
Iron man meets Thanos. For those that didn’t know I picked up a 91 LX hatchback as a development car. Dropped the new Foxbody project off for a little TLC with the guys at Imperial Works I’m Sacramento. Going to see what can be done with the paint from the 90’s . Getting it all cleaned up for the new Signature Wheel SV902 and Griggs Racing suspension.
Just so happened they finished wrapping a Dodge Demon. Makes the Fox look small, but I will admit the Demon has some good road presence.
Couple components from Trackspec Motorsports and Carters Customs on the way too. 2019 should be fun as I plan to test the Foxbody against metrics the R has set. What mods you guys have planned?


- Thread starter
- #369
50Deep
Jockin' GT350's
Nice!2019 mods:Hopefully in time for the Boston to Richmond rally in July
- Resonator delete (purchased Shiftek H-pipe)
- Oil catch can (FPP)
- Wheels....
When you get the 6GR wheels in please do me a favor and measure the caliper clearance on them. I have been wanting to get my hands on that data
- Thread starter
- #370
50Deep
Jockin' GT350's
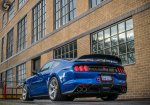
As time goes on I am starting to develop a real love for photography. Still a novice with my Nikon D3300 and Lightroom.
Most recently I had the good fortune of meeting Brett Turnage of Hot Rod Magazine. The guy is a total bad ass photographer, excellent writer, and just so happens to drive a 2018 GT350R as well. Been taking some tips from him and it helped on my last shoot with the new Signature Wheel Reserved SV901 mounted. I have a satin black 19x11 square set of these in production now if anyone is interested.
Long way to go, but got really good feedback/critiques from him this last set. Enjoy!
2017 Lightning Blue GT350R
Signature Wheel Reserved SV901
Brushed Aluminum Clear
19x11/19x11.5 (21-23lbs)
305/30/19 & 325/30/19 MPSS


- Thread starter
- #372
50Deep
Jockin' GT350's
What rear tow hook are you using??
This is the piece from ZL1 Addons. Installed it slightly offset
I like itThis is the piece from ZL1 Addons. Installed it slightly offset
I had a chance to see T’s new wheels yesterday and they look sharp.
- Thread starter
- #375
50Deep
Jockin' GT350's
I had a chance to see T’s new wheels yesterday and they look sharp.
Thanks Rick. Cant wait to see what you think of the fox when its done
- Thread starter
- #376
50Deep
Jockin' GT350's
Making some progress with the suspension install. Took a trip up to Sonoma to meet the man Bruce Griggs himself. Pretty cool experience to wander around the shop a bit. Had some good conversation, learned a lot about the science behind the suspension components, and then headed back home. Lots of goodies
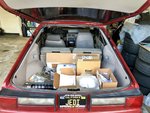
I spent a little time assembling the coil over kit on the Griggs Racing Varishock. Also did the install on the rear bump stops.
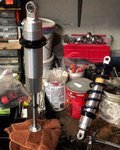
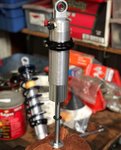
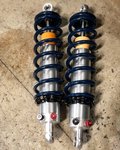
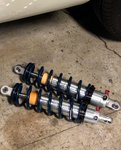
I found a good deal on some Koni yellow double adjustable struts locally and they will be used for the front coil over kit. Not going overboard on the front as an SLA is in the future. I will say that I miss the days you could find anything you needed for a Foxbody build on Craigslist for pennies on the dollar and at a moments notice.
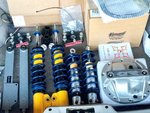
New 18” Signature Wheel Reserved SV902 came in. These are an 18x9 / 18x10 4-lug direct bolt on to any Foxbody. Designed to fit with only removal of the rear quad shock while sporting 255/35/18 & 285/35/18 Michelin Pilot Sport 4S. Got the tires mounted thanks to Premier Mobile tire that came to the house. Then I did some test fitting and love the look. Weights came in at 20/22 lbs which will be great for track use and an overall more enjoyable and nimble car.
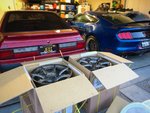
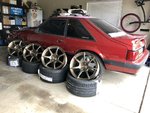
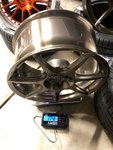
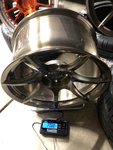
I also built a set of Signature Wheel Flagship Series FOUR for my brothers 86 coupe build. He will have an IRS setup and narrower front fenders so these are an 18x8.5 / 18x9.5. Weighing in at 22lbs each they will be an excellent lightweight wheel for street/track use.
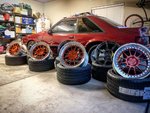
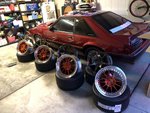
Had to do a quick test fit so I could sleep that night.
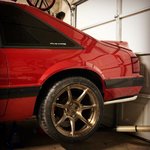
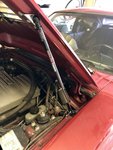
I wanted to update the car to modern standards so I ordered some Redline Hood/Hatch Struts. These little things go a long way
- Thread starter
- #377
50Deep
Jockin' GT350's
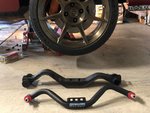
Next up was to get the suspension setup ready for install. On the rear you will find the Griggs Racing setup is very well constructed. I upgraded the lower shock mounts to accommodate the added load being placed on them. This required enlarging the bolt holes to fit the larger grade 8 hardware from Griggs.
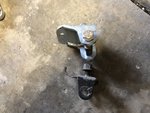
The upper shock mount comes with a custom perch to mount the spherical shock bearing too. This allows for more movement and less bind. Some simple trimming with some snips gives you the room needed to get it installed.
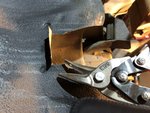
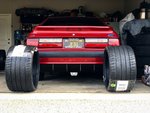
Snuck out to get the Carters Customs rear diffuser mounted. Easy enough task and really like the rivnuts. Although I spent almost 2 hours trying to figure out how to properly use the rivnut gun that I bought.

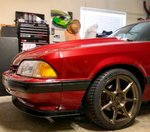
Can’t have the rear diffuser without a matching Carters Customs front splitter…
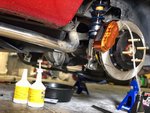
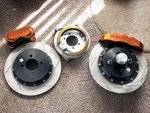
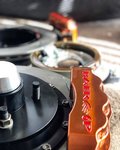
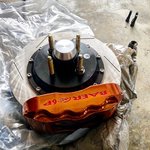
Over the course of time spent on the rear suspension the new Baer brakes arrived. This is the 13” 6-piston front setup and 13” 4-piston rear with internal parking brake. Slotted rotors were selected to hold up to track use. I selected Baer as they are one of the only manufacturers to have a 4-lug brake upgrade. I have also had a hard on for their Arizona copper caliper color for years.
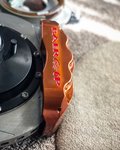
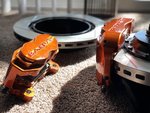
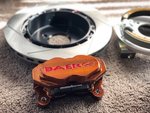
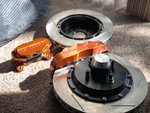
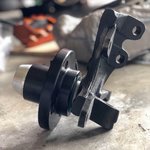
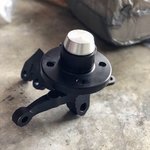
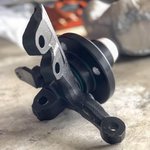
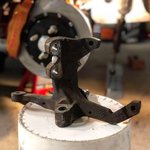
This brake setup comes on a custom spindle that is beefier than the OEM piece. You can also select to have the spindle assembled with a larger hub bearing to withstand the abuse of track time. Naturally I went for that option.
BAER
OEM
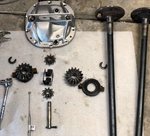
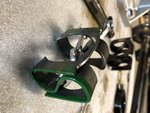
Since the rear axles had to be removed to dump the OEM brakes I went ahead and bought the Ford Performance carbon fiber clutch packs to rebuild the posi unit. This was my first time rebuilding a posi unit on my own, and thankfully it was a rather smooth process. Basic hand tools, a mallet, and some YouTube videos gave some tips on how to complete the process and get the S-spring back in. Compressing the spring with vice grips and then using a small wrench to prevent them from expanding was cool.
Went ahead and upgraded the wheel studs to ensure they would be strong enough for track use. ARP units were selected for the task and the finish. I found that trying to press in the studs using an impact gun damages the finish. Ended up buying a press from harbor freight and doing it that way. If I end up buying components new again I will spend the extra money to have the manufacturer press them in.

The upper shock mount comes with a custom perch to mount the spherical shock bearing too. This allows for more movement and less bind. Some simple trimming with some snips gives you the room needed to get it installed.

Snuck out to get the Carters Customs rear diffuser mounted. Easy enough task and really like the rivnuts. Although I spent almost 2 hours trying to figure out how to properly use the rivnut gun that I bought.


Can’t have the rear diffuser without a matching Carters Customs front splitter…

Over the course of time spent on the rear suspension the new Baer brakes arrived. This is the 13” 6-piston front setup and 13” 4-piston rear with internal parking brake. Slotted rotors were selected to hold up to track use. I selected Baer as they are one of the only manufacturers to have a 4-lug brake upgrade. I have also had a hard on for their Arizona copper caliper color for years.


This brake setup comes on a custom spindle that is beefier than the OEM piece. You can also select to have the spindle assembled with a larger hub bearing to withstand the abuse of track time. Naturally I went for that option.
BAER


OEM

Since the rear axles had to be removed to dump the OEM brakes I went ahead and bought the Ford Performance carbon fiber clutch packs to rebuild the posi unit. This was my first time rebuilding a posi unit on my own, and thankfully it was a rather smooth process. Basic hand tools, a mallet, and some YouTube videos gave some tips on how to complete the process and get the S-spring back in. Compressing the spring with vice grips and then using a small wrench to prevent them from expanding was cool.


Went ahead and upgraded the wheel studs to ensure they would be strong enough for track use. ARP units were selected for the task and the finish. I found that trying to press in the studs using an impact gun damages the finish. Ended up buying a press from harbor freight and doing it that way. If I end up buying components new again I will spend the extra money to have the manufacturer press them in.

- Thread starter
- #378
50Deep
Jockin' GT350's
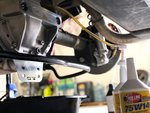
Finally got all the components installed and time for fluid to be put back in the system. New Griggs Racing rear diff cover, torque arm plate, and redline fluid are set. Decided to upgrade the transmission mount as well with a Stifflers piece.
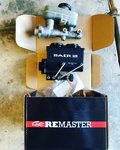
The brake install ended up being a total pain the ass. The Baer components went on just fine, but the car fought me along the way. Both the front brake hard lines were adamant about staying with the OEM brake lines. Stripped both the front hard lines trying to get the off. Several days of trying to cut and flare my own lines were time wasted. Initially I talked myself out of buying new pre-bent front hard lines, and that was a mistake. Went ahead and spent the money for new ones and within 2 hours I was done. Highly recommend that for anyone who finds themselves in the same boat. Chose to use the 1” Baer remaster and keep the OEM booster. Installation was pretty straight forward but still used the MM adapters for the 3-2 port conversion. The maximum motorsports pieces aren’t designed for the Remaster so I still needed to custom bend some lines. I may end up doing some custom stainless-steel braided lines from the master cylinder in the future.
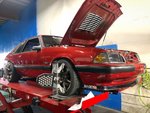
Got the car out to the alignment shop on its maiden voyage. In some ways I don’t miss the uneasy feeling of taking a Foxbody out on the street for the first time after working on it. However, the feeling of building something with your own hands is rewarding.
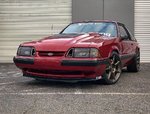
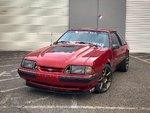
I still have some brake bleeding and adjustments to make but here are some pictures of how it sits now. Really pleased with the Carters Customs LX Street front splitter and rear diffuser. Looking forward to the side splitters he is developing and should be out soon.
And of course, what is a hatchback Foxbody without the Steeda Aero spoiler….
If you like the wheel/tire setup let me know. Now that I have accomplished the goal of building this all around 4-lug setup I am likely going to build a maximum fitment one. Good time to jump in on these if you want. More to come in the future. Forgive any pics oriented the wrong way. This free pic uploader is well…… free….
Norm Peterson
Corner Barstool Sitter
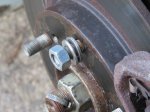
Something else that works is an open end nut of appropriate thread, a couple of stainless steel washers, and some grease between the washers and on the stud threads. The studs will pull up square and tight using only hand wrenches. Be sure to clean all of the grease off the stud threads with something like acetone or maybe brake cleaner before mounting the wheels.
It's another option. I've done 40 or 50 wheel studs this way.
Norm
It's another option. I've done 40 or 50 wheel studs this way.

Norm
- Thread starter
- #380
50Deep
Jockin' GT350's
Good infor Norm. I tried this initially but it seemed to remove the coating on the ARP studs. Perhaps the grease would have helped some. Will definitely keep this in mind for the future.Something else that works is an open end nut of appropriate thread, a couple of stainless steel washers, and some grease between the washers and on the stud threads. The studs will pull up square and tight using only hand wrenches. Be sure to clean all of the grease off the stud threads with something like acetone or maybe brake cleaner before mounting the wheels.
It's another option. I've done 40 or 50 wheel studs this way.
View attachment 7982
Norm
