- Thread starter
- #161
- Welcome to the Ford Mustang forum built for owners of the Mustang GT350, BOSS 302, GT500, and all other S550, S197, SN95, Fox Body and older Mustangs set up for open track days, road racing, and/or autocross. Join our forum, interact with others, share your build, and help us strengthen this community!
You are using an out of date browser. It may not display this or other websites correctly.
You should upgrade or use an alternative browser.
You should upgrade or use an alternative browser.
Shelby GT350 Build..."HAN SOLO"
- Thread starter50Deep
- Start date
This site may earn a commission from merchant affiliate links, including eBay, Amazon, and others.
More options
Who Replied?Wow!!
302 Hi Pro
Boss 302 - Racing Legend to Modern Muscle Car
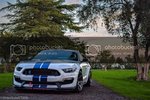
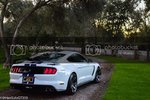
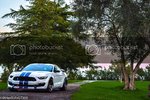
Red, White, and Blue, American Detroit Muscle.
Sweet!
2HP
Sweet!
2HP
Sorry I couldn't make it but even if I was available the threat of rain would have kept my car in the garage. :
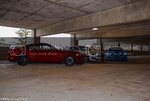
Justin's car looks awesome and who owns the ruby red GT350?
Maybe C&C Folsom this Saturday?
Justin's car looks awesome and who owns the ruby red GT350?
Maybe C&C Folsom this Saturday?
- Thread starter
- #165
50Deep
Jockin' GT350's
VoodooBOSS said:Sorry I couldn't make it but even if I was available the threat of rain would have kept my car in the garage. :
Justin's car looks awesome and who owns the ruby red GT350?
Maybe C&C Folsom this Saturday?
Cars and coffee for sure. @straightliner1 felt the same way about the rain but I guilted him into going. The Ruby car was a forum member driving down highway 1 from Washington to San Diego. They were stopping in Sacramento so I wanted to give them a warm welcome.
Merica!!302 Hi Pro said:Red, White, and Blue, American Detroit Muscle.
Sweet!
2HP
I couldn't believe it happened eitherArizonaBOSS said:Wow!!
Man! That blue R is teh SEX! 
- Thread starter
- #167
50Deep
Jockin' GT350's
Yeah, I wonder who owns it?straightliner1 said:Man! That blue R is teh SEX!
Had a chance to order these ZL1 Addons jacking plates. Designed to protect your pinch weld and provide a permanently mounted point to place the jack. They are slick little pieces and come in anodized red or black. I like these over the rails since they are lighter and easier to take on/off.
These are designed to be left on the car when you drive or race. All the install hardware is included, and the install itself took about 15 minutes. They have a groove cut in them to fit inside the cutouts on the side skirts. You can mount them forward and aft, or in the middle to jack up the whole car. They come in a set of 4 and run about $80. Price was also a factor in me picking these over the jacking rails. Here are a couple pics of them. Only showing three since one was already on the car
- Thread starter
- #168
50Deep
Jockin' GT350's
Had a chance to spend a little time with the car. Here is what happened
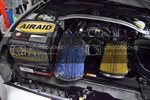
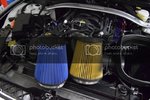
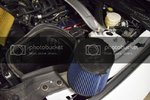
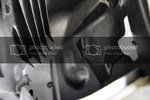
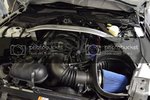
I ordered the GT350 high flow filter from Ford Performance. It has become common knowledge that it is made by Airaid, and they do not try to hide it as you will see in pictures. Price was pretty reasonable at $66, but took about 2 weeks to get. At 7k miles I noticed the stock paper filter was dirtier than I had imagined. Interestingly enough Ford decided to "clock" the filter and have a portion that faces down. There is also a groove molded into the air box for the tab on the filter to seat into. Stuff likes this sparks my interest as to why this was necessary from an engineering standpoint, Maybe someone can let us all know why.
I also had the chance to install the ZL1 Addons tow hook. The piece is pretty robust after handling it. I thought this would be a relatively easy install, and 3 hour later I had it done. I would not call it difficult, but more time consuming than imagined with all the parts I had to remove. Something I would encourage anyone to tackle on their own, but set aside some time and be patient. The basic instructions left out some critical information, as there are more parts to remove than I thought. I did not have my camera out there to step by step pictures, but here is what I did.
1) Jack up the car using universal safety precautions (Jack stand, wheel chocks, etc)
2) Remove front splitter (must come off to reach front belly pan bolts)
3) Remove belly pan
4) Remove passenger side brake duct by taking out the 3 reusable push pins. One attaching the duct to the front bumper, and two attaching to the fender well liner.
5) At this point you will notice a boxed in area under and around the radiator. On each side there is a rubber like panel attached by four reusable push pins. Remove the 4 push pins from rubber air tunnel and open up this area in front of the radiator. The panel is pliable and simply folds back.
6) Remove the air temp sensor that is located in front of the radiator, and attached to the lower boxed portion via a push pin and locating tab. The sensor is attached to a plastic arm with another push pin and locating tab. I had to use the "reach around" method to get to the sensor. It is a little awkward at first, but simple enough.
7) Remove the air temp sensor from the plastic arm, and reinstall the sensor facing toward the driver side of the car. This will shorten the distance it hangs down into the grill, and allow the tow hook room to align to the grille opening.
8) Remove the two nuts from the bumper support bolts
9) Install the tow hook onto the exposed bolts of the bumper support, then reinstall and LOOSELY tighten the nuts.
10) Use the small amount of play on the bracket to align the tow hook receiver to the shaft, and thread it a few turns. It will fit VERY SNUG into the honeycomb grill opening.
11) With the tow hook and bracket fastened together, tighten down the nuts attaching the bracket to the bumper support
12) Tighten up the tow hook shaft to the receiver to your liking
13) Reinstall the brake duct, belly pan, and front splitter
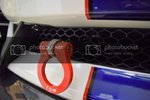
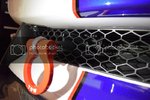
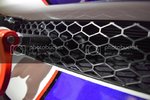
Here are a couple of finished pictures to show the bracket and how tight of a fit the shaft of the tow hook has. The kit comes with a bit to remove any excess plastic from the honeycomb grill, but I did not need to use it on mine.
The newly installed jacking plates worked like a charm as well. Super easy to get the car up in the air now. Very impressed at how rigid the car is, since jacking up the front pinch weld will still get the rear tire off the ground. All the fox body and sn-95 cars I owned would flex like crazy until I had subframe connectors installed.
I ordered the GT350 high flow filter from Ford Performance. It has become common knowledge that it is made by Airaid, and they do not try to hide it as you will see in pictures. Price was pretty reasonable at $66, but took about 2 weeks to get. At 7k miles I noticed the stock paper filter was dirtier than I had imagined. Interestingly enough Ford decided to "clock" the filter and have a portion that faces down. There is also a groove molded into the air box for the tab on the filter to seat into. Stuff likes this sparks my interest as to why this was necessary from an engineering standpoint, Maybe someone can let us all know why.


I also had the chance to install the ZL1 Addons tow hook. The piece is pretty robust after handling it. I thought this would be a relatively easy install, and 3 hour later I had it done. I would not call it difficult, but more time consuming than imagined with all the parts I had to remove. Something I would encourage anyone to tackle on their own, but set aside some time and be patient. The basic instructions left out some critical information, as there are more parts to remove than I thought. I did not have my camera out there to step by step pictures, but here is what I did.
1) Jack up the car using universal safety precautions (Jack stand, wheel chocks, etc)
2) Remove front splitter (must come off to reach front belly pan bolts)
3) Remove belly pan
4) Remove passenger side brake duct by taking out the 3 reusable push pins. One attaching the duct to the front bumper, and two attaching to the fender well liner.
5) At this point you will notice a boxed in area under and around the radiator. On each side there is a rubber like panel attached by four reusable push pins. Remove the 4 push pins from rubber air tunnel and open up this area in front of the radiator. The panel is pliable and simply folds back.
6) Remove the air temp sensor that is located in front of the radiator, and attached to the lower boxed portion via a push pin and locating tab. The sensor is attached to a plastic arm with another push pin and locating tab. I had to use the "reach around" method to get to the sensor. It is a little awkward at first, but simple enough.
7) Remove the air temp sensor from the plastic arm, and reinstall the sensor facing toward the driver side of the car. This will shorten the distance it hangs down into the grill, and allow the tow hook room to align to the grille opening.
8) Remove the two nuts from the bumper support bolts
9) Install the tow hook onto the exposed bolts of the bumper support, then reinstall and LOOSELY tighten the nuts.
10) Use the small amount of play on the bracket to align the tow hook receiver to the shaft, and thread it a few turns. It will fit VERY SNUG into the honeycomb grill opening.
11) With the tow hook and bracket fastened together, tighten down the nuts attaching the bracket to the bumper support
12) Tighten up the tow hook shaft to the receiver to your liking
13) Reinstall the brake duct, belly pan, and front splitter
Here are a couple of finished pictures to show the bracket and how tight of a fit the shaft of the tow hook has. The kit comes with a bit to remove any excess plastic from the honeycomb grill, but I did not need to use it on mine.


The newly installed jacking plates worked like a charm as well. Super easy to get the car up in the air now. Very impressed at how rigid the car is, since jacking up the front pinch weld will still get the rear tire off the ground. All the fox body and sn-95 cars I owned would flex like crazy until I had subframe connectors installed.
- Thread starter
- #169
50Deep
Jockin' GT350's
Cool plate, I'm surprised it was available. What did you do to fill the holes?
- Thread starter
- #171
50Deep
Jockin' GT350's
VoodooBOSS said:Cool plate, I'm surprised it was available. What did you do to fill the holes?
So far I have just bought a new stripe to cover the oem holes. Solved the issue of having them exposed. I may explore a custom plug, but it will do fo now.
I got lucky on the plate. DMV had it flagged as inappropriate but no reason why. I requested a review and they granted it.
- 451
- 0
Are all rear 19x11 sticking out of the fenders or is there room to have this width, let's say with a 315 inside the fender?
I know the R pretty much looks like having the rear wheels out... as well.
I know the R pretty much looks like having the rear wheels out... as well.
- Thread starter
- #173
50Deep
Jockin' GT350's
patrickshelby said:Are all rear 19x11 sticking out of the fenders or is there room to have this width, let's say with a 315 inside the fender?
I know the R pretty much looks like having the rear wheels out... as well.
These are 19x11.5 in the rear, with the same offset and specs as the R wheel. The stock GT350 wheel will tuck in the fender. You could fit a 315 on a 19x11 wheel and have it fit. Although maybe some tire bulge from the wheel not being wide enough for that wide a section tire. In he end it will come down to your offset and back spacing if it is not a OEM wheel.
Patrick you shouldn't have an issue running 315's square on a GT350. Black Boss has been running 315 Hoosiers on his R with no issues that I know of.
- 451
- 0
Thank you!
- Thread starter
- #176
50Deep
Jockin' GT350's
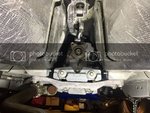
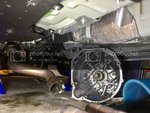
I was going to do a full write up, but the instructions included with the kit properly display everything. I will let you all know what size sockets/wrenches you need as to make that process smoother. For now I will leave you with this photo of my progress, and would also recommend you remove the driver side O2 sensor as it will interfere with a smooth removal. Also a very tight fit up top for the last two bolts, breather tube, and clutch fluid line. The higher up you can get the car the better.


- Thread starter
- #177
50Deep
Jockin' GT350's
She is out and up for sale! Pass along the word if you know anyone interested
I just removed this transmission from my 2016 GT350 Tech package. Transmission has 6500 miles on it with no track days, burnouts, or missed shifts. This model is exclusive to the GT350 and not currently available for purchase to the public. Probably the best transmission offered from Ford to date. Light years ahead of the M82. The transmission is still wet with the oem fluid from the factory. This model does not have the internal pump which makes it much easier to adapt to your coyote or project car.
Below is a link for more information regarding the transmission if you do not already know about the specifics. A simple google search will result in plenty of reading material.
http://www.mustangandfords.com/news/1509-2016-shelby-gt350-gets-beefed-up-tremec-tr-3160-six-speed/
The transmission is available as follows:
Transmission only $2200
Transmission + OEM shifter $2300
Transmission + Shelby American cooling scoop $2400
Transmission + Scoop + Shifter $2500
Local pickup preferred, but I have the materials to ship it if you want to pay for shipping.


- Thread starter
- #178
50Deep
Jockin' GT350's
Well it has been one hell of a day. First off George @MGW had a package waiting for me when I get home.
I think as men we have developed the ability to look at a woman and know based on the way she carries herself that the sex will be amazing. I have to say that this is the same feeling I get with this shifter. I have to give a ton of thanks to @Tob and George from @MGW for what they did in assisting me with obtaining the shifter. Customer service was off the charts, and I hope to be able to fly down south one day to meet both of these gentleman. I owe them a huge thanks, and their generosity was tremendous. :hail::cheers::headbang:
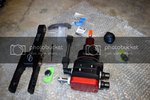
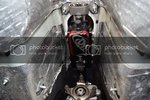

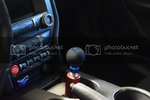
Installation was straight forward and the original install video was a big help. I believe @Tob and @MGW will be releasing a new installation video very soon as there are a few minor differences with the new setup.
Having the driveshaft and exhaust out of the way allowed me to install the shifter through the bottom and have much more room to work. Although not necessary, I am glad I waited to do it this way. The car is just about ready to go on the floor now that the shifter is in. Just the driveshaft, fluids, and exhaust, and interior shifter pieces need to go on
My son also took his first steps today. Thus far I cannot complain, and look forward to driving the car this weekend.
I think as men we have developed the ability to look at a woman and know based on the way she carries herself that the sex will be amazing. I have to say that this is the same feeling I get with this shifter. I have to give a ton of thanks to @Tob and George from @MGW for what they did in assisting me with obtaining the shifter. Customer service was off the charts, and I hope to be able to fly down south one day to meet both of these gentleman. I owe them a huge thanks, and their generosity was tremendous. :hail::cheers::headbang:


Installation was straight forward and the original install video was a big help. I believe @Tob and @MGW will be releasing a new installation video very soon as there are a few minor differences with the new setup.
Having the driveshaft and exhaust out of the way allowed me to install the shifter through the bottom and have much more room to work. Although not necessary, I am glad I waited to do it this way. The car is just about ready to go on the floor now that the shifter is in. Just the driveshaft, fluids, and exhaust, and interior shifter pieces need to go on
My son also took his first steps today. Thus far I cannot complain, and look forward to driving the car this weekend.
302 Hi Pro
Boss 302 - Racing Legend to Modern Muscle Car
Nice, looks great and hope she comes together so you can drive her very soon. We have 2 days here with temps forecasted in the 70's. Nicest February weather that I can remember, and no salt on the roads! Boss time for me.
Good Luck,
302 Hi Pro
Good Luck,
302 Hi Pro

