The Mustang Forum for Track & Racing Enthusiasts

Taking your Mustang to an open track/HPDE event for the first time? Do you race competitively? This forum is for you! Log in to remove most ads.

  • Welcome to the Ford Mustang forum built for owners of the Mustang GT350, BOSS 302, GT500, and all other S550, S197, SN95, Fox Body and older Mustangs set up for open track days, road racing, and/or autocross. Join our forum, interact with others, share your build, and help us strengthen this community!

Building and Blueprinting a Road Race Motor (mini-build thread)

This site may earn a commission from merchant affiliate links, including eBay, Amazon, and others.

756
1,113
TX
Gen 2 f150 Coyote long block $250.00
Short block rebuild (rings,bearings) machine work, balancing, torque plate boring assembly $800.00
14 Engine,Tranny and Fuse harness $500.00
with pedal & EEC
18 GT Intake Manifold $200 (market place local)
JBA long tubes $300 (Facebook Marketplace)
CNC porting on heads $950.00 (local) (not necessary at all)
Boundry oilpump gears $90.00 (Facebook marketplace)
GT350 Oil pan $159.00 (eBay)
Rails, injectors and coil packs $150.00
Boss 302 Cams from ford Shipped $445.00
EPASS Rack $200.00
DSS forged pistons $700.00

CURRENT TOTAL: $5105.00
I shopped around, interviewed many machinists before I found one that would do what I wanted.

Ahh, while I most of us can very easily appreciate the thriftness of your parts gathering, there’s a fairly large difference in what you’ve listed and Chris’ build. Yours appears to be a fairly basic build and not really on the same level. Is a build like Chris’ worth 4x the cost? That’s probably up to the individual to decide.

BUt seriously, that’s some thrifty shopping. I appreciate that. Might want to upgrade the valve train a bit If you plan to spin north of 6500. An F150 valvetrain wont last long without some upgrades at higher RPMs.
 
After looking at his parts list the builds are nearly identical. Except brand of pistons, I’m running the boss r springs to keep the parasitic loss down from heavier springs, the bearings are the clevelite (agh the high end version forgot the model). Same GT4 chain guides, the upgraded Motorsport tensioners.
I prefer a seasoned block and heads so it’s stress relieved. 90% of a build is in the assembly and not the parts.
now the one thing I didn’t see is what head bolts he is using. I’m running the stockers so I can pull the heads. And if they are good to 12-14 PsI and under ford warranty with the blower installs they will easily hold NA. Motor was built to run at 8000 Rpm and live for track days.
After close examination the big price difference is he bought all new parts. His Block, heads, oil pan alone are right at $3400. :-O
I'm using the GT350R pan and oil pump vs his $1200 one. Same cam setup, both 11.5 pistons, I prefer the torque range of the 2018 manifold and $700 price difference to the Cobra Jet, then again a seasoned crank vs a new one. But other than that both are setup to race.
 
Last edited:
756
1,113
TX
After looking at his parts list the builds are nearly identical. Except brand of pistons, I’m running the boss r springs to keep the parasitic loss down from heavier springs, the bearings are the clevelite (agh the high end version forgot the model). Same GT4 chain guides, the upgraded Motorsport tensioners.
I prefer a seasoned block and heads so it’s stress relieved. 90% of a build is in the assembly and not the parts.
now the one thing I didn’t see is what head bolts he is using. I’m running the stockers so I can pull the heads. And if they are good to 12-14 PsI and under ford warranty with the blower installs they will easily hold NA. Motor was built to run at 8000 Rpm and live for track days.
After close examination the big price difference is he bought all new parts. His Block, heads, oil pan alone are right at $3400. :-O
I'm using the GT350R pan and oil pump vs his $1200 one. Same cam setup, both 11.5 pistons, I prefer the torque range of the 2018 manifold and $700 price difference to the Cobra Jet, then again a seasoned crank vs a new one. But other than that both are setup to race.


You didn’t mention the springs/tensioners in the parts list that I saw, so make sure to add the price there.

Also keep in mind, this build has many other parts added in - FP350S oil pan, boundary pump and gear, L&M cams, ARP hardware, a lot more block machining, etc.

Doubt anyone is arguing that you could build a motor for less. This build was more about putting together a properly built blueprinted race motor with all the goodies.

As said before, it’s up to the individual to decide if all the details matter or not—they‘re really what drives the price up. If you want to prove to folks you can build a more for less, that‘s fine. Probably respectful to keep it out of Chris’ build thread, tho.
 

Grant 302

basic and well known psychic
yes, along with shopping for parts and $900 for CNC porting that put the flow numbers over GEN 3 and GT350 flow, then a machinist that knows all the small details that make
horsepower and longevity. A well assembled and balanced shortblock will add 30hp just from the details.
Man, I thought I could get a little critical of things other people did. Congrats on taking that to a new level.

I actually appreciate a lot of your comments, but not that you’re mucking up this thread with more criticisms and comparisons.

You’re more than welcome to show off what you know, or what you built, but I’d rather in your own thread or general topic.
 

captdistraction

GrumpyRacer
1,954
1,698
Phoenix, Az
I don’t want to derail the thread much further, but I also didn’t come $15k out of pocket on mine. Many of the parts have prices listed, but doesn’t include sale of parts, the generous payout from Ford Performance for winning a championship with them, some other agreements I cannot detail, etc. I still did spend a significant amount and some of the parts and costs were redundant (multiple sets of bearings and bolts/studs or parts I did not end up using). However I do have a knack for working the classifieds section and tracking down deals. I just wanted to set the expectations on what a full build would entail.

there’s some other differences in our motors like the lightweight valve train, aftermarket cams, the black series boundary pump and upgraded chains, and the hyper expensive oil pan system. I however fully agree - the shiny parts are one thing; the devil (HP, reliability) is in the details.

I’ll work on the next couple posts on this, I was sidelined with race prep as my season has kicked off; I wasn’t planning on going after a second regional championship but after last weekends excellent results and the opportunity to extend that lead next weekend I have been a bit distracted.
 

TMSBOSS

Spending my pension on car parts and track fees.
7,551
5,283
Exp. Type
HPDE
Exp. Level
10-20 Years
Illinois
Capt. agree. Keep the thread about the build. Economics are a different discussion.. After all, if we were looking for the most economical way to run our cars we would be driving the funny bubble shaped foreign car.
 

captdistraction

GrumpyRacer
1,954
1,698
Phoenix, Az
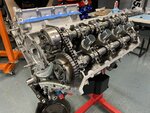
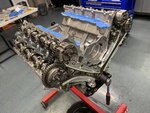
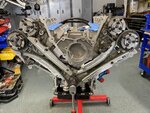
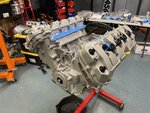
Continuing the build series from: This Post

Longblock assembly : Oil Line fabrication


I started by mocking up the heads with a spare set of gaskets to build the oil galley crossover lines.

IMG_1333.jpg

Since I didn't have a tubing straightener, a trip to Home Depot Motorsports yielded this ugly, but very helpful tool:
IMG_2036.jpg

Once the heads were mocked up, removing the rear threaded plugs is the first step, followed by inserting the angled NPT to AN adapters:
IMG_2028.jpg

IMG_2032.jpg

with the adapters aligned, the hardline length was measured, cut and custom bent with a tubing bender to make the lines. Then the compression fitting ends were installed and silicon/fiberglass protective sleeving was installed. A hint for those following is that to cut the lines about 1/4" longer than you need, but not more than that to ensure you have enough length, though it will be difficult to install the fittings until you tighten them into place and remove the bind from trying to squeeze in the hardline.
IMG_2039.jpgIMG_2042.jpg

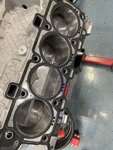
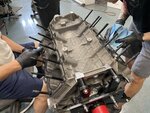
With the lines installed, the heads were removed one last time and the block was cleaned and tack-ragged to ensure nothing was on the surfaces

IMG_2013.jpgIMG_2006.jpg

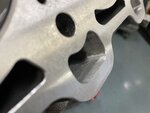
I mentioned devil is in the details, things like cleaning up these oil drainbacks were a part of the bigger plan to optimize all the low hanging fruit when it came to building a motor meant for extreme duty. With the block cleaned and ready to assemble, the gaskets were laid on the deck and head studs were prepared and threaded into the block:
IMG_2052.jpg
IMG_2055.jpg
 

captdistraction

GrumpyRacer
1,954
1,698
Phoenix, Az
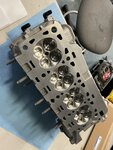
The heads were also cleaned one last time in preparation for install
IMG_2053.jpg
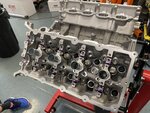
I didn't capture any pictures of torquing the head studs, however they were torqued and checked by a second pair of hands according to the specs from ARP. The cam caps were removed and assembly lube slathered on to install the Boss 302 Exhaust cams and L&M Intake camshafts.
IMG_2056.jpg
With the camshafts installed, the ARP cam cap bolts were carefully torqued in order and marked as we set them (we did not mark the headstuds - couldn't get a clean angle with the deep cavities and I was comfortable having checked them myself AND having a second set of hands checking them)
IMG_2058.jpg

With the camshafts installed, the oem gen1 phasers were installed, along with ARP hardware again and Gen1 Boss ratchet-style chain tensioners and JPC guides. Also seen is the upgraded SL secondary chains, the GT4 guides and small green pen marks all over:
IMG_2060.jpg
Rinse and repeat on the right side, we did have to move the crank per the guide, but also had to massage the exact crank and cam angles to line up the chains when installing the phasers and then again for the chains/guides.
IMG_2062.jpg

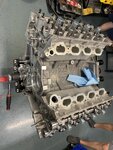
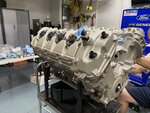
The result is now considered a longblock (note the rear oil lines were reinstalled, also the remaining galley cups were checked to ensure they were properly staked):
IMG_2063.jpg
 

captdistraction

GrumpyRacer
1,954
1,698
Phoenix, Az
Once the longblock was complete, time to dress her up with the titanium-cerakoted GT500 5.2L covers:
IMG_2066.jpg
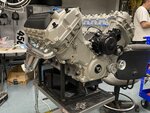
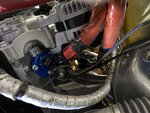
As part of that the phaser actuators, some gaskets, oil dipstick tube, and spark plugs and coils were installed (I keep the coils numbered in case I ever have to play musical coils should one give up the ghost)

IMG_2069.jpg

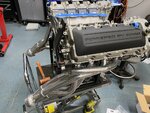
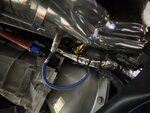
The exhaust manifold studs were removed to we could use the provided stage8 locking bolts with a fresh set of Jet-Hot by Kooks headers:
IMG_2071.jpg

Full disclosure, while gorgeous, I don't recommend these headers; I got a hell of a deal on them but in the end ended up paying more - I had to replace my X pipe that I had previously welded with a new one due to a spread change, and the Jet-Hot failed completely on the outside and inside of the header after a couple events, cooking a starter along the way. Jet-Hot is taking care of me, but I'll have to pull the headers and send them off to Jet Hot for a month and pay some out of pocket to upgrade the coating to one that will stand up to road race use.

This is a case where the headers I had before were fine, and were wrapped with header wrap, but I gave into the internet complaining about some build decision I made (you'll poke your eye out kid - header wrap edition). I never had an issue with wrap on a good stainless header; but as soon as I try one of the big name ceramic companies, it blew up in my face (and took my wallet with it). I'll resolve this over the summer but very frustrating. I might try to find a used set to limit my downtime depending on what's happening with Jet Hot for turnaround time and where I am in the regional championship this year. Covid makes already-risky supply chain management that much more difficult. Anyways, back to the build:

The electric water pump was mounted up front:
IMG_2073.jpg

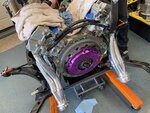
The exedy hyper single clutch was also installed out back and the assembly was mated to the K-member to lift it into place:
IMG_2088.jpg
Once the transmission was mated up, time to put it in the car (we are fans of rolling it in from the bottom and lifting the K-member with drivetrain into place.
IMG_2094.jpg
IMG_2516.jpg

Once it was all bolted up, the front crank damper and remaining assemblies were installed on the front, along with wiring and plumbing.
IMG_2207.jpg


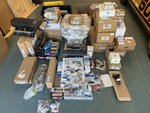
That takes this collection:
IMG_2447.jpg
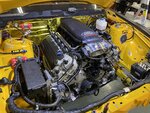
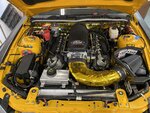
and turned it into this:
IMG_2513.jpg

Once it was broken in, obviously you have to test this thing, right? Here's some noise as it put down 468rwhp. (hopefully that answers some of the 470HP questions from other threads). As of this writing, its been on track 6 weekends, with 4 class wins under its belt and a 2nd place finish (along with a DNS and single disqualification - pass-under-yellow for good measure); one of those wins was an hour+ long enduro. Maintenance has been oil changes, and I'm just now doing the first round on plug changes and third oil change. (6 hours on plugs, 4ish hours on oil is the schedule).

 
You didn’t mention the springs/tensioners in the parts list that I saw, so make sure to add the price there.

Also keep in mind, this build has many other parts added in - FP350S oil pan, boundary pump and gear, L&M cams, ARP hardware, a lot more block machining, etc.
Doubt anyone is arguing that you could build a motor for less. This build was more about putting together a properly built blueprinted race motor with all the goodies.
As said before, it’s up to the individual to decide if all the details matter or not—they‘re really what drives the price up. If you want to prove to folks you can build a more for less, that‘s fine. Probably respectful to keep it out of Chris’ build thread, tho.

I did not notice that was not in my list I'll add those. That is what caught my eye is we are using almost all the same parts, and I am doing a properly built race motor. My build is almost exactly the same. Same cams, machining assembly procedures ect. We spent a good 8 hours matching bearing and setting clearance on the crank alone and it spins exceptionally free. Hand fit on the rings, All arp for the shortblock, billet gears and hand fitted and blueprinted GT350 oil pump.
But the cost difference is astronomical for one and not the other. So its not a I can do it better its simply a contrast of a near identical build. So not sure why you guys are getting all bent, I never once criticized just made comparisons.
I don’t want to derail the thread much further, but I also didn’t come $15k out of pocket on mine. Many of the parts have prices listed, but doesn’t include sale of parts, the generous payout from Ford Performance for winning a championship with them, some other agreements I cannot detail, etc. I still did spend a significant amount and some of the parts and costs were redundant (multiple sets of bearings and bolts/studs or parts I did not end up using). However I do have a knack for working the classifieds section and tracking down deals. I just wanted to set the expectations on what a full build would entail.

there’s some other differences in our motors like the lightweight valve train, aftermarket cams, the black series boundary pump and upgraded chains, and the hyper expensive oil pan system. I however fully agree - the shiny parts are one thing; the devil (HP, reliability) is in the details.

I’ll work on the next couple posts on this, I was sidelined with race prep as my season has kicked off; I wasn’t planning on going after a second regional championship but after last weekends excellent results and the opportunity to extend that lead next weekend I have been a bit distracted.
wow. Ok I read that as that is what you spent!! I am running the l&m cams too but did forgo the titanium for the tool steel.
 

captdistraction

GrumpyRacer
1,954
1,698
Phoenix, Az
Some final thoughts on this before it descends back into chaos and phallic measurements:

Having many of these parts on hand along with much of the other reasons the financial picture isn't clear-cut, meant that this isn't as scary as that $15k number I mentioned at the beginning of the thread. It was a significant spend over 2 years, but I learned many lessons along the way and wouldn't change much if I were starting over from scratch with maybe two exceptions:

  1. Use the GT500 oil pan and pump with a Black Series Boundary gearset - this is 1/4 the cost of the FP350S setup and is 90% as good, probably immeasurably different performance when also backed with an accusump.
  2. I should have kept the spare motor. If you're a racer, don't go into a build like this without something to keep you racing. Sitting out 2 years (which has been a pattern for me) left me SO far behind my peers in driving talent. I'm still seconds behind and trying to claw my way up through seat time, seat time, seat time, coaching, repetition and more seat time. Budgets are tight, but seat time is life (and fresh tires if you're trying to find podiums).
Now one thing I'll get ridiculed for (and have been ridiculed for thus far, as regular as the sun rising every morning) is why didn't I just pursue a LS swap as the car gods at Vorshlag would recommend? I ran the numbers and considered it very carefully, more so than many would realize. I came up with $20k for a budget to do it end to end, and that's before all the scope creep and contingent items you don't realize until you're 75% into this. LS power is great, the torque is fantastic and its a lot less crazy work to make good reliable power; weights are fairly close all said and done but I decided that ultimately, spending half of that and keeping the recipe simple was the right move for me at this stage, and that if I wanted to explore LS power, I would instead chose to move to a platform that was built for that motor - IE corvette. The day may come where I do something like that, but for now the mustang remains ford powered and is still an absolute blast to drive. I would love to improve my power to weight just slightly and do something like a cambered rear axle on the car to help get it more competitive against some of our very talented racers here in AZ, but had I gone down the LS route, I'd be even further from that goal.

I do have a few power items I'm exploring on this coyote now that I know what the car weighs and that I know I have some room to play with. I expect it to be able to make mid-high 470's in power to get me on the edge of the Super Touring 2 classing after some changes. If I went full balls out, I think this build would top out in the 480's; but ultimately I wanted as much reliability as you can buy on this platform, so we're leaving room in tuning. Turning up to 8200RPM isn't easy on the coyote platform and its derivatives, and requires careful planning and tuning. However, anyone who says any alternative is 100% reliable is out of their mind or has never raced a full season of racing (or both). Racing is brutal on people, hardware, and money. This build thread I hope provides some value into those curious what it takes to make a coyote truly meant for the rigors of club circuit racing.
 

captdistraction

GrumpyRacer
1,954
1,698
Phoenix, Az
The heads are the Boss 302 ones that already had the CNC program on them. Since I'm in a power/weight regulated class and didn't have infinite budget, I left that alone. I've not seen clear cut HP numbers for porting over boss head; there's flow gains for sure, but I hadn't personally been able to quantify a HP:dollar ratio for the work. Its certainly something I can explore down the road whenever its time to refresh this mill. I'm certainly happy to see anyone else's data; just none was available that satisfied my curiosity at the time.

Going back with what is known today, if anything I would consider the GT350 heads and a 5.2 block for what was spent and pick up the power/torque that way. I was initially shy on the valvetrain changes on GT350 and was a bit worried on the spray-bore blocks and the inability to service them beyond their initial bore/hone.
 
277
161
@captdistraction ,thanks for the update on what you would do different looking back on this build. Think that might save a lot of people sum $ and time down the line. Your ability to assemble your heads and build this motor out yourself from a short block was very impressive. Along with your no two post needed motor and tranny installs. Very impressive and thank you for sharing.
 

captdistraction

GrumpyRacer
1,954
1,698
Phoenix, Az
@captdistraction ,thanks for the update on what you would do different looking back on this build. Think that might save a lot of people sum $ and time down the line. Your ability to assemble your heads and build this motor out yourself from a short block was very impressive. Along with your no two post needed motor and tranny installs. Very impressive and thank you for sharing.

Thanks for all the wrenching, I should mention you were the second pair of hands on most of these bolts and second set of eyes on the assembly work. Its hugely satisfying that some of the first races with this motor was between our cars with awesome close racing action. I cannot understate how much I had missed that.
 

TMO Supporting Vendors

Latest posts

Buy TMO Apparel

Buy TMO Apparel
Top