The Mustang Forum for Track & Racing Enthusiasts

Taking your Mustang to an open track/HPDE event for the first time? Do you race competitively? This forum is for you! Log in to remove most ads.

  • Welcome to the Ford Mustang forum built for owners of the Mustang GT350, BOSS 302, GT500, and all other S550, S197, SN95, Fox Body and older Mustangs set up for open track days, road racing, and/or autocross. Join our forum, interact with others, share your build, and help us strengthen this community!

Cool Tech Tow Hook Installtion Tips

This site may earn a commission from merchant affiliate links, including eBay, Amazon, and others.

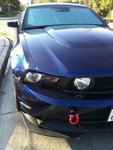
Please post up any tips and photos of removing the bumpers and installing the tow hooks. The instructions don't have a lot of detail to them so photos will be helpful.

While not the exact same procedure these Roush instructions should help if not cover everything you'll need to know.

Front Bumper Removal:

www.roushperformance.com/parts/manuals/Mustang-Front-Fascia-with-Foglamps-and-Harness-2010-2012-1310R17C381IM-AA.pdf

Rear Valance Removal:

www.roushperformance.com/parts/manuals/Rear-Valance-for-Mustang-GT-2010-2012-420009-manual.pdf
 
Roush only has the rear valance posted on their website and no instructions. They should be very similar.

http://www.roushperformance.com/parts/mustang-body-kits-category.html
 
I too will try to monitor this thread and help where we can. As tow hooks will fit any S197 (2005-2013), we chose to make directions a little more generic. However, I did capture a lot more pics than were included with the instructions so I will endeavor to post those extra pics here.
 
Kendall: When drilling the 1" hole for the hook to protrude through th efas--are you intending for us to drill perpendicular to the fascia surface, or on the same axis as the tow hook? These will produce different hole shapes.

EDIT: Nevermind--it would have to be perpendicular to the fascia to ensure your "plug" will work.
 
ArizonaGT said:
Kendall: When drilling the 1" hole for the hook to protrude through th efas--are you intending for us to drill perpendicular to the fascia surface, or on the same axis as the tow hook? These will produce different hole shapes.

EDIT: Nevermind--it would have to be perpendicular to the fascia to ensure your "plug" will work.

Actually, this is a very relevant question. Just did the install and everything worked well, but I did have to 'adjust' the hole inboard to accommodate the angle once the hook is inserted and to clear the hex parts. Pics to follow shortly.

I think your idea to drill the hole co-axial to the tow hook might be a good idea.
 
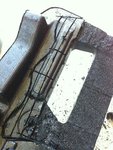
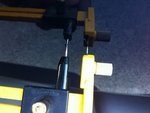
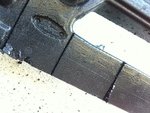
Started with a hand saw. Scored the back of the foam to make sure I was cutting to the ~1/4' depth needed:
8048882024_3ac50a6528.jpg

Switched to a dremel cut-off tool and swiss-cheesed it:
8048884746_6a0143ce41.jpg

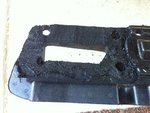
Not so pretty:
8048880385_3aa433058c.jpg

Perfect fit:
8048884942_df4e51cc4f.jpg

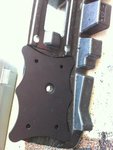
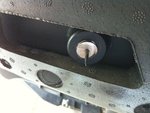
Recess for bolt head:
8048880187_633d38527c.jpg

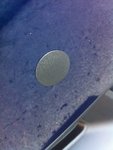
Ice pic installed:
8048885558_572b1e26e5.jpg

Scored the paint with this OLFA circle cutter. Totally not needed. Then drilled with a hole saw from the back.
8048910115_1a5f8fc40f.jpg

Initial hole:
8048880825_85924e46e4.jpg

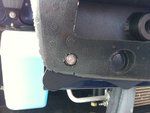
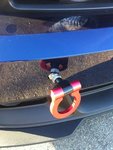
Installed:
8048886368_aac3b21cca.jpg
8048881435_c02150bd75.jpg

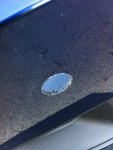
Plugged:
8048886108_fc5a1fd24c.jpg

Total install time for me was 2 hours 8 minutes from when I parked the car.
 
Grant it looks good. A couple of questions:

1. Should the hole be offset towards the middle of the car?
2. How did you know where to cut the Styrofoam? Did you mark it after you installed the bracket?


Does anyone have any good tips on painting the plastic plug so it won't chip off? You can purchase the matching paint from the link below.

http://www.automotivetouchup.com/choosecolor/choosecolor.aspx?year=2012&make=Ford&model=Mustang
 
5 DOT 0 said:
Grant it looks good. A couple of questions:

1. Should the hole be offset towards the middle of the car?

Not 100% sure, but I think so. ArizonaGT brought up a good point about the hole being axial with the tow hook and not perpendicular to the bumper cover. I needed to widen the hole to make it a tad oval so the hex parts don't hit the cover. I happened to need to go in-board, but with less than 1/16" clearance it would easily be user error with the pilot bit for the hole saw is (I think) 1/8".
It could also be that I drilled the 1" hole from the back side. Due to the thickness of the bumper material, that side of the pilot dent/hole would be a little outboard of where the center needs to be when drilled perpendicular.

2. How did you know where to cut the Styrofoam? Did you mark it after you installed the bracket?

I did it with the bracket loose. With the bumper foam off and the alignment nub cut off, I centered the corresponding hole on the bracket/plate and scribed the outline +~1/8". There's no need to make it that tight, and marking a rectangle would be more practical.

And a BIG thanks to CoolTech and Kendall for making this GREAT product and posting an earlybird special! I'm very happy with the results :)
 
Wow!! You guys are AWESOME!! Grant, NICE work...

Please note: I have a bunch of 1.25" hole plugs should anyone prefer these. With the 1" everything is nice and tight - maybe too tight. If you early bird folks think the 1.25" plugs would work better, I can supply those, no problem!

Grant, I noticed you didn't use the plug with a little notch in it. In my (limited) experience, removing the plug without the little notch was a PITA. I don't think anyone will be losing these on the road! Just in case, I shipped everyone extra ones and I have more if needed, of course.

Keep the installs coming..... (Grant, we're now awaiting rear pics!)
 
When the hole was first drilled, the plug was tight and took a little finesse to get it out. After I widened the hole a little, it comes out pretty easily, but still sits flush. I went with the plug without the notch just for looks.

I think the install looks good with the 1" hole, but I think a 1.25" hole might be more practical.
 
I just finished installing the front. I don't have much to add, except I tried a couple saws on the foam bemper and found that the dremel did the work quickest and easiest.

The 1"hole should be perfect except it was hard to get the starter hole perfectly centered and I did do an axial cut. Even though I took my time and got 4 nice punches from the centering awl (all within a 1/32") and I drilled it axial to the mount plate, I ended up with it slightly offset inside (opposite from Grant 302) and now I do need the 1-1/4 plug to make it right. If I did it again I would do a 3/4" hole and then enlarge it to 1" from the outside when I got it all back together so it would be perfectly centered.
 
I'm planning on installing my tow hooks tomorrow. A couple of questions:

I have a Dremel and Dremel Trio. With the Dremel you guys used a cutting blade to cut the Styrofoam? I'm not sure the Trio, a mini router, will work for all of it but it might.

I have a 3/4" hole saw. You guys think I should use it and make the hole larger as needed? I'm a little fuzzy on cutting the hole due to the offset. I remember a similar issue mounting my LS spoiler (the 3/4" is left over from that install).
 
I could see the Trio/router helping to set the depth, but I don't know how far you can get with just that. I used one of the fiberglass reinforced cutoff wheels, but the smaller, non-reinforced ones would probably work too, but they are smaller diameter and would probably break more often. I considered using high-speed cutting bits (for porting aluminum), but I figured that would make more mess than removing little blocks like I did.

I could see starting with the 3/4" hole like motoviper suggests. But I think you need to figure out what you will use to do the enlarging so that the cut is smooth. I used a knife followed by cleanup with a sandpaper roll to enlarge mine.
 

TMO Supporting Vendors

Latest posts

Buy TMO Apparel

Buy TMO Apparel
Top