The Mustang Forum for Track & Racing Enthusiasts

Taking your Mustang to an open track/HPDE event for the first time? Do you race competitively? This forum is for you! Log in to remove most ads.

  • Welcome to the Ford Mustang forum built for owners of the Mustang GT350, BOSS 302, GT500, and all other S550, S197, SN95, Fox Body and older Mustangs set up for open track days, road racing, and/or autocross. Join our forum, interact with others, share your build, and help us strengthen this community!

Install The E-Z Do-It-Yourself Snap On Engine Breather Kit

This site may earn a commission from merchant affiliate links, including eBay, Amazon, and others.

Here is a quick vid (s) on the installation of the canister kit. Raw video so no poking fun at me ;D Sorry it is in four parts, when I tried to combine these the audio was silent, watch in order. It was also a little difficult to do while holding the camera. Anyway I don't think it came out too bad except the four parts not being one. For those getting the first set of the canisters. I did not go into the clamps near the snap fitting in depth in the video. You will need to twist these around and tighten down the clamp once it is in a position you are happy with.

The canister is a Peterson brand and compliant with many different racing sanctioning bodies. Hose is Pro-lite 350 or similar quality, fittings are Earls or similar quality, hose connectors and hose elbows are OEM Ford parts.

When finished start the car and let idle for five minutes before driving to reset the idle, no tune is needed.

Cost for the canister is $335-400 depending on how many are built at once and cost of parts which can vary. The price always includes shipping charges in the US. Canada will be $10-20 more, actual shipping charges only. There is a 3% paypal fee added if using that, I would rather a check or MO.

One change that will be made is the canister kit will come without the hoses attached, see picture one below. These hoses attach very easy, just screw on and snug in place. They do not need to be tightened hard. You can use a one inch wrench, adjustable wrench or pliers, use a cloth over the hose fitting if using pliers to avoid scratching the black finish. If you want the canister with the hoses attached, test fitted to my car and the clamps (where the hoses snap into place on the valve covers) positioned and tightened in place, it will be an extra $40 charge.

If there are any questions please let me know.

http://www.youtube.com/watch?v=A2FDyRWmeLI
http://www.youtube.com/watch?v=iW0KZnY5zcI
http://www.youtube.com/watch?v=ee7GbzHu1-s
http://www.youtube.com/watch?v=a39AiKaok5A


canistersetup_zps4ce8c913.png
canistersetup1_zps0340df14.png


OLD info .....
I will update this thread with a complete how-to on the kit that is being put together. Several people asked for detailed instructions, for now I did a quick fit on the bracket to make sure the bracket was correct. cp85gt did a wonderful job making the bracket and the shop was able to follow his instructions for a perfect fit. We all owe him a big thanks. The shop made the bracket out of aircraft grade aluminum. I am no metallurgist and just shook my head like I knew the difference, in the end they felt it was better then doing stainless like we first talked about.

Until I get the full instruction up this should show how easy the install will be, even Gary will be able to do it ::)

Here is how the bracket will come, one bolt will hold it in place that you will need to attach.

canistersbracket1_zpsf18b5a63.png

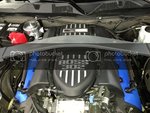
This is how the canister and lines will come
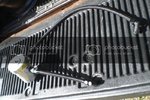
canistersbracket2_zps9ad07501.jpg

Where the bracket fits. I have my strap mounted very low, I did this due to the shape of the firewall. This way is actually better since the strap will be in the middle of the can and the nut that needs to be loosened will be more accessible.

canistersbracket3_zps60ff5119.png
canistersbracket4_zpsc5aa202b.jpg
 
First round guys, the parts are in and spent most of today working on these. I will finish up this weekend and send these out on Monday or Tuesday, I'm shooting for Monday but just in case ;)

ArizonaGT said:
Also wondering about the intake block-off plugs--are those provided? If not, can you tell me where to get em?

Drew need you even ask? :eek: Of course they are and the clamp is even put around each plug ready to install ;D

Boostd4 said:
I've read through the threads, but I didn't see anything specific to plugs for the intake manifold and/or intake tube. Did I completely miss this, or is it included in the kit?

Looks great! Definitely interested.

https://trackmustangsonline.com/index.php?topic=880.0

In this thread it talks about the plugs. If you are interested in one please PM me.

jlwdvm said:
This works for the 2013? Are you currently shipping?

The parts are very expensive so I am doing this in orders of around ten units. If you would like one please PM me to get on the next list. Turn around will be around two weeks maybe more depending on parts.
 
jlwdvm said:
Has anyone used this on a 2013...are they different?

There should be no difference in the 12 and 13. I did see pictures of an early 13 302S build that had a modified firewall cut out but that does not appear to have been the case with production cars. It may have been something Watson did to the firewall when mounting the can directly to the firewall. That would have only had an effect on the mounting bracket and nothing else.

If you read here and the posts after you will see a 13 owner took pictures and measurements and they are exactly the same as the 12. However as stated in post number 226 I do not have a 13 here to do an actual test fit.

https://trackmustangsonline.com/index.php?topic=880.msg68018#msg68018
 
The first post has been updated with with the following info:

Here is a quick vid (s) on the installation of the canister kit. Raw video so no poking fun at me ;D Sorry it is in four parts, when I tried to combine these the audio was silent, watch in order. It was also a little difficult to do while holding the camera. Anyway I don't think it came out too bad except the four parts not being one. For those getting the first set of the canisters. I did not go into the clamps near the snap fitting in depth in the video. You will need to twist these around and tighten down the clamp once it is in a position you are happy with.

When finished start the car and let idle for five minutes before driving to reset the idle, no tune is needed.


Cost for the canister is $335 including shipping charges in the US. Canada will be $10-15 more, actual shipping charges only. There is a 3% paypal fee added if using that, I would rather a check or MO.

One change that will be made is the canister kit will come without the hoses attached, see picture one below. These hoses attach very easy, just screw on and snug in place. They do not need to be tightened hard. You can use a one inch wrench, adjustable wrench or pliers, use a cloth over the hose fitting if using pliers to avoid scratching the black finish. If you want the canister with the hoses attached, test fitted to my car and the clamps (where the hoses snap into place on the valve covers) positioned and tightened in place, it will be an extra $40 charge.

If there are any questions please let me know.

[youtube]http://www.youtube.com/watch?v=A2FDyRWmeLI[/youtube]
[youtube]http://www.youtube.com/watch?v=iW0KZnY5zcI[/youtube]
[youtube]http://www.youtube.com/watch?v=ee7GbzHu1-s[/youtube]
[youtube]http://www.youtube.com/watch?v=a39AiKaok5A[/youtube]

canistersetup_zps4ce8c913.png
canistersetup1_zps0340df14.png

I hope I have covered everything but I am always ready for any questions. If any of you guys feel like reposting this on the other forums, feel free for anyone there interested.
 

zzyzx

Steve
299
0
I've installed mine on my 2013 and can confirm fitment is right on the money.

The only thing I did in addition to Scotts informative install videos is to first rotate my positive battery terminal forward (clockwise when looking from above) to create a large gap between it (positive), and the canister (ground). Those two contacting wouldn't be pretty.

canister-by-terminal.jpg
 
YellowBoss said:
I had a spare elbow tube in my track bag and the tube from the PCV to intake off my car needed for the fittings. I was able to put together a complete unit and shipped that to John, he was the first to send a check and that is the only fair way I could think of getting this one out.

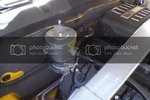
Scott - Thank you for letting me be your test case to check out the fitment. The install went very well and very easy, which says a lot as I am no mechanic. Everything fit as it should with no adjustments. Great work putting this complete package together! Here is pic of the install.

photo_zps3ba1619c.jpg
 
zzyzx said:
I've installed mine on my 2013 and can confirm fitment is right on the money.

The only thing I did in addition to Scotts informative install videos is to first rotate my positive battery terminal forward (clockwise when looking from above) to create a large gap between it (positive), and the canister (ground). Those two contacting wouldn't be pretty.

canister-by-terminal.jpg
Good idea. Scott has his battery in the trunk so you don't see it on his car. It still seems pretty close but maybe no big deal?
 

zzyzx

Steve
299
0
cloud9 said:
Good idea. Scott has his battery in the trunk so you don't see it on his car. It still seems pretty close but maybe no big deal?

As pictured is after I moved it. Before I moved it it was 1/4" away. I considered using zip ties on the red boot, but it looked crappy, so just left it.

I'm OK with the clearance now, but had I left it where it was I was at risk grounding the positive terminal during the install itself.
 
I am currently taking orders for the next round of these. I have had about 15 ask for payment info and only received replies back from two of them. If you want in please send me a PM again. I need a few more people to order the next round of parts.

FAQ's

Do I need this breather for my car?

No, you do not "need" this for your car. For street driving any after market oil separator will remove some of oil before it reaches the intake. If you do more spirited driving or track your Boss you still don't need it but it would be a very good idea to have.

What are the benefits of this setup?

It will remove pressure, loss of vacuum and stop sucking "dirty" air back into engine. All of this adds HP and you will suck zero oil into the intake and engine. With this kit you retain all of your factory parts and can easily reattach them after the track day or for state inspection.

Are there any down sides to installing this setup?

Yes, it is not good for the environment but our cars without the PCV attached are not going to cause global warming. Some people have reported the smell of fumes inside the cabin, I have never had this problem but do not discount the people that have. With the AC on recirculate you should not get this and even without (IMO) it will not be enough to hurt you (again my opinion only).

Do you have one ready to ship to me?

No, I will make them as orders come in and are pre-paid. I had to lay out several thousand dollars just to make up the first twelve of these. When I made the first run of these three people backed out after I spend the money for them, I am not a business and can not afford to continue that way. Depending on how many orders I get turn around time could be two weeks or more.

If you need something faster Rehagen Racing sells a kit. It is a little more expensive and needs to mounted to the firewall rather then the bracket but it may be quicker then mine.

Will this fit the 2012 and 2013 Boss?

Yes it will fit both, several kits I have made are mounted in cars from both years.
 

ArizonaBOSS

Because racecar.
Moderator
8,730
2,734
Arizona, USA
Scott:

Just wanted to let you know that I got that fitting today in the mail. That lil guy is tough to press in even with some WD-40! I'm going to install the kit this weekend. Thanks again!!
 
ArizonaGT said:
Scott:

Just wanted to let you know that I got that fitting today in the mail. That lil guy is tough to press in even with some WD-40! I'm going to install the kit this weekend. Thanks again!!

Your welcome. Trust me I know about that fitting, did 30 of them :eek:
 
Just FYI to get more clearance to the battery. Remove the cables & heat shield. Loosen the long bolt. There are 2 spacers (approx 1") on each side of the battery. I removed them (just pop out), slid the battery closer to the fender. Now have plenty of clearance. Reinstall neg cable at 45 degree angle, it will reach. Can reinstall shield if you want.
 
Just ordered the parts to make a few more of these canisters.

I also ordered a couple of extra brackets for anyone looking to do a kit by themselves, contact me if interested.
 

TMO Supporting Vendors

Buy TMO Apparel

Buy TMO Apparel
Top