The Mustang Forum for Track & Racing Enthusiasts

Taking your Mustang to an open track/HPDE event for the first time? Do you race competitively? This forum is for you! Log in to remove most ads.

  • Welcome to the Ford Mustang forum built for owners of the Mustang GT350, BOSS 302, GT500, and all other S550, S197, SN95, Fox Body and older Mustangs set up for open track days, road racing, and/or autocross. Join our forum, interact with others, share your build, and help us strengthen this community!

Watson Roll Bar install Mishap

This site may earn a commission from merchant affiliate links, including eBay, Amazon, and others.

484
451
Exp. Type
HPDE
Exp. Level
Under 3 Years
MD
The excitement of finally putting in a roll bar got to me lol. I’ve read the instructions several times in addition to all the install threads and still managed to mess up.
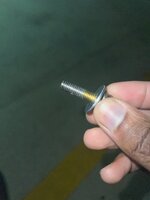
When bolting the main hoop to the car(3 M8 bolts each side) I ended up cross threading one of the bolts. More specifically the one on the top in relation to the other two. Every other bolt went in smoothly except this one. Didn’t realize it was cross threading. I am able to snug it down but realized the torque spec will be off and I won’t be at peace knowing that with it being a safety device. So the thickness of the threads in which the bolts go into is about 3-4mm. I figured I have a few options.

-Try to chase the threads with a M8 tap and die
-enlargen the hole to a M10 and tap it
- use a M8 nutsert (will have to see what metal thickness the one I have can be used for)
-just continue using the same bolt that caused the cross thread.

I know it’s a silly mistake but I rather ask more knowledgeable people than pay a serious price.
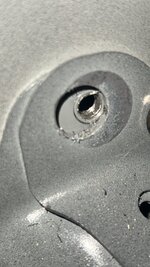
IMG_4002.jpeg

IMG_4006.jpeg
 
6,410
8,312
Get a longer bolt, get a fender washer, followed by a grade8 machine washer and put a lock nut on it. It looks like the threads are completely fubar'd so a heli coil would prolly not hang in there, and retapping it is not an option.
 
484
451
Exp. Type
HPDE
Exp. Level
Under 3 Years
MD
Get a longer bolt, get a fender washer, followed by a grade8 machine washer and put a lock nut on it. It looks like the threads are completely fubar'd so a heli coil would prolly not hang in there, and retapping it is not an option.
Thanks Rob! I’ll use a lock washer and that should hold.
 

cholmes1

400lb Gorilla
350
216
Denver, CO
I will be installing my WR roll bar soon. Any pics you can take of your install progress and finished product would be great. Like you, I have read almost everything on the process but more is never a bad idea.
 

TMSBOSS

Spending my pension on car parts and track fees.
7,557
5,294
Exp. Type
HPDE
Exp. Level
10-20 Years
Illinois
I will be installing my WR roll bar soon. Any pics you can take of your install progress and finished product would be great. Like you, I have read almost everything on the process but more is never a bad idea.
The install for the 197 is similar in some ways to the 550 and different in others. The down bars mount the same way, drill 8 holes for the bolts and 4 to secure the reinforced nut plates. Where they differ is the bolting in of the main loop. The newer S550 uses the bolt holes ford provides. The 197 you have to drill and install the nut reinforcing plates. The 550 is a bunch easier because of this.
 
Last edited:
484
451
Exp. Type
HPDE
Exp. Level
Under 3 Years
MD
I will be installing my WR roll bar soon. Any pics you can take of your install progress and finished product would be great. Like you, I have read almost everything on the process but more is never a bad idea.
Sorry. I don’t think I will be much help. But clearly given my mishap I’m not the person to seek help from lol
 
6,410
8,312
Sorry. I don’t think I will be much help. But clearly given my mishap I’m not the person to seek help from lol
Just to get back to this, if you can't get to the back of that area, (like it's a captured bolt in the frame rail with no access) then you will have to go to a bigger thread and bolt. If it were me, and that was the case, I would prolly go 2 sizes up because those threads are pretty bad and you will want to have exceptionally good threads for the install. So run down to the hardware store with the size bolt you had, go 2 sizes bigger, get the drill, tap and new bolt for it and go that way. Go slow and use a decent oil, because if you should tear that capture bolt out from inside the frame (and you already lucked out once when you stripped it) you will really , really be screwed. (no pun intended)
 
1,059
1,107
Monaca Pa
Personally I wouldn’t worry about it as it’s in a shear mount. The 2 down tubes to the trunk area should prevent the roll bar from ripping out.
If it would make you feel better I would go next size bigger with a bolt. Either a metric or standard bolt.
just my 2 cents
 
484
451
Exp. Type
HPDE
Exp. Level
Under 3 Years
MD
Just to get back to this, if you can't get to the back of that area, (like it's a captured bolt in the frame rail with no access) then you will have to go to a bigger thread and bolt. If it were me, and that was the case, I would prolly go 2 sizes up because those threads are pretty bad and you will want to have exceptionally good threads for the install. So run down to the hardware store with the size bolt you had, go 2 sizes bigger, get the drill, tap and new bolt for it and go that way. Go slow and use a decent oil, because if you should tear that capture bolt out from inside the frame (and you already lucked out once when you stripped it) you will really , really be screwed. (no pun intended)
Thank you sir. I already had a M10 tap so I went ahead with the direction. All went well there. Thank you for the suggestions. With it being a safety bar I just wanted to make sure I wasn’t compromising that.
 
484
451
Exp. Type
HPDE
Exp. Level
Under 3 Years
MD
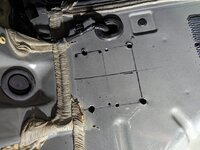
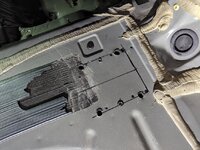
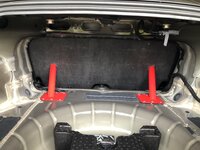
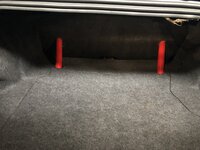
But to update. I am definitely not the person to seek advice from. I don’t have experience drilling in sheet metal. The drill bit got caught up on quite a few on the holes and started pulling the metal. That caused serious burrs underneath that I am unable to reach and file down so the plates don’t lay flat under the car. I decided to just weld the bars in. Kinda disappointed because it was a straight forward install but again, it was a learning lesson. I tried using a burr bit on a Dremel to clean the holes but ended up making some a bit larger. Hoping to get it done before my event next weekend.

I don’t plan on selling the car so I don’t mind the permanent route.

image000001.jpegimage000002.jpeg
 
484
451
Exp. Type
HPDE
Exp. Level
Under 3 Years
MD
I would not worypry about the burrs. The down bars have a plate that sits on the trunk floor and nut plates which fit on the underside. They will “Clamp” the metal of the floor, not only at the hole. In my opinion, no need to weld.
I did think about that and how the clamping force of the 4 bolts of each down bar should be enough. At this point with me trying to make an event next weekend and work/school schedule this week, I rather take it in and see what the shop decides. I did like 95% of the work already so if they can still bolt it in then perfect. If they cant, then no problem with them welding it. I'm just happy I didn't try doing this at the last minute because I still have a seat and harness adjustment to figure out.
 
225
312
Exp. Type
HPDE
Exp. Level
5-10 Years
Virginia
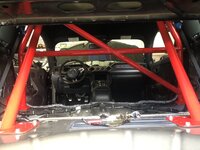
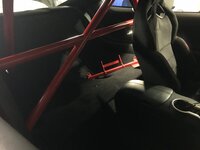
I had issue with the same hole. I ended up using the stock bolt in that location. Hindsight I would removed a little metal to give the bolt a straighter shot to the threads. I'm happy with the way mine came out but, doing it again I'd change my way of going about a few things.

- Loosening the harness on both sides down the door frame gives more play to install the main hoop.
- Ensure you have a unobstructed access to threads for main hoop
- When your test fitting the rear bars be sure to COMPLETELY tighten the 4 upper apex bolts that secure the rear bars to main hoop. (be sure to do this before center punching your spots for drilling
- Where the bar wants to sit may supersede it being perfectly square...seams are a little different in some cars. I shoved my rear bars forward for perfect symmetry I thought, only to have to make adjustment afterwards...my rear bars wanted to shift rearward to the location it rested during test fit as I started tightning things down.
- Angle aluminum works amazingly well for centering the holes when cutting in to your R Rear seat delete. I measured in 4 points around the bar tracing the OD of the angle aluminum chalking out a square, then placed a 2 1/4" hole saw in the center then made an indentation in the seat deleted trough the center of the hole saw (where you attach the drill bit). Made a pilot hole then cut holes with hole saw.

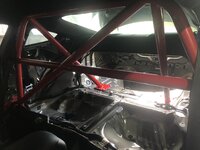
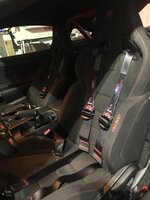
Just did my first track weekend with the bar and six point harnesses. LOVED not holding myself in the seat. My left knee and dead pedal thanked me too. My hands look way softer on the steering wheel as well.

46964CA2-8924-4CD9-B4A1-DD3E8A3B60F0.jpeg

A45C359F-C659-48DC-80DA-EB0C08261EA5.jpeg

2E65EE6A-DF24-4F0E-864B-D60F388422AA.jpeg

0E89A30A-3035-4101-B5BE-33DA8DF412B8.jpeg

0A78CF5E-292F-49CB-9D5A-55132B61B559.jpeg

5773DBAC-92D4-4EF3-AF23-9721269404EF.jpeg

40F47435-1CCC-4100-A09C-83D3A79409A7.jpeg
 
Last edited:
484
451
Exp. Type
HPDE
Exp. Level
Under 3 Years
MD
Thank you very much for your input. I agree that in hindsight I should’ve removed the metal surrounding the hole to get a better angle. Everything you said makes sense and I agree. I had the main hoop snug but not torqued as I center punched the holes.
I spoke to Adam at Revolution Automotive in Baltimore and he said there may not be a need to weld. Will just try to use the holes already made. That’s good news that my hard work wasn’t for nothing lol.

I’m really looking forward to being less exhausted from having an actual race seat now.
 

TMO Supporting Vendors

Buy TMO Apparel

Buy TMO Apparel
Top