Shortblock build
(I'll go into the long block build, final assembly, install and break-in/dyno next week)
With machining complete (which you can see in the above table), the shortblock was assembled by my builder. There's a number of operations that take a significant amount of time to complete properly:
Final fitting of bearings: this took 3 sets of KingXP main bearings (one undersized, one oversized and one standard), 2 sets of rod bearings (undersized and standard) to match up to the crank, rods and block. Once those bearings were selected (using the arp studs torqued to spec for each component with a head clamping load in place and temperatures controlled), Its on to file fitting the rings to get target ring gaps. I was a bit worried when I received a box containing my oil control rings, but my builder opted to use some different rings from Callie's that are in use in circle track applications as he had some concerns around the mahle ones. once those rings were fitted then everything could be disassembled, cleaned and prepped for final assembly. Final assembly is pretty straight forward, we used guides from the Ford Assembly plants and Service assembly guides (which we discovered there's some significant differences in each guide, but mostly applied to the top end/long block assembly). What is missing from the basic service guide are a lot of the torque specs and tolerances/measurements for things like block dowels, press fits, etc. where the assembly plant guide goes into much further detail about ever part with multiple schematics and quality control information.
I don't have many pictures from this portion, but its best left to your builder (maybe that's you) as the need to check and measure clearances one more time during final assembly was beyond my comfort zone. The engine was assembled and filled with heavy assembly lube in all the pathways; this led us to a small discovery of an issue around the oil pump (that I didn't figure out until I initially ran the motor - and required pulling it briefly to change a part of the oil filter housing), but highlights the importance of taking as many pictures and creating documentation along the way. It was also validated during this process that oil squirters would not fit.
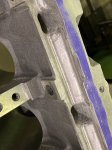
Some pictures of the finished product:

if you don't have one of these hydraulic carts, get one!
.jpg")
.jpg")
.jpg")
.jpg")
 Boundary Pumps - New Coyote Black Series pump assembly
Boundary Pumps - New Coyote Black Series pump assembly
We also installed this new prototype pump (that has since become a stocking product. The pump came as a complete assembly (in my case using a stock GT350 style housing that was deburred, machined and blueprinted) and the new black series gears feature a few new innovations that set them apart from the other available gear sets out there (I've tried them all): They feature special heat treating processes, a hard superfine glossy final finishing process that reduces wear and drag, and a different gerotor shape that features some additional cuts that improve overall flow and reduce aeration. The pump also included a billet steel backplate which holds a bit tighter tolerance than the cast plate included with the oem pump, and has some features in its design to reduce aeration of the oil.
Some pictures of that unit: (ignore the cloth lint from my wiping the unit down after opening it up, its shipped/packed in oil. - it was cleaned like every other assembly in the motor)


sample of what the gerotor looks like (covered in oil, so ignore what looks like scratching outside the circular stuff)

We did have an adjustable shim stack on the bypass spring, but that's what I later ended up removing due to some issues. Using the stock GT350 spring, bypass cold is around 125PSI (and a bit more I think), so I don't think there's much value in trying to shim that up.
The pickup tube assembly was completed as well, and it fit very, very tightly now into the pump housing and the block. Modifications to it brough its total to $500, so if I had to go back I think I'd have started to look at a dry sump system given what all this cost me. Though data shows the FP350S + boundary setup is by far the best wet sump setup I've seen, there's just no real drops in pressure even in high G-load turns (there's a small drop, but nothing like with the moroso pans that could drop 30PSI or more in a hard right hander under braking). The welds aren't porous into the tube as some were worried about (they're a bit more functional than form - albeit prettier than the welds the tube came with out of the box, and it was difficult on such a small piece to keep heat under control): I rigged up a simple pressure test and everything was good.


You can see the additional bracing placed on this, as these have had a few failures in their short time as an available part. Its worth noting that ford performance no longer recommends these tubes for GT350s (as the simple bent steel bracket would snap, unlike the reinfoced oem bracket used on the production 5.0 tubes and now the GT500 tubes). I think by re-working the part the risk is lowered; however better alternatives exist now in the GT500 pan+pump kit and/or dry-sump systems.
Ford Performance's Oil Line adapter kit
Another snag we ran into was the FRPP oil adapter kit, part M-6881-M50A. The ports on it were significantly off when bolted up, with one port being significantly off center on the AN fitting. Additionally, it had lots of rough edges in the machining and some tight bends that would restrict flow. Since the block was having its oil feed passages ported and cleaned up, we did the same to the block adapter. After cleanup, it fit much better and the rough transitions were removed. I'm not sure what's going on at FRPP, but their supplying manufacturers are all over the place on quality. For the cost, its also interesting the o-ring seal is only outside the ports. A more ideal seal would also include isolating the pressurized ports from each other.


To be continued next week: