The Mustang Forum for Track & Racing Enthusiasts

Taking your Mustang to an open track/HPDE event for the first time? Do you race competitively? This forum is for you! Log in to remove most ads.

  • Welcome to the Ford Mustang forum built for owners of the Mustang GT350, BOSS 302, GT500, and all other S550, S197, SN95, Fox Body and older Mustangs set up for open track days, road racing, and/or autocross. Join our forum, interact with others, share your build, and help us strengthen this community!

Complete 2013 Boss 302 audio system upgrade

This site may earn a commission from merchant affiliate links, including eBay, Amazon, and others.

It's widely known that the OEM audio system in the 2012/2013 Boss Mustang is the cheapest and lowest quality available for a Mustang. Not knocking Ford for this, this model is touted as 'a race car with a license plate', so anyone who expects good tunes from the factory will be in for a big disappointment. The speakers are suitable for AM radio only, and the head unit lacks power. The sad part is, if you just replace all of the 6x8 speakers with any decent coaxial, you will quickly discover that the signal quality and lack of power requires a complete replacement of the head unit.

Once you know you need to replace the head unit, finding a replacement dash panel is required. I really wasn't too impressed with the appearance of the Metra & Scoche kits, and was glad to see the iDatalink Maestro kit hit the market. I was critical of the initial cost when this was released, but I got lucky and snagged the ADS-KIT-MUS1 and RR module for 249$ new/shipped from eBay. I couldn't be happier with the quality, fit and finish. Props to the manufacturer, iDatalink really impresses with their product line, engineering, web site, and attention to detail. The fact that we have 12v Guy here to answer questions and offer help and advice is a much appreciated bonus.

Since I had tried the incremental upgrade approach - replace all speakers - suck - add PAC Audio interface to feed amplifier - more suck, fail - it was time to go whole hog. So the time came to put together a list of components and materials. Since I had already installed an old, scratch that, *ancient* Yamaha 4ch amp to power the JL Audio coaxials, I already have the amp install kit installed. Now it's one inline fuse and wires run through the firewall from the pre-cut hole in the firewall thanks to the sound tube delete kit grommet. My arm is sore from patting myself on the back for running TWO power wires, as I knew I would be adding a second amp. I figured I could address the need for a 2nd fuse later (now if recommended), but at least that part is done.

Another reason my shoulder is sore, is that I came up with an innovative way to temporarily mount the amplifier in the trunk. I got some industrial strength tie wraps, and looped them around the rear deck and seat area. From those I was able to suspend the amp by running another set of tie wraps through the 4 corner mount holes of the amp through the loops created by the 1st set of tie wraps around the body panels. The beauty of this setup is that you can adjust the tension of the wraps as needed. A piece of foam can be wedged between the rear deck to prevent the amp from bouncing upward in event of a hard bump. This setup is also quite handy as you can snip the secondary set of ties to 'uninstall' the amp so you can make adjustments as needed, and then re-tie. I may copy the plywood and angle bracket setup shown in clucas build thread for my amps.

On a side note, using this old amp wasn't such a hot idea. After a few weeks use, one of the channels started to fail. As a side effect, Sync voice prompts ceased to function, even after yanking the battery cable and performing a factory reset. Once the faulty amp was removed, Sync functions returned.

The equipment list (links provided for reference only, all gear purchased through Amazon, Parts-Express, or Ebay);

Kenwood DNX690HD
http://www.kenwoodusa.com/Car_Entertainment/eXcelon/Mobile_Video_n_Navigation/DNX690HD
iDatalink ADS-KIT-MUS1 & RR Module
http://maestro.idatalink.com/search/search?vehicle_make_id=12&vehicle_year_id=2013&vehicle_model_id=66&vehicle_audio_id=8478
Crunch Audio DRA 1450.4 4x175w
http://www.sonicelectronix.com/pictures_new.php?id=67958&picture_id=1300073
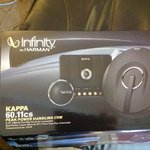
Infinity Kappa 6.5 60.11cs
http://www.sonicelectronix.com/pictures_new.php?id=60700&picture_id=-1
Dayton Audio RS-255-8
http://www.parts-express.com/dayton-audio-rs225-8-8-reference-woofer--295-356
Cerwin Vega HEDBK212
http://www.sonicelectronix.com/item_39705_Cerwin-Vega-HEDBK212.html

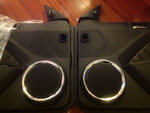
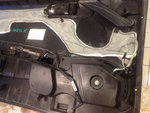
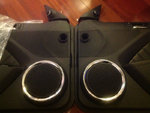
When I bought my Boss, I knew I would be upgrading the audio, so I purchased a pair of GT Premium door panels, complete with all hardware and switches.
13791087585_9c0d77588b_c.jpg
13791089775_bdac185111_c.jpg
13791093905_9574255363_c.jpg

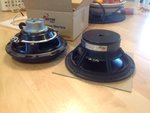
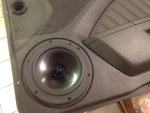
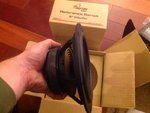
As I was having a hard time finding some JL ZR-800s for a decent price, I picked up a pair of Dayton Audio RS-255s. Great reviews and feedback on these, and I'm very happy with the pair of 10" Dayton Audio powered subwoofers, so I'm liking the brand so far.
13791190603_179101ba9a_c.jpg
13791173845_18d18ae777_c.jpg

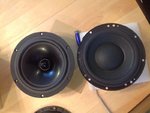
No comparison to the wimpy & cheap stock speaker.
11208522943_a7f7f3f9cd_c.jpg
11208400634_58997d6131_c.jpg
11208506813_db358a2b37_c.jpg

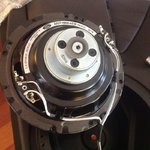
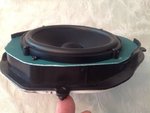
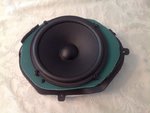
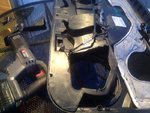
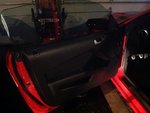
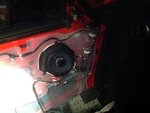
So the first order of business is to remove the stock door panels, remove the JL Audio coxials, and re-purpose the OEM speaker bracket to house the 6.5" Infinity driver. The problem using the bracket is that now there is open air space on either side. The solution was cut out material from a heavy duty storage tote. I had tried a small tote, but the plastic was brittle, but the bigger green tote lid was just right. Once I'm ready for final install, I will seal up the bracket surface & tote material with silicone adhesive.
13791195173_fd9b0d546f_c.jpg
13791179455_dc1e752ea8_c.jpg
13791198373_de8cd1e82b_c.jpg
13791069305_a43903502a_c.jpg
13791067605_1c5eabc24b_c.jpg

As this post is already long, the component tweeter & Dayton woofer install will follow.
 

ace72ace

Zaino, I put that $hit on everything
1,242
71
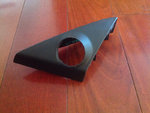
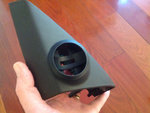
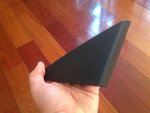
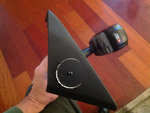
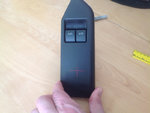
The sincerest form of flattery is imitation, and I saw this this installation tip in another build thread. Locating component tweeters up high is going to provide good separation, clarity, and tune-ability. As I had committed to not chopping up any original parts on my Boss Mustang, I purchased another set of the door panel trim pieces from eBay. I had called a Ford Parts dept, and was happy to find the used parts, as new cost is ~60ea.
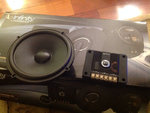
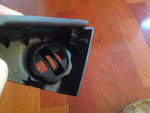
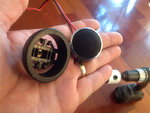
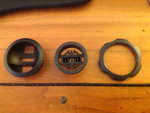
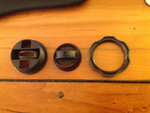
I can't say enough good things about the quality of the entire Infinity component speaker package. Not only is the mounting hardware plastic a perfect match for the Mustang interior, but also has a nifty bucket design that allows for a wide range of adjustment.

11208581436_e254cc957e_c.jpg
13791168185_6ae88bfbb0_c.jpg

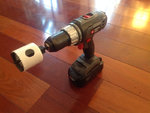
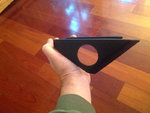
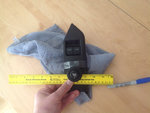
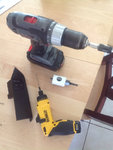
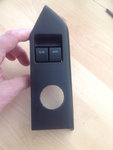
After measuring the diameter required for the mounting hardware, it was off to Lowe's to buy a hole saw, and then measure twice, drill, dress edges, and install after removing mirror switch.

13791139435_e805a3146e_c.jpg
13791161643_71b7723f2c_c.jpg
13791164523_847b6afb1b_c.jpg
13791480354_42b49f66e6_c.jpg
13791150605_a7e1bc3ac8_c.jpg
13791151555_a4cb4d3548_c.jpg
13791153415_6d3a98fd06_c.jpg
13791190373_31c6c93166_c.jpg
13791501104_84e65cd141_c.jpg
13791492844_ac497d5cbf_c.jpg

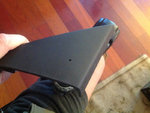
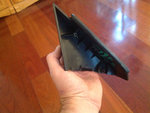
Now, onto the passenger side. Determine best mounting spot from back side of trim piece, drill pilot hole, use hole saw, dress edges, install mounting hardware.

13791487054_c19ff6024a_c.jpg
13791493604_063682d3dc_c.jpg
13791156735_3521dfa7a5_c.jpg
13791496324_0bfe3dcf73_c.jpg
13791498114_8b32b4480e_c.jpg
13791107205_92f51cc2de_c.jpg

I'm also glad these crossovers aren't as massive as the units shown in another build. Will be using heavy duty velcro to mount mine also.

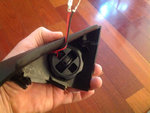
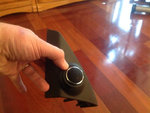
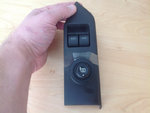
Now what to do with that power mirror switched that gave up it's home for the driver's side tweeter. What to do? Why buy another hole saw! Measure, align, drill, dress edges, test fit. Noticed after the fact the switch is upside down, the dot belongs on top.

13791391584_6e3a9034b6_c.jpg
13791082453_071b0e4a99_c.jpg
13791394954_b7d47fe208_c.jpg
13791065065_41a69da04d_c.jpg
13791067145_61251076d7_c.jpg
13791093463_7cfcc280a7_c.jpg
13791070075_857570ffd9_c.jpg

I will run a bead of silicone adhesive under the lip when I'm ready to button up the install.

13791407194_419f4da106_c.jpg
 

ace72ace

Zaino, I put that $hit on everything
1,242
71
As the 2012/2013 Boss 302 door panels are identical to base V6/V8 Mustangs, they lack the 8" speakers underneath the 6x8 speakers. For good quality sound, I decided to get a pair of used GT Premium panels, as there was no way I was going hack up the original Boss panels. Sure it added $450 to the cost of the build, but I think it was worth it.

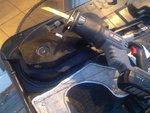
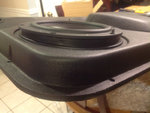
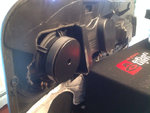
To get the Dayton 8 inchers to fit, there were 2 options, heat gun, or cut the rear enclosure to allow clearance for the MUCH BIGGER magnets. I started out trying to use the heat gun, but quickly determined that a) I didn't like the stench of the fumes, and b) by the time I melted it enough to allow clearance, I would have to repeat the process of test fitting over and over, so cutting the plastic was my choice. Since I'm also going to line the door panel skins and door body with GTMAT, I'm really not worried about a tight enclosure behind the new speaker. I am sure the stock enclosure was designed to wring out the most efficiency/loudness out of the wimpy stock speakers.

13791089775_bdac185111_c.jpg
13791423284_8fd1c0da65_c.jpg
13791093905_9574255363_c.jpg
13791115963_4b83d2431f_c.jpg
13791118993_4589ed1efb_c.jpg
13791432604_89f8dfe45f_c.jpg
13791434484_431cb3c1a4_c.jpg
13791104905_5c7ddf1c88_c.jpg
13791107205_92f51cc2de_c.jpg

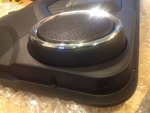
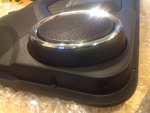
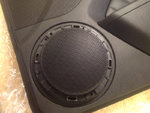
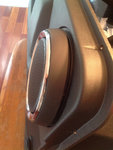
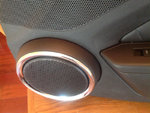
Notice that the stock speaker grille now sits a visibly higher over the replacement speaker that has the thicker metal. The grille cover is also not perfectly symmetrical, and the thinner edge is aligned up top for a flush mount with the factory speakers. As this is down by your ankles, you'll never really notice it unless you are looking for it. However if you rotate the cover so that the fatter side that had been on the bottom is now on the top, it still presents the clean, factory appearance that I'm looking for. You will only see the much bigger gap that exists on the bottom if the panel is off. Sitting in either seat inside the car, you will never see it. =)

13830829255_51a1c9667b_c.jpg
13830847793_c863f405de_c.jpg
13830852713_344247206a_c.jpg

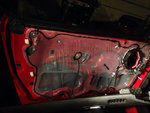
So the hard part is done, next up is to complete the GTMAT installation on the doors, extend the wiring for the power mirror switch, run the wires in for the woofers, and test fit everything.
 
Nice, I'm sure that's going to sound great. Believe it or not, the stereo in my 2013 F-150 with MyFord sounded worse than the Boss. I tried to use a less expensive solution in the truck. I changed all the speakers, added a JBL MS-8 plus an amp/sub. It's better than stock but not good enough that I will use that solution for the Boss.

When I get around to the Boss' audio system, I will probably go with the Maestro kit so I look forward to the rest of your install.
 
I was literally telling the wife 10 minutes ago I need a new stereo. I for one disagree with Ford for not putting an average stereo or offering an upgrade as an option.

Great looking install. I have limited audio options here in Austin and don't trust they can do a system that won't trash the car and keep my Sync in tact.
 

ace72ace

Zaino, I put that $hit on everything
1,242
71
If you want to keep Sync, then the Maestro setup is the way to go. It's not cheap, but I think it's worth it looking at the completed installs over in audio section on TMS. As a bonus, I get Garmin Nav too, so the iDatalink kit lets you plug right into the stock harness, only needing to splice 1 wire for Sync, and 2 for ODB2.

Here's a link to a great install where you can see I borrowed some ideas. I love the idea of getting TPMS reading for each wheel and not just a freakin idiot light!!

http://forums.themustangsource.com/f803/upcoming-audio-build-detailed-w-pics-data-521961/index5/
 
Thanks. This was extremely helpful and I have started the process. Trying to determine what head unit I want to go with. I want to be sure I get one with a capacitive touch screen.

How does the touch screen on the 690 perform especially with the climate controls?

Also, how much improvement do you think there will be with upgrading the head unit and stock speakers. I might have to dis in stages before buying new door panels, amps and subs.
 
Nice job Rich, thanks for sharing.
 

ace72ace

Zaino, I put that $hit on everything
1,242
71
Darth Boss said:
Thanks. This was extremely helpful and I have started the process. Trying to determine what head unit I want to go with. I want to be sure I get one with a capacitive touch screen.

How does the touch screen on the 690 perform especially with the climate controls?

Also, how much improvement do you think there will be with upgrading the head unit and stock speakers. I might have to dis in stages before buying new door panels, amps and subs.

I wont know how well the DNX690HD performs until I complete the installation later this week. How much improvement is pretty subjective, but it's fair to say that you will notice better quality when replacing the stock speakers. I've tried the incremental approach, but the stock head unit has got to go. Today's head units have a good amount of power to 4 channels, so depending on your musical tastes, you may not need an external amp, just a good head unit, dash kit & module, speakers, and powered sub, if desired.
 
Ace, I admire your dedication to improving the sound system in your Boss. But I'm on the other side of the spectrum......I haven't used mine since I got the car ( over 2 yrs). The motor & exhaust is the music I need to hear when I'm driving my Boss. "To each his own" I guess...............
 

ace72ace

Zaino, I put that $hit on everything
1,242
71
I can't afford to track my Boss until I get my kids out off college. But this upgrade will allow me to remove the subwoofers and amps when the time comes. So while plenty of a Boss owners say 'what radio?', others can upgrade as they see fit. I scrimped and saved week by week since last summer, and just had enough to get a refurb head unit.

What's the real percentage of Boss owners that have taken their own Boss to the track?

I'm sure there are a lot of Boss owners who just lurk or read forums for fear of recriminations from the hardcore track guys. So I'm surprised it took this long for someone to express in some way, shape, or form that their Boss was purchased just to enjoy the engine, exhaust, etc. There's no need to repeat that idea, I get it...

Up until 8 years ago, I had never owned a brand new vehicle, the new vehicle was for the wife/family mobile. I drove beaters, until I got a used Buick. Now that I was finally fortunate enough to get a Boss Mustang, I'm posting up the best install I can do, while on a budget. So for all those track guys out there, perhaps they can understand my motivation on this upgrade. At least I'm not putting on 22" mags, shag carpet and curb feelers! =P
 
302BOB said:
Ace, I admire your dedication to improving the sound system in your Boss. But I'm on the other side of the spectrum......I haven't used mine since I got the car ( over 2 yrs). The motor & exhaust is the music I need to hear when I'm driving my Boss. "To each his own" I guess...............

To each his own should be just that. I honestly get perturbed by posts like this. I get it, we all get it, our cars sound awesome stock and modified. There's no point in stating it. ace72ace took a lot of time to detail what it takes to do a proper upgrade. I for one appreciate the insight, but also the care and attention to detail in documenting it is not so easy.

If you want to make the perverbial all I need to listen to is the car speech, keep it to yourself on in the right context. If it was a debate post, great.

We can have our own opinions, and though your comments are not rude or insulting, it can be viewed borderline disrespectful. I personally find it hard to believe that in two years you have not used the radio.

Bottom line, regardless if you are a track head or just a lover of cars, the stock radio sucks. I love how my car sounds, but it sucks when it's difficult to listen to tunes or talk radio over what makes this car great.

Nice job ace72ace, can't wait to see the finished build. Hope ur photos get relinked, as I was going to use them as a guide at some point.
 

ace72ace

Zaino, I put that $hit on everything
1,242
71
I didn't take the post as disrespectful at all, I'm sure that there are indeed some owners who simply don't bother with the radio. But let's face it, this site is really geared (nice pun) toward the serious track enthusiast, and the reason is obvious. The new Boss 302 is the best handling Mustang to date, and the DVD that came with the owners kit illustrates the pedigree of this model. When Ford decided to only offer one option for these cars for both model years, the intent was clear, RCWALP. If you want all the luxury goodies, pony up the extra cash for a Shelby (rimshot).

It's great to see the passion and dedication that the hardcore to casual track guys dedicate to this site. The breadth and depth of knowledge on this site is second to no other Boss Mustang site. It's also free (as far as I can see) of trolls, wanna be comedians and bomb tossers. It was only a matter of time until some expressed their honest point of view regarding the pure purpose for which the Boss 302 was designed. So while the percentage of total Boss owners who track their cars may be small (pick a number), the percentage of active posters on this site is much higher.

Since there was no way for me to start a track experience right now due to financial constraints, upgraded audio is something I've been planning on for a long time. If things work out in the years to come, I would love to get my hands on another Boss 302 that could be stripped down for hardcore track duty. When that time comes, the content here on this site will be my best source for knowledge, advice, and guidance.

As I went overboard with dozens of pix from every angle, I took the time to post threads in 4 different forums. I think the total views for all 4 is now over 1000, with BMO not surprisingly having the smallest percentage. I saved the original posts on my PC, so I will be able to edit the posts with links to another hosting site since I blasted by the free bandwidth quota on photobucket. I will resize the images and upload them to another hosting site as there appears to be a great deal of interest in this project.

My motivation for putting up this thread here was to pay it forward for all the technical knowledge I will tap in the future when the time comes for me to start racing. So until this day arrives, I'll be enjoying good tunes. :D
 

TMSBOSS

Spending my pension on car parts and track fees.
7,514
5,217
Exp. Type
HPDE
Exp. Level
10-20 Years
Illinois
ace72ace said:
I didn't take the post as disrespectful at all, I'm sure that there are indeed some owners who simply don't bother with the radio. But let's face it, this site is really geared (nice pun) toward the serious track enthusiast, and the reason is obvious. The new Boss 302 is the best handling Mustang to date, and the DVD that came with the owners kit illustrates the pedigree of this model. When Ford decided to only offer one option for these cars for both model years, the intent was clear, RCWALP. If you want all the luxury goodies, pony up the extra cash for a Shelby (rimshot).

It's great to see the passion and dedication that the hardcore to casual track guys dedicate to this site. The breadth and depth of knowledge on this site is second to no other Boss Mustang site. It's also free (as far as I can see) of trolls, wanna be comedians and bomb tossers. It was only a matter of time until some expressed their honest point of view regarding the pure purpose for which the Boss 302 was designed. So while the percentage of total Boss owners who track their cars may be small (pick a number), the percentage of active posters on this site is much higher.

Since there was no way for me to start a track experience right now due to financial constraints, upgraded audio is something I've been planning on for a long time. If things work out in the years to come, I would love to get my hands on another Boss 302 that could be stripped down for hardcore track duty. When that time comes, the content here on this site will be my best source for knowledge, advice, and guidance.

As I went overboard with dozens of pix from every angle, I took the time to post threads in 4 different forums. I think the total views for all 4 is now over 1000, with BMO not surprisingly having the smallest percentage. I saved the original posts on my PC, so I will be able to edit the posts with links to another hosting site since I blasted by the free bandwidth quota on photobucket. I will resize the images and upload them to another hosting site as there appears to be a great deal of interest in this project.

My motivation for putting up this thread here was to pay it forward for all the technical knowledge I will tap in the future when the time comes for me to start racing. So until this day arrives, I'll be enjoying good tunes. :D
Ace

You did a great write up. I am sure the system sounds amazing. I thought you may do this for a living.

Yep, lots of track animals on this site. I like that. I also feel there was a bit of negativity thrown your way by some that see the Boss as a track beast only.

RCWALP. Is probable the single most persuasive point in the belief the Boss is for the track only.

BS.

Our cars are owned by individuals with their own certain tastes and talents. You chose to go the stereo/sound system route. From my novice point of view, you kicked A** with your project.

Hope you enjoy your Boss with your own personalization (Mods) as I do. ;D
 

ace72ace

Zaino, I put that $hit on everything
1,242
71
Over the past weekend I was able to sort out all the wiring harness connections from the Kenwood head unit to Maestro RR module. Had to look at the wiring diagram to sort out the various connections from one harness to the other, and solder together the required wires. Assuming I made the proper connections with the RR module (it includes 2 sets of 3 wires, which I assume one is for the T harness, and one for the ADS-KIT-MUS1), all that was left to get head unit ready to go in the dash was to;

Unscrew the shift knob (if you have an automatic, find the procedure for 6AT)

Pull out the center console assembly from the main console to allow access to the lower bolts on the OEM dash trim panel - disconnect left side switch connector under console - traction control/trunk release

Unscrew the trim panel bolts

Pull panel away from dash

Disconnect OEM 8 pin harness wiring connection from the lower right hand side of the panel

Remove the 4 bolts that secure the OEM head unit to the dash

Pull head unit forward so you can reach behind the unit and first disconnect the antenna cable from the bottom middle/right rear side of the head unit. Doing so allows you easier access to remove the remaining 2 wiring harness connections from the bottom/middle section of the unit, and the bottom/left.

Head unit ready for removal - Make sure you hit eject before uninstalling to remove any CD you may have inside. FYI - once you disconnect the OEM dash panel, if you start your car with it disconnected, it will blast the fan to max speed on defrost mode by default. It's easy enough to reconnect the panel by plugging in the 8 pin jack again while unbolted from the dash to avoid the max fan blast defrost effect.

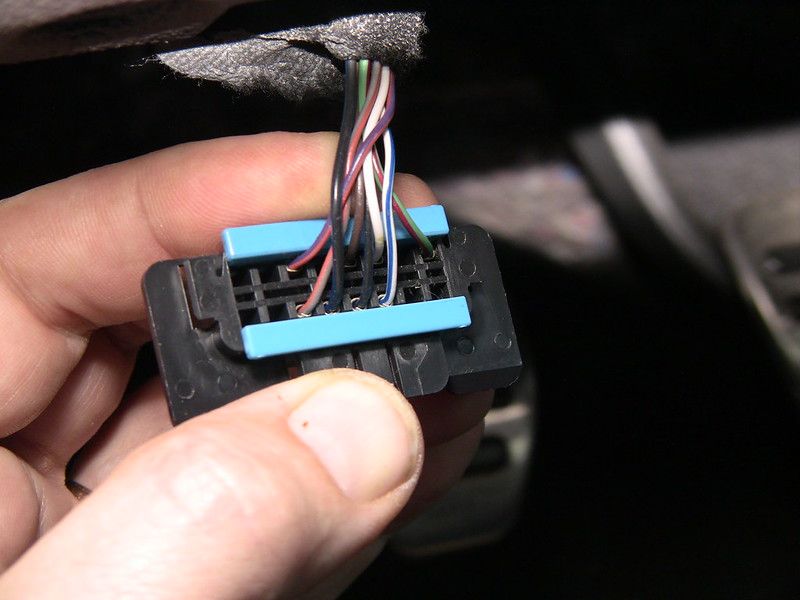
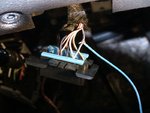
This left the ODB2 & Sync wire splices. The ODB2 connector is under the dash by your left knee, slightly to the right of due south from the headlamp switch. There is a bolt on the underside of the dash near the connector, leave it be, it's only there to secure the dash to the dash support structure. You can pry the connector from the dash with a short flat blade screwdriver leveraged behind the plastic, pushing it toward the firewall.

Once free, cut back an inch or 2 of the cloth electrical tape to expose the required wires.

13834992833_3a4efd9a98_c.jpg


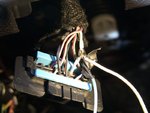
I harvested 2 small sections of wire from the spare harness connector from the Maestro RR kit to splice into the ODB2 wires. I used a razor knife to trim away about 1/4 inch of insulation on each wire to allow the spare length of wire to wrap around the exposed section, and then apply solder.

13834972665_d8950e94fa_c.jpg

Once I had a good solder, I wrapped a small piece of electrical tape around the Y shaped splice. Because of the shape of the extra wire splice, it would be extremely difficult to do the traditional wrap below the area, and stretch over the soldered area technique. So I just got the tape behind the splice, gave it a stretch over the exposed solder splice and gave it one more wrap around. Here you can see the floppy tape end while I preparing the 2nd solder. A pair of hemostats is a great tool to position the 2nd wire for the next splice.

13834972215_fe7fdaaec2_c.jpg
13834974765_4874cb659e_c.jpg

Another wrap around the white wire, and then a good tight wind and stretch over the wire bundle. On the other end I crimped a female bullet connection should I end up having (KNOCK WOOD) any kind of warranty issue, that requires me to pull the head unit. I will perform the same splice of the Sync wire as soon as I can figure out how to release the wiring harness connection from the back of the Sync module behind the glove box.

13835335184_ac78db65d9_c.jpg
 
Very nice. Close to buying my equipment. Just need to figure out what speaker setup I want. Pretty much talked myself into the Pioneer 8000NEX head unit.
 

TMO Supporting Vendors

Top