The Mustang Forum for Track & Racing Enthusiasts

Taking your Mustang to an open track/HPDE event for the first time? Do you race competitively? This forum is for you! Log in to remove most ads.

  • Welcome to the Ford Mustang forum built for owners of the Mustang GT350, BOSS 302, GT500, and all other S550, S197, SN95, Fox Body and older Mustangs set up for open track days, road racing, and/or autocross. Join our forum, interact with others, share your build, and help us strengthen this community!
Screenshot_20231026-124614_(1).png

S197 DeepImpactBlues Build Thread Profile - S197 Mustangs

A Salvage Restoration Project

This site may earn a commission from merchant affiliate links, including eBay, Amazon, and others.

Now it's time for the nitty-gritty!

As my project progresses it's apparent that I need to get some more weight on the front of the car. I'm not comfortable with the stability of the chassis on my quickjacks right now. Before I can put the engine in I've finally turned my attention to getting the forward wiring sorted out, something I've been avoiding until now.

My wiring harness was damaged in the wreck and it seems that replacements are no longer available. The 'new' car's harness isn't compatible. I've had no success finding the right used harness either, and from the condition of my second harness I'm not sure I'd trust one if I did find it, so I'm resorting to splicing in parts of the 2 harnesses to repair the original.

20241013_181541.jpg

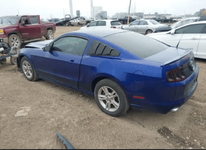
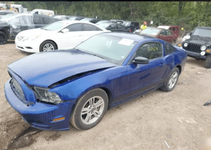
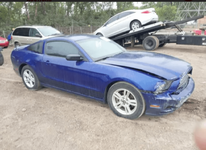
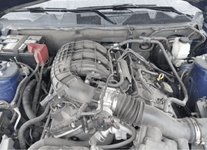
What a difference in condition between these two harnesses! My original, garage kept, low mileage car vs one model year older, weather beaten with crumbling split loom tubing and brittle connectors.

While I've been going about swapping harnesses, I've confirmed a few fears, partly why I've been avoiding this till now:

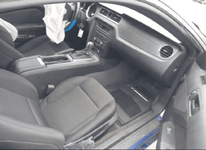
The 2 cars are equipped differently, things like auto dimming rear view mirror and SYNC means the body harnesses are different too. I'm not sure if the provision for power seats exists in all harnesses either, but again, I'm not happy with the condition of some of these harnesses anyway, so...since wiring is not my specialty, rather than trying to figure out how to provide for the differences, I'm going to swap every harness in the car. 😮

Both cars have had the front wiring harness mostly or completely removed for some time now, and have had much structure either removed or replaced too. Even though I carefully marked everything and took lots of photos, I've got a bit of a puzzle on my hands determining the routing and attach points for everything. There are many dozens of holes for attaching everything to the chassis, and remembering or deciphering the context is a bit confusing. For future reference: No amount of detailed info is too much!

Once I get this part sorted out I'm hoping the rest of this build will be more of a plug and play operation, wish me luck!
 
Last edited:
More progress!
Rear body harness removed from the wreck...
20241019_145813.jpg
...and installed in the project:
20241020_172608.jpg
Pedal cluster, carpet, evaporator core, and dashboard are swapped.
20241030_092629.jpg
In the engine bay the forward body harness is in place and mostly ssecured. PCM, ABS module, master cyl. and brake lines swapped, and various bits and pieces are going in prior to engine install:
20241030_092819.jpg
It's fair to say that I've passed the point at which the project car is more assembled than the donor car is now!
 
While I'm in there...
This car will see street driving as well track use, so a few creature comforts will be nice too. I had planned to do this a couple of years ago, and since I've got the access now I took the opportunity to add a component speaker system with separately mounted tweeters.
Installing pod mounted tweeters on the rear deck was a simple installation:
20241102_081938.jpg
20241102_081646.jpg
In the front, the sail panels on the doors are an ideal location for tweeters but the driver's door has the side mirror joystick in it.
After a slight modification to the door harness, I relocated it to the blank space behind the power window controls and installed my speaker in it's place.
20241102_084418.jpg
One way of dealing with NVH...
Well, at least N!
 
Other than the engine bay, the wiring is practically completed. I installed the gauge cluster & center console display, mounted my Ford Racing gauge pod and routed/secured the gauge wiring:
20241112_075809.jpg
20241112_080131.jpg
I'm looking for a dimmed lighting power source for my gauges. There's an unused power connector for an auto transmission shifter under the console, does anyone know which wire is for illumination, and if it's dimmer controlled?
20241112_085607.jpg

I also completed a bunch of miscellaneous wiring for stereo amp, intercooler pump, and fuel pump booster. Wiring for transmission and differential coolers will be installed soon.

I've also finally got the axle installed! Along with CorteX coilovers, watts link, LCAs, and torque arm:
20241111_120409.jpg

I want to install the engine soon, and want to replace the clutch first, but I have the engine/transmission sitting on an improvised stand right now:
20241112_083531.jpg
I have yet to come up with a good plan for this. I can't get to the clutch/flywheel with the engine mounted on an engine stand, so, other than doing all this with the engine swinging from a chain, I may end up installing the engine separately and doing the clutch under the car before the transmission goes in.

I can't believe it but I just hit the 1 year mark since I started this project!
 
Really impressive work, looks awesome! So clean.
Thanks for the kind words!
A major factor in my attempting this project was how clean and low mileage my donor car was before I wrecked it. After swapping so many parts it's getting harder to tell the difference anymore! The plan must be working 😉
 
After a few weeks away from the project for Thanksgiving, I took some steps towards installing a transmission cooler and a differential cooler. Because I'll be placing an oil cooler and a humongous supercharger intercooler up front, and retaining the a/c condenser, real estate for a couple more coolers is scarce! The common location for a differential cooler is underneath the spare tire well, but there isn't really room for TWO coolers.... or is there?

After several iterations, I came up with this template:
20241213_115414.jpg

A flat surface to mount everything onto, which extends a bit beyond the tire well dimensions to utilize all available space:
20241214_132953.jpg

By mounting one pump vertically, and overlapping a fan pack with the other pump, this arrangement allows for a compact pre-assembled 'cooling module', with access to all of the hose fittings.
20241214_161506.jpg

There's just enough room left to clear my Watts Link
20241215_173121.jpg

Although the pumps are attached to the mounting plate with rubber isolators, I used them in between the plate and the tire well also, for additional vibration isolation, and added some fan exhaust spacing.
In hindsight, a fantastic way to over-complicate things and add some challenge to the installation process!
20241215_173308.jpg

Components installed and ready for plumbing and wiring
20241215_173814.jpg
 
Yeah, been there done that, throwing in coolers and pumps and lines for the engine oil, trans and diff. Trying to find spots to mount pumps, coolers, route oil lines, switch panels, wiring, warning lights and on and on it goes. Then the fun begins trying to keep all that stuff running and avoid damage from track junk. Spend all your time between sessions trying to find out what quit and why and fix it.
Eventually you get sick of trying to keep all that stuff running and buy a new car that comes with a full suite of coolers built in by Ford. The Mach 1 had them all and so does the DH, nicely put in with all OE lines and pumps and thermostats to turn them on and off and protected from track klag.
The easy button. Good enough for me.
Ahh... The evolution of track Mustang ownership!
I'll venture a guess that many of us aspire to own a Mach 1, Dark Horse, or why not even a GTD if we could get our hands on one?
I agree with you wholeheartedly, I'd love to spend more time in my car than under it. I'm happy for your having achieved that.

Meanwhile, I'll have to settle for some sense of accomplishment in trying to build a better mousetrap out of what I have and hope for the best. And I'll try to enjoy the journey as much as the destination, maybe that's why there are so many build threads here?
 
45 years ago today I found myself replacing a timing chain on a 69 Mustang,. Outdoors in 15 degree weather.
Lately, I'm struggling to motivate myself to get out to my garage with temps in the 40s & 50s. Maybe all those years make a difference, or maybe I'm enjoying time with family around the holidays. One thing for sure, it's not my daily driver this time so I just don't have to!
I keep envisioning the day it's completed, and will get back to it soon enough though, more progress coming soon.
 
Last edited:
One step forward one step back.

I had a huge oversight during the process of locating my trans & diff coolers. I didn't have the rear swaybar installed and made an incorrect assumption about how much clearance it needed. Now I realize that it moves in a couple of directions at once. It has a few bends in it, so the center portion travels in an arc around the bar's rotational axis. But as the axle moves through it's full travel the lower end of the links move in another arc which moves this rotational axis forward and aft too. Long story short... I didn't have the required clearance.

So here's cooler installation v2.0
I was able to fit both fan packs and the larger pump in the same area, the other pump will be installed farther forward on the frame, closer to the transmission.

 
Now that I've got a workable layout for my differential and transmission cooler components, I'm sourcing the fittings and hoses to complete the systems.

There are 3 threaded ports on the CorteX differential cover, for oil in & out to a cooler, and a temp sensor. I've come to realize that a fitting can't be installed into the forward port when a torque arm is used too, the differential cover bracket for the torque arm almost overlaps the port:

20250131_081454.jpg20250131_081623.jpg

So maybe a pipe nipple would solve this?
Yes & no!

20250131_081830.jpg
This one had an O.D that still prevented me from installing. In fact, even the largest diameter of the tapered threads was too big, and threaded end too long to clear the bracket. I had to turn down the center section to smaller than the largest part of the threads, removing the largest 2 threads from the cover end to shorten them enough to clear the bracket when installing:

20250130_234942.jpg
20250131_075300.jpg

It just clears now!
I'm not real happy with this solution, this nipple will need to be removed anytime the differential cover needs to come off. Even a standard fitting would need to be removed, but at least I'd have a hex to wrench it with. I've got 0.070" of wall thickness remaining, hopefully that's gonna be strong enough.
I'd like to find something like this to modify, but 2-1/2" long:

 
Last edited:
Another quick update.
I finished installing my transmission & differential coolers, plumbed the complete differential circuit, filled it, ran the pump and topped it off.
20250208_150128.jpg

Before I can determine the hose routing for the transmission I needed to install my Exedy ET04XD twin disc clutch with new throwout & pilot bearings.
20250227_173430.jpg
MGW Shifter
20250228_114842.jpg
And complete the transmission installation
20250311_105932.jpg

On to the transmission cooler hoses now!
 
While my project in the garage proceeds, my wrecked donor car sits in a temporary carport canopy, stripped of all but the last few wanted items. Apparently somebody found a better use for it than I now have. 20250402_105146.jpg
A pair of doves have moved into the cowl area. They've built a nest where the wiper motor lived.
20250402_170158.jpg
I'm living with 2 birds freaking out and flying laps around the inside of the carport every time I enter!
 
While my project in the garage proceeds, my wrecked donor car sits in a temporary carport canopy, stripped of all but the last few wanted items. Apparently somebody found a better use for it than I now have. View attachment 101674
A pair of doves have moved into the cowl area. They've built a nest where the wiper motor lived.
View attachment 101675
I'm living with 2 birds freaking out and flying laps around the inside of the carport every time I enter!
Smart birds! If there's a better place to get down to business I can't think of one!
 

Buy TMO Apparel

Buy TMO Apparel
Top