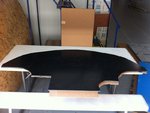
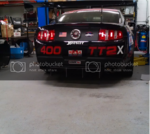
So I decided to dive into the world of unique aero dynamics. I’ve always been interested in making a rear diffuser and have watched many youtube videos and read many articles on the subject. I finally felt like I was ready to make one and one weekend I made a mock up with cardboard.


I uploaded it to corner ponies for critique and got some good and bad suggestions. A couple guys have a diffuser made up of ABS plastic; however, I wasn’t sure how strong ABS weld glue would hold up to varying weather and heat when I drive the car. A co-worker then suggested that I just use sheets of aluminum, then the idea came alive. Now many people state that for a rear diffuser to work you “have” to have a flat bottomed car. That is true in a since, but even without one there is still air flowing under the car and it is still under pressure. I do plan on paneling some parts of the underbody in the near future, but our axle cars are not designed well for a fully flat bottom.
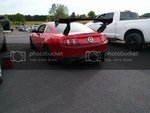
Before I installed anything I wanted to go do some testing to see what kind of air flow I was getting behind the car before I installed anything. The video doesn’t show much movement from the spoiler to the rear bumper. I can post that later if anyone really wants to see it. At this point I haven’t conducted my post install test yet.

So after doing some research on youtube, I made myself a homemade sheet metal bender out of wood, door hinges, and an angle iron. The wood is heavy enough that I didn’t need to attach it to anything, I can also use my body weight to hold it down when bending the metal.


So my diffuser design is about a 1-yard square design with fins rising to 4.75” at a 7-degree angle. I used diamond plating for the main support because my local Home Depot only have thin aluminum sheets, and the diamond plating was the thickest sheet they had. Maybe in the future I’ll buy some thicker aluminum and replace the diamond plating.

My sheet metal binder worked very well and was used a lot during this build. I also built two support beams that go on the top of the diffuser to help it keep its shape. Here is the unpainted version.


I built 6 attachment brackets that attach it to the spare tire well. I used two 5.5” bolts to support the middle of the diffuser and keep it from bowing the in middle.


I used zip ties to hold up the (evaporator?) module under the wheel well. I originally had it bolted to the diffuser but the aluminum was too thin and bowed under the weight.


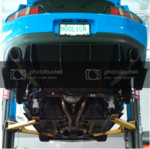
Once I got that fixed and the center of the diffuser supported it looked good. I just need to take it off now and give it a good coat of black spray paint. The entire diffuser weights ~4lbs, so it won't be slowing me down weight wise. The entire build, with building my sheet metal binder, cost me ~$100. Next month I have an event at Hallet, a track I’ve been to multiple times, and since this is the first major mod I’ve done since my last trip there I’m excited to see if it helps lower my lap times.


-James


I uploaded it to corner ponies for critique and got some good and bad suggestions. A couple guys have a diffuser made up of ABS plastic; however, I wasn’t sure how strong ABS weld glue would hold up to varying weather and heat when I drive the car. A co-worker then suggested that I just use sheets of aluminum, then the idea came alive. Now many people state that for a rear diffuser to work you “have” to have a flat bottomed car. That is true in a since, but even without one there is still air flowing under the car and it is still under pressure. I do plan on paneling some parts of the underbody in the near future, but our axle cars are not designed well for a fully flat bottom.
Before I installed anything I wanted to go do some testing to see what kind of air flow I was getting behind the car before I installed anything. The video doesn’t show much movement from the spoiler to the rear bumper. I can post that later if anyone really wants to see it. At this point I haven’t conducted my post install test yet.

So after doing some research on youtube, I made myself a homemade sheet metal bender out of wood, door hinges, and an angle iron. The wood is heavy enough that I didn’t need to attach it to anything, I can also use my body weight to hold it down when bending the metal.


So my diffuser design is about a 1-yard square design with fins rising to 4.75” at a 7-degree angle. I used diamond plating for the main support because my local Home Depot only have thin aluminum sheets, and the diamond plating was the thickest sheet they had. Maybe in the future I’ll buy some thicker aluminum and replace the diamond plating.

My sheet metal binder worked very well and was used a lot during this build. I also built two support beams that go on the top of the diffuser to help it keep its shape. Here is the unpainted version.


I built 6 attachment brackets that attach it to the spare tire well. I used two 5.5” bolts to support the middle of the diffuser and keep it from bowing the in middle.


I used zip ties to hold up the (evaporator?) module under the wheel well. I originally had it bolted to the diffuser but the aluminum was too thin and bowed under the weight.


Once I got that fixed and the center of the diffuser supported it looked good. I just need to take it off now and give it a good coat of black spray paint. The entire diffuser weights ~4lbs, so it won't be slowing me down weight wise. The entire build, with building my sheet metal binder, cost me ~$100. Next month I have an event at Hallet, a track I’ve been to multiple times, and since this is the first major mod I’ve done since my last trip there I’m excited to see if it helps lower my lap times.


-James
