


steveespo
@21CarProductions @NJS58 Racing @NJS58 Eurosport
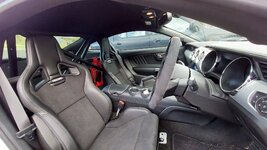
Like the box and hold down. If in the cockpit it needs to be properly secured and isolated.This is why I opted to mount my battery behind the pass seat.
The cable weighs more than the battery so moving the battery to the trunk would be of no benefit.
Plus, less cable means less voltage drop.
View attachment 110202


