This guide will go over my installation of a Radium Fuel Surge tank in a 11-14 S197 Mustang. This will solve fuel slosh / fuel starvation issues when running extremely grippy tires with the OEM fuel tank. There are two excellent existing guides by resident racer @captdistraction here: https://onedrive.live.com/?authkey=!AIDveM0l8mcBVjY&id=1C56AF0EFE270D56!1685232&cid=1C56AF0EFE270D56 & well known vendor Vorshlag @Fair here: https://www.vorshlag.com/forums/for...ang-fuel-starve-fixes-surge-tank-or-fuel-cell
These two guides helped out a lot when I built my setup, so I wanted to provide a in-depth guide to help those looking to set one of these up.
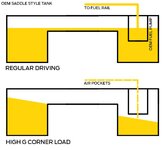
When running the OEM saddle style tank with half a tank of fuel or less, the pump will begin to suck up air pockets when turning corners with high G loads as the fuel sloshes to one side:
Radium Engineering has a great fuel surge tank solution which can be piggy backed off the OEM tank & OEM fuel pump harness. This is a great option for a dual duty vehicle or those looking for ease of installation.
FST-R:
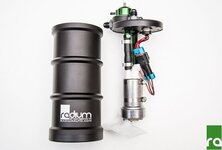
It includes its own fuel pump, or you can spec it without one to use your own pump. I spec'd mine with the AEM 50-1200.
The setup uses -6 lines & fittings and requires a fused relay to piggy back off the OEM wiring harness for the fuel pump. The tank sucks up fuel from the OEM tank and has its own pump inside which feeds fuel directly to the fuel rail. Since the tanks cylindrical & is constantly pressurized full of fuel, there is no where for the fuel to slosh. You can run fuel down to almost the last drop without worrying about sucking up air.
Part List
Here is a complete list of parts I used for my build. I wont include prices as that fluctuates often, but expect to spend around $1000 for everything:
Radium Fuel Surge Tank - FST-R : 20-0130-01
Radium Hose Barb Adapter for 1 1/4" ID Hose w/ 1/4 NPT Port: 14-0058
Radium 0-100 PSI Fuel Pressure Gauge: 20-0029
Radium FST Mounting Bracket, Wall/Floor Standard Mount: 13-0054
Radium 5/16in SAE Female to 6AN Male Low Profile Elbow: 20-0600
Fragola 6000 Series PTFE Hose 20 ft.: FRA-602026
x3 Fragola Real Street Reusable PTFE Hose Ends Straight, -6 AN: FRA-680106-BL
x3 Fragola Real Street Reusable PTFE Hose Ends 90 Degree, -6 AN: FRA-689006-BL
Russell Performance -6 AN to 1/4 in. NPT: RUS-660823
Improved Racing -6 AN, -6 AN, 1/8 in. NPT Gauge Port: TR-06-02-B
Vibrant Performance Fuel Rail Fitting 5/16 in. to -6 AN: 16880
Aeroquip 1/8" NPT Plug: FCM3685
MGI SpeedWare Fused Relay: EP-FREL40
MGI SpeedWare GXL 12GA: WC-GXL
2" / 50mm Desk Grommet
Other materials/tools recommended: Hose cutter, basic wiring tools, high temp heat reflection tape, tesa tape, sharp knife, high temp thread sealant, -AN wrenches or 11/16 wrenches if you want hose ends to look like they were chewed on, hole saw 1.5"- 2", deburring tool, rivnut tool, rivnuts, chassis paint, Posi Taps, hose clamps, jack & stands, basic hand tools.
Diagrams
Plumbing Diagram:

Wiring Diagram:
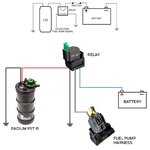
Relay Diagram:
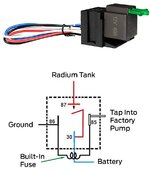
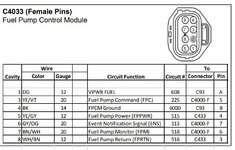
Factory Fuel Pump Harness:
Instructions
Remove battery negative terminal.
Decide on where to mount the Radium tank. I used the floor mount from Radium & bolted it directly on the left side (Driver side) of the trunk beside the spare wheel compartment.
Mark the holes and drill them, following up with deburring & chassis paint to prevent rust. I inserted M6 rivnuts to bolt the tank down:
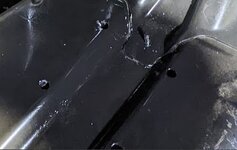
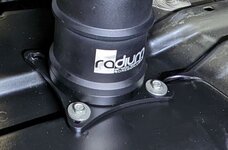
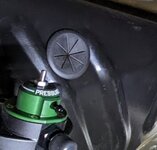
Instead of using bulkhead fittings (cleaner & more professional, but more expensive & added leak points), I copied what Chris did; which was drilling a big ol' hole into the wheelwell area to feed the fuel lines through to the OEM fuel tank & overflow line:
I used a 2" hole saw, following up with deburring and chassis paint & covered the hole with a office desk gromet. You could maybe do this with a 1-1/2" size or 1-3/4" if you want to try to get away with a smaller hole.
[ Nice of you to say hello, racing slick ]
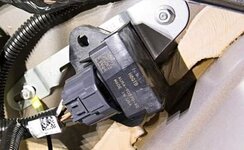
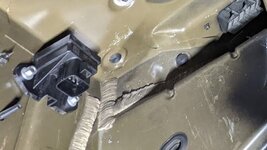
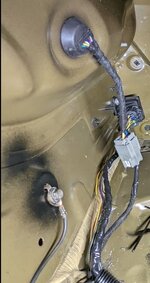
I worked on the wiring next. I relocated the OEM Fuel Pump harness from the rear driver side of the spare wheel area over to below the driver side rear taillight. I did this step because I utilize the spare wheel area for storage & trackday gear which results in things always bashing against the harness and the wiring was actually coming apart because of this. The relocated area should work better and is closer to where I placed the Radium surge tank. There were already two bolts in this location which perfectly fit the harness housing sans metal bracket. I just had to shave down some of the plastic housing base to fit the mounting nuts on. I did not have to extend any wires, just had to separate the grounding wire & relocate it:
OEM Fuel Pump harness:
Relocated ground strap:
Next, mount the Relay somewhere close to the Radium tank. I just added a rivnut into an existing hole on the wheelwell "wall" and bolted the Relay housing in here:
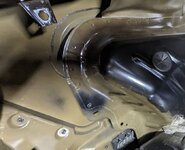
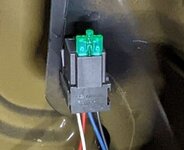
Refer to the diagrams above for where all the wires run. Be sure to use minimum 12 gauge wire or 10 gauge for long runs over 15 ft. High quality automotive/racing wire recommended. The Relay I used features a built in fuse to simplify the setup a bit.
I used a "Posi-Tap" to tap the switch wire (White) from the Relay to the OEM Fuel Pump Harness (Violet/Green stripe):
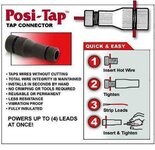
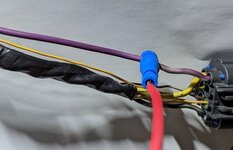
I ran the +12 (Blue) wire from Relay to the front of the car & fed it through the firewall on the Driver side to get into the engine bay and added it to the + battery post with a ring terminal.
Recommend cleaning up all the wiring with Tesa tape.
Next, move onto the plumbing. See diagrams above to see where all the lines route to.
Thread in the Improved Racing -6 AN, -6 AN, 1/8 in. NPT Gauge Adapter (TR-06-02-B) to the pressure line on the Radium tank with the Radium PSI gauge attached & a plug used on the second port, or feel free to add in a temperature gauge. Make sure to use high temp thread sealant on the NPT threads. I like to use the liquid stuff from Permatex - PN: 592
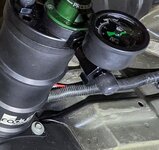
Next, get under the rear seat area & on the Driver side you'll find the OEM fuel pump under the rubber gromet:
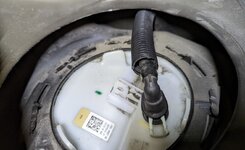
Remove the wiring harness to get it out of the way. Remove the push lock retainers & pull the fuel line off. This is the line which runs to the fuel rail. Keep a towel handy as some fuel will leak out when pulling this off.
Add the Radium low profile elbow fitting ( 20-0600) onto the plastic quick fit adapter:
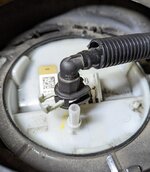
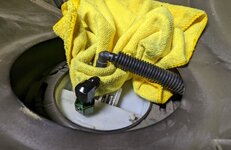
Add the Vibrant Performance Fuel Rail Fitting 5/16 in. to -6 AN: 16880 to the Fuel Rail line and lock it in with the factory clips.
Now you can begin running the lines to measure the appropriate lengths. I built a 90 degree hose end & threaded it into the surge tank and then fed it through the hole and fed it under the car up into the Driver side of the fuel tank saddle:
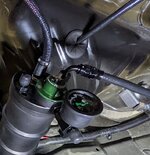
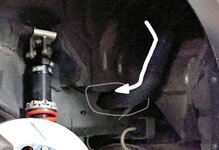
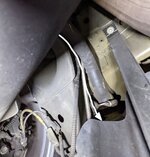
Once the line is fed through, you can mark where the termination point is for the cut and then you can cut & build the straight end fitting. Repeat these steps for the pressure line. These two lines will feed into the OEM fuel tank.
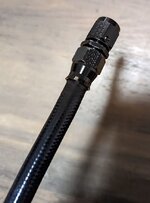
For the lines, I used Fragola -6 PTFE 6000 series which features stainless steel braid with a black jacket to protect the stainless braid from abrasion. A very nice line for this purpose. You can do your own research for the pros and cons to using other types of line in this scenario.
For the third line, this will dump excess fuel from the Radium tank back into the OEM fuel tank. You can route this by splicing into the filler neck tube. Remove this tube from the vehicle by undoing the two hose clamps and wrestling it out:
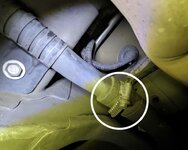
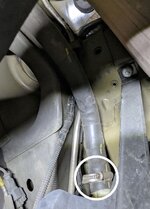

Cut into this hose with a sharp knife & remove enough width to make room for the Radium Hose Barb Adapter for 1 1/4" ID Hose w/ 1/4 NPT Port: 14-0058 fitting:
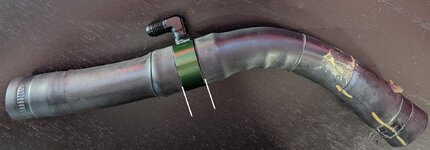
Apply high temp thread seal and thread in the Russell Performance -6 AN to 1/4 in. NPT: RUS-660823 Put hose clamps on each side of the spliced in barb fitting.
The filler tube can now be put back into the vehicle and the third line can be measured & built.
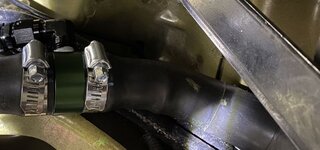
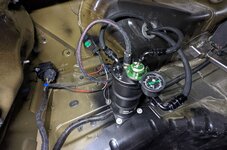
How the whole arrangement looks in the trunk:
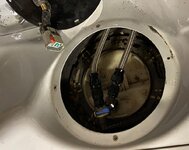
How it will look in the OEM fuel tank area:
You can now plug in the fuel tank harness & Re-install the negative battery terminal.
Remove the Fuse from the Relay & cycle the ignition power 3 or 4 times. This will activate the primary fuel pump for a few seconds each time. Check for leaks. The surge tank will be full of fuel now.
Re-install the Fuse on the Relay and put the key into the ignition on position. You will hear the Radium surge tank pump fire up. Now adjust the pressure on the top of the tank with allen key until you achieve about 60 PSI on the gauge:
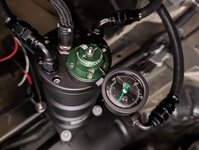
Lock down the jamnut on the pressure adjuster and you are all set.
You can now fire up the car & drive. Check for leaks around the surge tank and around the factory tank.
Enjoy cornering fast with no more fuel starvation! Let me know if you have any questions.
These two guides helped out a lot when I built my setup, so I wanted to provide a in-depth guide to help those looking to set one of these up.
When running the OEM saddle style tank with half a tank of fuel or less, the pump will begin to suck up air pockets when turning corners with high G loads as the fuel sloshes to one side:

Radium Engineering has a great fuel surge tank solution which can be piggy backed off the OEM tank & OEM fuel pump harness. This is a great option for a dual duty vehicle or those looking for ease of installation.
FST-R:

FST-R, Fuel Surge Tank with Integrated FPR
Fuel surge tank with built in pressure regulated output.
www.radiumauto.com
It includes its own fuel pump, or you can spec it without one to use your own pump. I spec'd mine with the AEM 50-1200.
The setup uses -6 lines & fittings and requires a fused relay to piggy back off the OEM wiring harness for the fuel pump. The tank sucks up fuel from the OEM tank and has its own pump inside which feeds fuel directly to the fuel rail. Since the tanks cylindrical & is constantly pressurized full of fuel, there is no where for the fuel to slosh. You can run fuel down to almost the last drop without worrying about sucking up air.
Part List
Here is a complete list of parts I used for my build. I wont include prices as that fluctuates often, but expect to spend around $1000 for everything:
Radium Fuel Surge Tank - FST-R : 20-0130-01
Radium Hose Barb Adapter for 1 1/4" ID Hose w/ 1/4 NPT Port: 14-0058
Radium 0-100 PSI Fuel Pressure Gauge: 20-0029
Radium FST Mounting Bracket, Wall/Floor Standard Mount: 13-0054
Radium 5/16in SAE Female to 6AN Male Low Profile Elbow: 20-0600
Fragola 6000 Series PTFE Hose 20 ft.: FRA-602026
x3 Fragola Real Street Reusable PTFE Hose Ends Straight, -6 AN: FRA-680106-BL
x3 Fragola Real Street Reusable PTFE Hose Ends 90 Degree, -6 AN: FRA-689006-BL
Russell Performance -6 AN to 1/4 in. NPT: RUS-660823
Improved Racing -6 AN, -6 AN, 1/8 in. NPT Gauge Port: TR-06-02-B
Vibrant Performance Fuel Rail Fitting 5/16 in. to -6 AN: 16880
Aeroquip 1/8" NPT Plug: FCM3685
MGI SpeedWare Fused Relay: EP-FREL40
MGI SpeedWare GXL 12GA: WC-GXL
2" / 50mm Desk Grommet
Other materials/tools recommended: Hose cutter, basic wiring tools, high temp heat reflection tape, tesa tape, sharp knife, high temp thread sealant, -AN wrenches or 11/16 wrenches if you want hose ends to look like they were chewed on, hole saw 1.5"- 2", deburring tool, rivnut tool, rivnuts, chassis paint, Posi Taps, hose clamps, jack & stands, basic hand tools.
Diagrams
Plumbing Diagram:

Wiring Diagram:

Relay Diagram:

Factory Fuel Pump Harness:

Instructions
Remove battery negative terminal.
Decide on where to mount the Radium tank. I used the floor mount from Radium & bolted it directly on the left side (Driver side) of the trunk beside the spare wheel compartment.
Mark the holes and drill them, following up with deburring & chassis paint to prevent rust. I inserted M6 rivnuts to bolt the tank down:


Instead of using bulkhead fittings (cleaner & more professional, but more expensive & added leak points), I copied what Chris did; which was drilling a big ol' hole into the wheelwell area to feed the fuel lines through to the OEM fuel tank & overflow line:
I used a 2" hole saw, following up with deburring and chassis paint & covered the hole with a office desk gromet. You could maybe do this with a 1-1/2" size or 1-3/4" if you want to try to get away with a smaller hole.


[ Nice of you to say hello, racing slick ]
I worked on the wiring next. I relocated the OEM Fuel Pump harness from the rear driver side of the spare wheel area over to below the driver side rear taillight. I did this step because I utilize the spare wheel area for storage & trackday gear which results in things always bashing against the harness and the wiring was actually coming apart because of this. The relocated area should work better and is closer to where I placed the Radium surge tank. There were already two bolts in this location which perfectly fit the harness housing sans metal bracket. I just had to shave down some of the plastic housing base to fit the mounting nuts on. I did not have to extend any wires, just had to separate the grounding wire & relocate it:
OEM Fuel Pump harness:


Relocated ground strap:

Next, mount the Relay somewhere close to the Radium tank. I just added a rivnut into an existing hole on the wheelwell "wall" and bolted the Relay housing in here:


Refer to the diagrams above for where all the wires run. Be sure to use minimum 12 gauge wire or 10 gauge for long runs over 15 ft. High quality automotive/racing wire recommended. The Relay I used features a built in fuse to simplify the setup a bit.
I used a "Posi-Tap" to tap the switch wire (White) from the Relay to the OEM Fuel Pump Harness (Violet/Green stripe):


I ran the +12 (Blue) wire from Relay to the front of the car & fed it through the firewall on the Driver side to get into the engine bay and added it to the + battery post with a ring terminal.
Recommend cleaning up all the wiring with Tesa tape.
Next, move onto the plumbing. See diagrams above to see where all the lines route to.
Thread in the Improved Racing -6 AN, -6 AN, 1/8 in. NPT Gauge Adapter (TR-06-02-B) to the pressure line on the Radium tank with the Radium PSI gauge attached & a plug used on the second port, or feel free to add in a temperature gauge. Make sure to use high temp thread sealant on the NPT threads. I like to use the liquid stuff from Permatex - PN: 592

Next, get under the rear seat area & on the Driver side you'll find the OEM fuel pump under the rubber gromet:

Remove the wiring harness to get it out of the way. Remove the push lock retainers & pull the fuel line off. This is the line which runs to the fuel rail. Keep a towel handy as some fuel will leak out when pulling this off.
Add the Radium low profile elbow fitting ( 20-0600) onto the plastic quick fit adapter:


Add the Vibrant Performance Fuel Rail Fitting 5/16 in. to -6 AN: 16880 to the Fuel Rail line and lock it in with the factory clips.
Now you can begin running the lines to measure the appropriate lengths. I built a 90 degree hose end & threaded it into the surge tank and then fed it through the hole and fed it under the car up into the Driver side of the fuel tank saddle:


Once the line is fed through, you can mark where the termination point is for the cut and then you can cut & build the straight end fitting. Repeat these steps for the pressure line. These two lines will feed into the OEM fuel tank.

For the lines, I used Fragola -6 PTFE 6000 series which features stainless steel braid with a black jacket to protect the stainless braid from abrasion. A very nice line for this purpose. You can do your own research for the pros and cons to using other types of line in this scenario.
For the third line, this will dump excess fuel from the Radium tank back into the OEM fuel tank. You can route this by splicing into the filler neck tube. Remove this tube from the vehicle by undoing the two hose clamps and wrestling it out:


Cut into this hose with a sharp knife & remove enough width to make room for the Radium Hose Barb Adapter for 1 1/4" ID Hose w/ 1/4 NPT Port: 14-0058 fitting:

Apply high temp thread seal and thread in the Russell Performance -6 AN to 1/4 in. NPT: RUS-660823 Put hose clamps on each side of the spliced in barb fitting.
The filler tube can now be put back into the vehicle and the third line can be measured & built.

How the whole arrangement looks in the trunk:

How it will look in the OEM fuel tank area:

You can now plug in the fuel tank harness & Re-install the negative battery terminal.
Remove the Fuse from the Relay & cycle the ignition power 3 or 4 times. This will activate the primary fuel pump for a few seconds each time. Check for leaks. The surge tank will be full of fuel now.
Re-install the Fuse on the Relay and put the key into the ignition on position. You will hear the Radium surge tank pump fire up. Now adjust the pressure on the top of the tank with allen key until you achieve about 60 PSI on the gauge:

Lock down the jamnut on the pressure adjuster and you are all set.
You can now fire up the car & drive. Check for leaks around the surge tank and around the factory tank.
Enjoy cornering fast with no more fuel starvation! Let me know if you have any questions.


