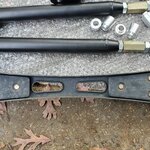
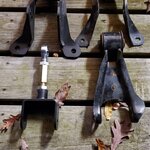
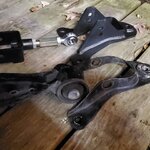
This is the Build Thread for s197hpde3v. Reply below.
- Welcome to the Ford Mustang forum built for owners of the Mustang GT350, BOSS 302, GT500, and all other S550, S197, SN95, Fox Body and older Mustangs set up for open track days, road racing, and/or autocross. Join our forum, interact with others, share your build, and help us strengthen this community!
You are using an out of date browser. It may not display this or other websites correctly.
You should upgrade or use an alternative browser.
You should upgrade or use an alternative browser.
S197 s197hpde3v Build Thread Profile - S197 Mustangs
- Thread starterGT4Pop
- Start date
This site may earn a commission from merchant affiliate links, including eBay, Amazon, and others.
More options
Who Replied?- Thread starter
- #2
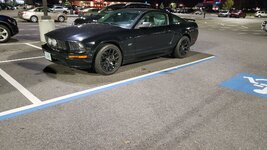
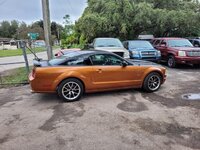
So I decided to go HPDE with my 2006 Mustang GT instead of drag racing. I had already installed some BMR rear supsension parts: upper and lower adjustable control arms and mounting brackets. I had installed Whiteline lowering springs and sway bars (on the softest settings of course, street/strip thinking, lol) and Strange single adjustable struts and shocks. SVE drift 18x9/10 wheels with Nitto 555 G2 255/40zr18 and 285/40zr18 tires. This worked fine for commuting and beating on it a little. I bought a performance kit from Steeda which included: cai, sct 4x tuner, udp, mufflers, and some other stuff not yet installed. I was invited to a track club day at VIR by a friend who cut me loose with his prepped Miata and I was bitten by the bug, badly. And I changed course from the drag strip towards the road course. Fortunely most of the performance parts I had aquired could be used for HPDE. I would like to add that I have no garage, all of this is done on my driveway. I have plenty of tools and currently own an automotive machine shop so resources are not a problem, I just don't want to tie up someone elses garage space (nor hear about it either) and I prefer to work at home with my own tools. So I will try to get this in chronological order with the pictures from my phone. And if I'm completely screwing up please feel free to let me know. Thanks! And enjoy the show! LOL
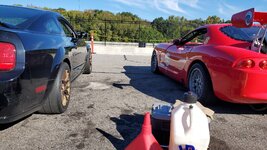
P.S. This is the only picture on my work computer of my car. This is at VIR on Oct 4th parked next to my friend's Panoz which is MUCH faster than me.
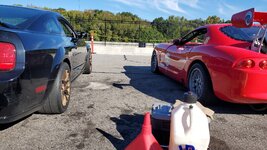
P.S. This is the only picture on my work computer of my car. This is at VIR on Oct 4th parked next to my friend's Panoz which is MUCH faster than me.

- Thread starter
- #3
- Thread starter
- #4
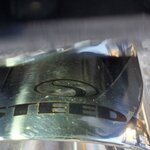
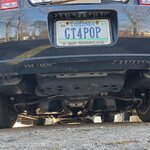
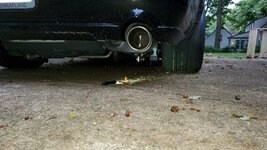
I was working swing shift and free time when it was slow got the better of me. I ordered a performance kit from Steeda consistenting of: cold air intake, sct 4x tuner, underdrive pulley set, charge motion delete plates, 4.10 gears, and Steeda branded Flowmaster axle back exhaust. First was the big cold air intake along with a flash from the tuner and I would never believed the difference a performance tune makes if I hadn't seen it. The mufflers were next and I soon discovered about interior drone, nothing too bad though. But there was a noticeable power difference. Next was the underdrive pulley kit, a bigger water pump pulley and a new Steeda branded Powerbond balancer. It felt stronger and the fuel mileage was better. Here's more pictures.
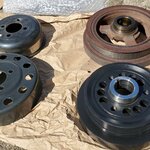
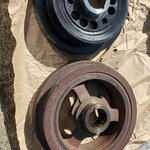
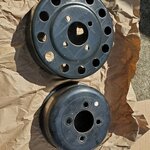


- Thread starter
- #5
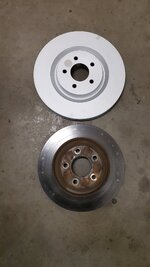
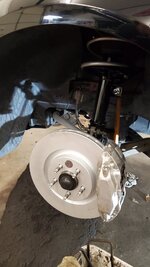
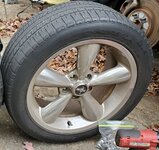
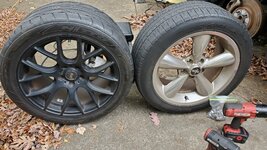
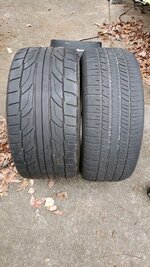
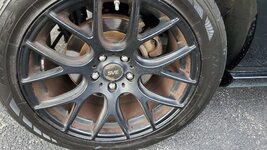
Next I swapped the stock front brakes with GT500 style 14" rotors and 4-piston calipers. I used Powerstop rotors and ceramic pads, because I'm still drag racing, which required ditching the factory 18" chrome 5 spoke wheels and installing the SVE Drift 18x9 and 18x10 used wheels that were aquired through horse trading. They came wrapped in Nitto 555 g2 255/45zr18 and 285/40zr18 tires. Not an ideal performance tire but better than the stock 235s.


- Thread starter
- #6
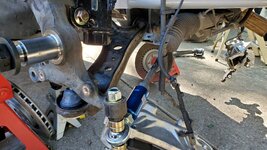
Fast forward to me attending a track club day at VIR in my friend's prepped Miata and my first time on a road course. I had a blast and found myself over the weekend trying to decide which vehicle in the fleet was going to become dedicated to doing this frequently and it fell upon the mustang. So acquisition of parts began and I began to install some of them for car's first time at any track. So on to the good stuff. A lot of my parts decisions were based on overall cost, could I perform labor with less parts to get the same end result, and just plain ignorance of what the hell I was trying to do. Lol. So I perched the 'stang on my big boy jack stands and started working on the suspension. Started with front control arms replacing ball joints with longer Steeda units (greasable now) and the rubber bushings with urethane from energy suspension. What a gooey mess!
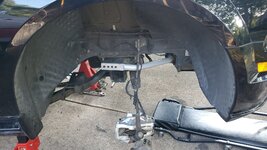
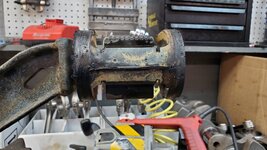
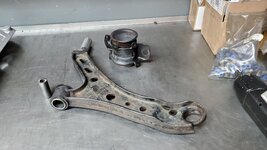
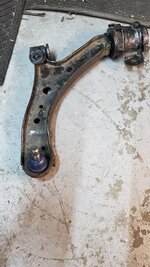


- Thread starter
- #7
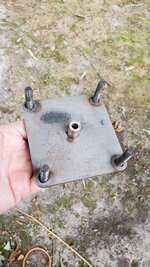
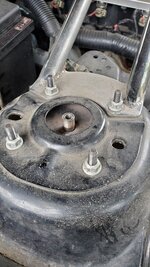
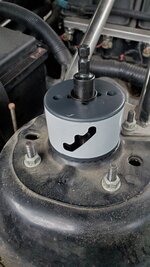
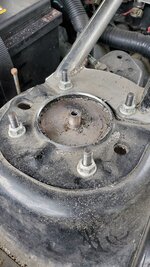
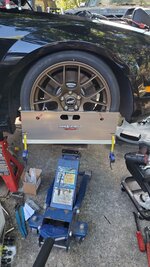
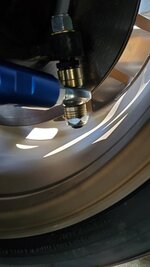
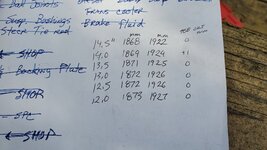
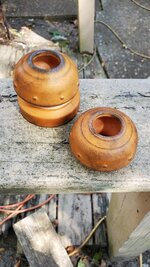
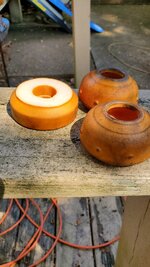
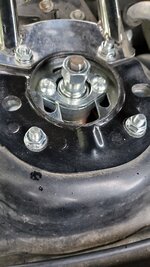
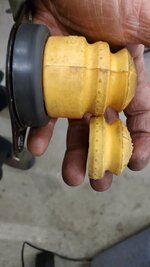
And for this episode of "Lost & Confused" a fixture from Vorshlag is used to open up the strut tower hole to 3 inches. To allow for camber adjustment. I reassembled the front suspension without front springs and dust boots so I could measure bumpsteer and correct it with the adjustment tie rod ends. Someone was going to loan me a bumpsteer gauge but I ran out of time waiting for it to materialize so I got creative with a pair of toe plates, 3 tape measures, a level, and a floor jack. I got it to zero mm of toe change over the top 2.5 inches off suspension travel. I also discovered without the boot on that at ride height there was very little travel left to the enormous jounce bumper thingy so I cut off the hollow part. I reinstalled the front springs and adjustable camber plates and torqued everything down. The camber plates are SPC el cheapo. They're not uniball or billet, but for less than $100 on clearance I figured I'd try them. I can get from -0.4° to -3.0° camber out of them.


Last edited:
- Thread starter
- #8
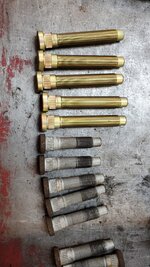
Installed ARP long front studs in the original hubs. Put Blowfish rotor cooling shields and Steeda billet inlets in the lower bumper and connected them with high temperature hose plumbed along the frame rail and sway bar. I also added a rear caliper bracket to upgrade to 13.8 inch rear rotors. And off course I still have the ceramic powerstop pads because I didn't know better yet.
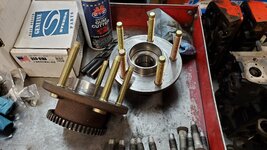
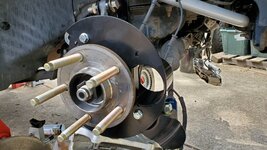
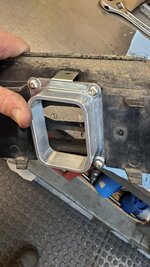
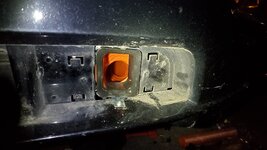
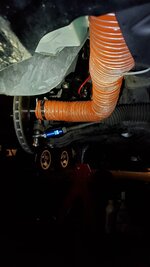
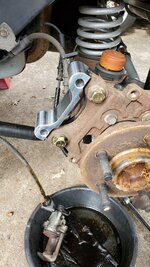
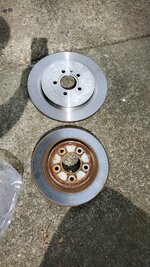
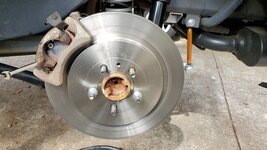


- Thread starter
- #9
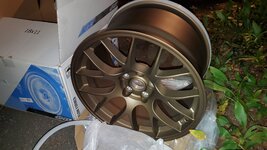
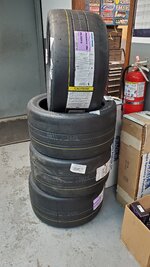
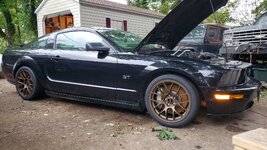
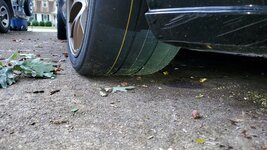
Next braided stainless brake hoses were installed. I don't remember what brand but they had a red coating on them and I didn't get any pictures specifically of them but I'm sure they are in some of the pictures. And then it was time to fit the new wheels and tires on it. Per Apex recommendations on their web page I bought four EC-7 18×11 53et wheels in satin bronze (that color was on sale and goes with the black) and four Toyo Proxes RR 295/30zr18 tires (I don't know why that size is so much cheaper but I'll take it). I went square to be able to rotate tires and overall ease of use. The front requires a 3/4 inch spacer to allow strut clearance and fortunately they're not anywhere close to the front fender. The rear requires a 1/8 inch spacer to clear the bump stop bracket. I have an adjustable panhard bar that I used to center the rear-end. I set the alignment at -1.3 camber and 2mm toe in to drive to the track. I moved it to -3.0 camber and 3mm toe out once I got there.


- 6,405
- 8,301
So far, I'd say your mods are right on target for "bang for the buck" they are very reasonable and well thought out.
However.. there's alway the "however" lol
I see you changed course on suspension mods, when you decide to do something with that, I would highly (very highly) recomend you go with the Ford Prtfotmance kits that basically have everything you need, they are a fire and forget piece, my next choice would be a Cortex kit, I know that is a pretty expensive payday, but if you can buy it all at once, it's a lot cheaper than piecing it out, bit by bit, and sometimes you can find them on sale.
Here's my build post, feel free to go ove rit, it's all there, disasters included, and may be a decent resource for you.
 trackmustangsonline.com
However.. there's alway the "however" lol
I see you changed course on suspension mods, when you decide to do something with that, I would highly (very highly) recomend you go with the Ford Prtfotmance kits that basically have everything you need, they are a fire and forget piece, my next choice would be a Cortex kit, I know that is a pretty expensive payday, but if you can buy it all at once, it's a lot cheaper than piecing it out, bit by bit, and sometimes you can find them on sale.
Here's my build post, feel free to go ove rit, it's all there, disasters included, and may be a decent resource for you.

Project Super Beater
So at the tire tests in Daytona, and along with the recent NASA deal, it was nice to see people having fun with cars. I recently sold my yellow T4 car to a guy who's daughter wants to go racing. It should be perfect for her, not much power, and easily maintainable. I really liked that car...
Last edited:
- Thread starter
- #11
Thanks. I would eventually like to go to coilovers and lighter weight suspension components. After the next round of modifications I'm probably going to focus on my driving skills (lot's of room for improvement!) and wearing out some tires and brakes while saving for better suspension stuff. I appreciate the suggestions!So far, I'd say your mods are right on target for "bang for the buck" they are very reasonable and well thought out.
However.. there's alway the "however" lol
I see you changed course on suspension mods, when you decide to do something with that, I would highly (very highly) recomend you go with the Ford Prtfotmance kits that basically have everything you need, they are a fire and forget piece, my next choice would be a Cortex kit, I know that is a pretty expensive payday, but if you can buy it all at once, it's a lot cheaper than piecing it out, bit by bit, and sometimes you can find them on sale.
Here's my build post, feel free to go ove rit, it's all there, disasters included, and may be a decent resource for you.Project Super Beater
So at the tire tests in Daytona, and along with the recent NASA deal, it was nice to see people having fun with cars. I recently sold my yellow T4 car to a guy who's daughter wants to go racing. It should be perfect for her, not much power, and easily maintainable. I really liked that car...trackmustangsonline.com
- 6,405
- 8,301
Well before you get carried away, remember all the Grand Am and PWC cars used basically stock suspensionsThanks. I would eventually like to go to coilovers and lighter weight suspension components. After the next round of modifications I'm probably going to focus on my driving skills (lot's of room for improvement!) and wearing out some tires and brakes while saving for better suspension stuff. I appreciate the suggestions!
- Thread starter
- #13
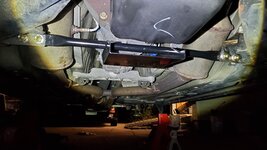
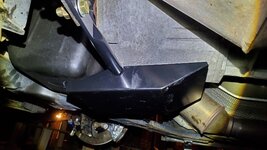
I installed a Corbeau harness bar and 4-point harnesses after I got it on the ground. I didn't think to get pictures but I'm sure y'all know what they look like. I almost forgot the trans cooler/subframe brace, did get a picture of that. I put in fresh Amsoil racing oil 5w20 and an oil filter (interesting oil waterfall from air scoop now) and changed back to street tires for the 2.5 hr drive to VIR. I fit two of the semi slicks in the trunk and two in the passenger seat. Fortunately I was able to leave them with my Panoz friend and didn't have to transport them back home. At this point the hurricane remnants where passing through and I wasn't sure if it was going to be a wet or dry track day.


Last edited:
- Thread starter
- #14
This was a double post. Haven't figured out how to delete it yet and I can't edit it without some kind of comment. Oops!
Last edited:
- Thread starter
- #15
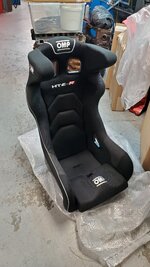
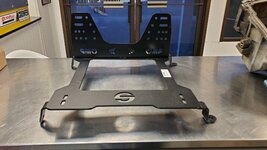
So I made it to VIR on October 4th! We changed from street to race rubber and changed camber from -1.0° to -3.0° and toe checked at 2mm toe-out. I set the tires at 35psi cold to start somewhere. I went out for the first session and discovered brake fade from the street pads going into turn 1 which ended up with me putting 2 tires off track about 2/3 through turn 1. I'm sure some of you are thinking "Duh...Street pads!" I really do get it now. The track store had Hawk 453 DTC60 pads in stock so I installed them during lunch break. They work much better, but the street pads in the rear are probably limiting them so I purchased Hawk 485 DTC30 for later installation (didn't stock them at the track). I thought the car handled great, no over or understeer, barely any body roll. An instructor in the car behind me said the car corners flat and looked balanced. I did notice if I flat footed it around turn 17 it would unload the right rear tire slightly, there's a T-2R sitting in my living room to solve that, maybe. It would turn 6000-6200 rpm in 4th around 125-128 mph in the back straight according to Harry's lap timer (one of the best $22 I've spent on this project). By the last session I was turning 1g in most corners and getting 2:26.×× lap times. I know there's lots of room for me to improve my driving (especially in the uphill esses) and the car is probably much faster with a better driver but I left feeling pretty good about my first outing with the mustang. I do see a proper racing seat happening soon, stock leather buckets ain't hitting on much for this application. More stuff I already aquired will be installed soon. I only got one picture that day, me parked next to my friend's Panoz.

Last edited:
- Thread starter
- #16
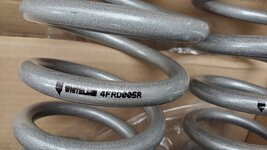
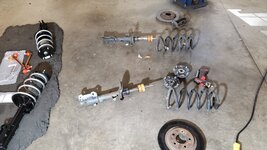
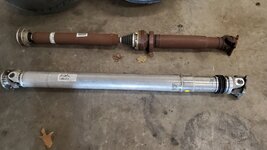
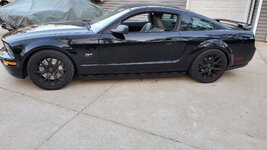
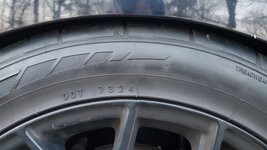
Somehow I overlooked the springs and struts pictures. Oops! After the sve drift wheels I felt like the car had too much gap at the top of the tire. So I shopped around and found a deal on a Whiteline spring and sway bar kit, which turned out to be a good thing since I was close to going with lowering drag springs (I was still thinking drag racing at this point). I have a customer with a new edge (for whom we built an LS3) who turned me on to Strange single adjustable struts and shocks, which would be perfect for my budget and drag racing. As it turns out all this Whiteline and Strange stuff corners pretty well too. The rear bumpstops were trimmed down so it wasn't riding on them. I also installed a frpp aluminum driveshaft too while on the lift. It was a good 1.5 to 2 inches lower and rode better than the stock gt suspension, of course the shocks were on 3 out of 10.


- Thread starter
- #17
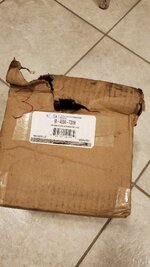
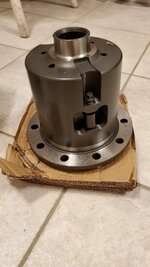
My plan is to return to VIR for the Turkey Run November 7 & 8 so I have 3 weeks to install more goodies. Two most important to me are a racing seat and a T-2R differential. I'll change to DTC30 rear pads from street pads while apart. There's other things I'd like to do but I'm just not sure I'll have time to finish and I don't want the car apart on track days. Time will tell...


- Thread starter
- #18
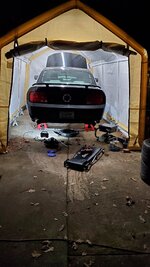
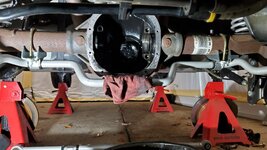
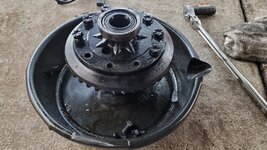
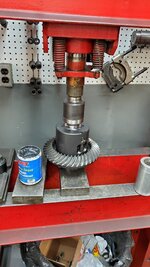
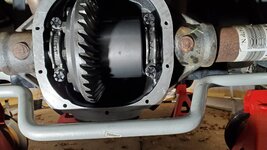
I bought a portable 10' x 17' garage from HF, beats working outside in the rain. Next I removed the stock differential and removed the ring gear. After cleaning everything the ring gear and new carrier bearings were installed on a new T-2R differential. Played with the shim packs to get back to .010" backlash and proper preload. I did notice the axle shaft end play is almost nothing with the torsen. The o.e. set-up had probably. 060" of endplay.


PatientZero
@restless_performance
What's your honest opinion on that canopy? I'm intrigued. Do you have it secured to the ground?
- Thread starter
- #20
It's not anchored. I laid spare 4x4s on top of the extra side material at the bottom. The front door and rear cover barely touches the ground so I suspect some leaves will blow in. Frame and plastic material seems sturdier than the cheap carport HF sells. It's got a decent roof pitch so heavy rain and light snow should fall off. It's been up 3 days now so it's a little early to tell on longevity. Big advantage for me is not spending time putting all the tools and parts out of the weather.What's your honest opinion on that canopy? I'm intrigued. Do you have it secured to the ground?
