The Mustang Forum for Track & Racing Enthusiasts

Taking your Mustang to an open track/HPDE event for the first time? Do you race competitively? This forum is for you! Log in to remove most ads.

  • Welcome to the Ford Mustang forum built for owners of the Mustang GT350, BOSS 302, GT500, and all other S550, S197, SN95, Fox Body and older Mustangs set up for open track days, road racing, and/or autocross. Join our forum, interact with others, share your build, and help us strengthen this community!

S197 BOSS 302 Race Car Build Thread Build Thread

This site may earn a commission from merchant affiliate links, including eBay, Amazon, and others.

I'll be keeping this thread as it has some good stuff in it if I decide to build up the LS later on. Part of me wants to go S550 but the LS just looks more badass :).

I'm planning for next year. Won't make it this year as I am still prepping the car for NASA Nationals.
I have heard similar horror stories of V10 mileage :) @mattlqx knows :)
I have my finance plans lined up tentatively out through 2022 to help with planning and knowing what to buy and when. Benefits/curses of an engineering career.
It may be worth getting a pallet (5-6 sets) of the Pirelli take-offs from gttracktires.com, unless you can get them locally for cheap!

That site isn't working. I've been getting mine from usedracingtires.com. I though they used to sell them by the pallet but didn't see any on their site right now. I thought about going in on a pallet with one of my local track buddies.
 

ArizonaBOSS

Because racecar.
Moderator
8,730
2,734
Arizona, USA
Whoops--try this one: http://gttrackdays.com/

Also, it looks like they have a 2012 F350 6.7 for sale, as well as a trailer...
 

Fabman

Dances with Racecars
6,553
8,204
Exp. Type
W2W Racing
Exp. Level
20+ Years
Pleasanton: 1/2 way between Sonoma and Laguna Seca
OK I got a chance to spend some time in the garage after work last night.

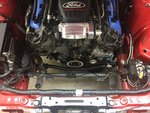
First up I removed the existing starter motor and installed a fresh FoMoCo one, along with a full heat-shield wrap. This is a real PITA with long-tube headers and the Watson motor mounts. A long line of extensions was used to get to the mounting bolts. I am keeping the original one as an emergency spare. I ran into an issue with the original one at Auto Club where the car wouldn't restart hot, I think the solenoid got temporarily fried by the headers. The heat wrap I had on this starter didn't cover the solenoid--so we'll hope this new wrap holds up better.

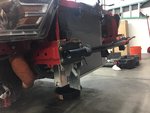
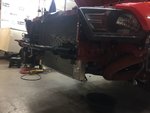
Next up I removed the OEM lower radiator support and front sway bar. No pics here as my hands were covered in grease and grime from removing all the built-up crud on the bar and bushings and freshly greasing everything before installing the BMR lower radiator support.

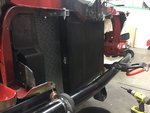
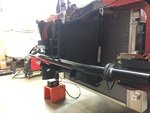
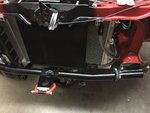
BMR support installed. The main tube seems slightly higher than OEM as it rubs the front passenger brake hard-line. Gonna keep an eye on this but hopefully not an issue long-term:
8vhe8rD.jpg

Overall this seems like a nice piece and I hope it holds up to my abuse!
YKGFAwP.jpg

There were two primary reasons I went for this lower mount:
1) Create additional room/clearance for my oil cooler lines (which must now come from the side due to the much larger C&R radiator), and
2) to help offset weight increase from additional water capacity of C&R radiator.

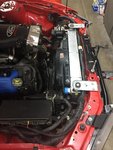
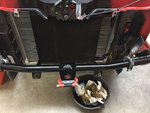
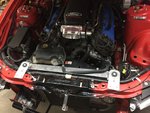
After that was installed, the C&R radiator simply dropped into place. The fitment is a little tight due to the increased width of the unit. Then the SVT fan assembly clips on:
UU3NSsm.jpg

I was able to get my modified side-shroud for the radiator installed on the passenger side of the car, but the driver one will need to be modified before it (and the engine air snorkel) will fit with the new radiator (my added sealing flap is too long now):
1sD3Vtx.jpg

GfZBHBV.jpg

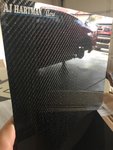
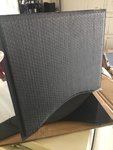
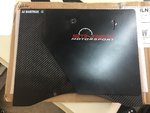
Also, I ordered a set of "large" CF endplates from AJ Hartman Aero, since they are a little lighter than my homemade ones (and also significantly larger). My hope is that the reduced weight and added stiffness will take some of the stress off of the repaired mounting points I had to cobble together in the wing stub. These plates are beautiful.

Front:
SmnXkPJ.jpg

Back:
Gcp3xHC.jpg

Old vs. New (need to apply some fresh Stinger decals to the new ones):
NsU26Ya.jpg

I should be able to spend most of the weekend in the garage cranking on the car. Next up will be to get the diff and trans fluids changed out, fill the engine with oil, heat-wrap some harnesses, reconstruct and vacuum-fill the cooling system, and maybe apply some of the new BOSS decals and other racing livery.

Stay tuned!
I thought you had an APR wing....the AJ Hartman pieces fit?
 

Fabman

Dances with Racecars
6,553
8,204
Exp. Type
W2W Racing
Exp. Level
20+ Years
Pleasanton: 1/2 way between Sonoma and Laguna Seca
I do have an APR wing. The AJH endplates are offered as "you drill it". So they will fit...soon.
sweet...do you need the extra downforce?
 

ArizonaBOSS

Because racecar.
Moderator
8,730
2,734
Arizona, USA
To vacuum fill, you need an AirLift system...you vacuum all the air out of the system, then stick a filler hose into a bucket and it will fill everything in about a minute flat.

Old endplates were Aluminum, 5052 IIRC, I think 3/16" thick.
 

Fabman

Dances with Racecars
6,553
8,204
Exp. Type
W2W Racing
Exp. Level
20+ Years
Pleasanton: 1/2 way between Sonoma and Laguna Seca
To vacuum fill, you need an AirLift system...you vacuum all the air out of the system, then stick a filler hose into a bucket and it will fill everything in about a minute flat.

Old endplates were Aluminum, 5052 IIRC, I think 3/16" thick.
Wow, heavy end plates is right. Interested to see the AJH ones installed.
 

Fabman

Dances with Racecars
6,553
8,204
Exp. Type
W2W Racing
Exp. Level
20+ Years
Pleasanton: 1/2 way between Sonoma and Laguna Seca
Just a better chance of getting it right the first time. Also a lot less time spent warming up the car, and less guessing/mess.

Electric water pump and no thermostat makes it easy.
No waiting for the stat to open and no restriction in the system so air doesn't trap nearly as easily. Just fill it up, then run the pump-engine off until the bubbles are gone. For warming up just leave the pump switch off for a few minutes so the motor can warm up and hit the switch and go. No more burping the system.


Sent from my iPhone using Tapatalk
 

Fabman

Dances with Racecars
6,553
8,204
Exp. Type
W2W Racing
Exp. Level
20+ Years
Pleasanton: 1/2 way between Sonoma and Laguna Seca
I can also shut the motor down and run the pump to cool the motor off. I have a big fan I put on the radiator and 2 small ones for the front brakes. Everything cools down quick.


Sent from my iPhone using Tapatalk
 

Fabman

Dances with Racecars
6,553
8,204
Exp. Type
W2W Racing
Exp. Level
20+ Years
Pleasanton: 1/2 way between Sonoma and Laguna Seca

Fabman

Dances with Racecars
6,553
8,204
Exp. Type
W2W Racing
Exp. Level
20+ Years
Pleasanton: 1/2 way between Sonoma and Laguna Seca
I also have an inter cooler with no fan so it cools everything at once. Works quite well actually.....


Sent from my iPhone using Tapatalk
 

ArizonaBOSS

Because racecar.
Moderator
8,730
2,734
Arizona, USA

ArizonaBOSS

Because racecar.
Moderator
8,730
2,734
Arizona, USA
Got some work done this weekend.

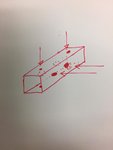
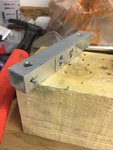
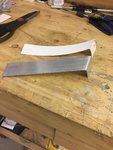
First up was to create some brackets that would allow me to mount my Setrab 948 sideways. With the larger radiator, there is no room to pass the oil lines underneath anymore. I don't have much in the way of repeatable fab capability here so I was trying to find some off-the-shelf solution for a 90* bracket, when it dawned on me that I could use some square tubing quite easily, cheaply, and also achieve better rigidity.

AUX6EsO.jpg

Cut and drilled. I was thinking to use some Riv-Nuts (my favorite :) ) but I couldn't get the holes drilled straight enough through-and-through. I need to get a drill press.
VDSW3HY.jpg

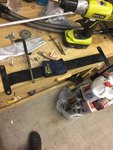
These allowed me to replace the (quite reliable) bracket I have been using for many years supplied by @06mach1 , but still use the same holes I drilled in the factory upper radiator support.

Original bracket:
LbkueJ6.jpg

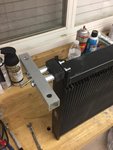
New mounts w/ aluminum collar spacers. I could have done this with another length of square tube in the same direction as the other square, if I had thought of that before I put everything together:
xK1g1OB.jpg

G177gIo.jpg

Cooler mounted (at top, at least):
fKXwdAo.jpg

Lower bracket early fabricobbling:
EF2gYwh.jpg

Lower brackets in-place:
yO6RjRH.jpg

Test fit for proposed AN-line arrangement:
ZhdKotN.jpg

Hoses routed...may need to play with the lower one a bit still:
o15pZLp.jpg

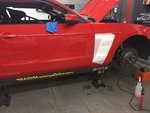
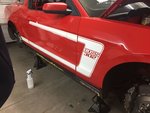
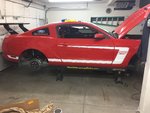
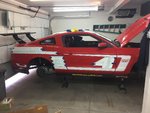
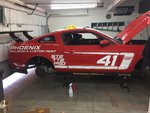
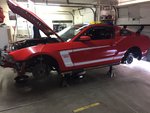
Started some work on the new graphics scheme:
QyNVAr3.jpg

9XCgcsi.jpg

3dkLK1z.jpg

T8qHjc7.jpg

1ILoKpV.jpg

Got the striping on the driver's side done as well:
Civfikd.jpg

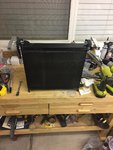
Also I put all of the coolant system components back in-place.
RoY8yyV.jpg


Going to spend a few hours each night this week to play with the oil lines a bit more, install a remote line for my oil pressure sender (since my sender no longer fits with the revised orientation of the sandwich plate), fill trans fluid, change diff fluid, and once the pressure sender is in-place I'll fill with oil and coolant and get her fired up!
 

TMO Supporting Vendors

Top