The Mustang Forum for Track & Racing Enthusiasts

Taking your Mustang to an open track/HPDE event for the first time? Do you race competitively? This forum is for you! Log in to remove most ads.

  • Welcome to the Ford Mustang forum built for owners of the Mustang GT350, BOSS 302, GT500, and all other S550, S197, SN95, Fox Body and older Mustangs set up for open track days, road racing, and/or autocross. Join our forum, interact with others, share your build, and help us strengthen this community!

Out of the ashes, a Phoenix is born

This site may earn a commission from merchant affiliate links, including eBay, Amazon, and others.

302 Hi Pro

Boss 302 - Racing Legend to Modern Muscle Car
2,009
441
Southeast
Now that is passion.

Sean:

Thank you for the insight on your monster 326 build. Now that we have this inside view, what are your
objectives/goals in terms horsepower and torque output at the flywheel?

I was going to ask you if you had a build budget, but I can see now that your build is quite unique and you are committed to Excellence in the build of this "All Motor" engine.

This is the kind of stuff that makes for great feature articles in the car buff magazines.

Keep it coming, and thank you for sharing,
Dave
2HP
 

steveespo

Lord knows I'm a Voodoo Child
Moderator
4,030
1,993
Exp. Type
W2W Racing
Exp. Level
10-20 Years
Cookeville TN
Sean
Sorry if I was harsh and it wasn't directed at you specifically. I applaud you building your motor up yourself, not many of us will take that on. The amount spent was a shocker to me, and I have read many nightmare posts from members here and on other forums about "custom builds" that burn oil like mad, break valve springs, spin rod bearings etc. and leave the buyer holding the bag for big $$$$, when the builder shrugs and says they can't warranty a race engine. Personally I am going to put Boss heads on an Aluminator long block (to get all new timing components) and possibly put the CJ cams in as well (have Boss spec cams in the box). I trust Ford to check and assemble the long block, I would trust Roush/Yates and Livernois. Other than that I am leery of the other builders out there. That being said there are probably many competent shops that can build one up, but most likely not as cost effectively or reliably as FoMoCo.

Best of luck and I hope you make huge N/A power. Get it back on track ASAP.
Steve
 
Sean. Keep doing your thing man! You got the mind for it. Money comes and goes but building an awesome motor like you're doing is a keeper for life.

Sometimes dollars and cents don't matter. In my case I could have bought a factory 302s for half what I got into my car. It's absurd and illogical. But it's mine. My decisions. My parts. My success and failures.

Your story ends well when it's finally done. Don't rush it.
 
Hi everyone,

Sorry for my delayed response! I threw my back out at work on Saturday so getting to a computer and typing has been hard for me until now.

twistedneck said:
Excellent post. I have yet to see a coyote make power above 8200 rpm.. with your increased displacement to 326 (5.34L) The stock boss heads will flow better with the unshrouding probably shift at 7800 and get all the power efficiently and w/o tearing up chains and springs. Looking forward to future posts!

I don't think I have either, most runs I see, they tend to shut off at around the 7500 mark. I have seen a couple that will continue to 8000 and it looks like the power sort of plateaus at that point. I think 8000 will be my stopping point but the shift lights will come on at around the 7800 mark is what I am thinking. It all depends on where the car stops making power but using Darrens car as a model, I doubt it will make that power that high in the RPM range. Also, with the 2015 heads things should be interesting they sure do look purty. When I was able to line the head gaskets up by hand it doesn't look like there will be any interference with the valves and head gaskets as it sort of looks like in the picture.

20245455928_755085068c_b.jpg

302 Hi Pro said:
Now that is passion.

Sean:

Thank you for the insight on your monster 326 build. Now that we have this inside view, what are your
objectives/goals in terms horsepower and torque output at the flywheel?

I was going to ask you if you had a build budget, but I can see now that your build is quite unique and you are committed to Excellence in the build of this "All Motor" engine.

This is the kind of stuff that makes for great feature articles in the car buff magazines.

Keep it coming, and thank you for sharing,
Dave
2HP
For flywheel power, on E85 I would LOVE to make 650-666 using a 12-15% drivetrain loss. I highly doubt I will make those numbers though. It would be kind of cool if I did but in all honesty I think I will be making 627-644. As far as Torque, I have no idea but I think 420 RWtq is doable.

steveespo said:
Sean
Sorry if I was harsh and it wasn't directed at you specifically. I applaud you building your motor up yourself, not many of us will take that on. The amount spent was a shocker to me, and I have read many nightmare posts from members here and on other forums about "custom builds" that burn oil like mad, break valve springs, spin rod bearings etc. and leave the buyer holding the bag for big $$$$, when the builder shrugs and says they can't warranty a race engine. Personally I am going to put Boss heads on an Aluminator long block (to get all new timing components) and possibly put the CJ cams in as well (have Boss spec cams in the box). I trust Ford to check and assemble the long block, I would trust Roush/Yates and Livernois. Other than that I am leery of the other builders out there. That being said there are probably many competent shops that can build one up, but most likely not as cost effectively or reliably as FoMoCo.

Best of luck and I hope you make huge N/A power. Get it back on track ASAP.
Steve

Oh believe me, as I said, I think of you all as an extended family so to speak so I didn't take anything being said by anyone as something that was meant to be harsh or critical. The sticker shock is something that takes you for a triple take when there are cheaper options for less power. So no worries about anything, I never felt that anyone was criticizing or trying to be harsh and I hope that no one had felt the same way in regard to my responses.

DG#56 said:
Sean. Keep doing your thing man! You got the mind for it. Money comes and goes but building an awesome motor like you're doing is a keeper for life.

Sometimes dollars and cents don't matter. In my case I could have bought a factory 302s for half what I got into my car. It's absurd and illogical. But it's mine. My decisions. My parts. My success and failures.

Your story ends well when it's finally done. Don't rush it.

Thanks Darren! Seeing your car has definitely been an inspiration as to what I would like to achieve with the car. I like the way you put that part, good way to look at it in the end from my view point.
 
So I talked to Tim Eichhorn at MPR Engines in Flordia yesterday and he advised me that they got the billet secondary timing chains in. Finally, the last piece that I was waiting for will be here sometime today supposedly *fingers crossed*. I know I am overbuilding the engine as is in hopes that it will not break on me. That being said, I chose to go with the Billet chains over the Ford units due to the Trick Flow valve springs in the engine having a higher seat pressure than the stock Boss springs (which for as decent as they are, they really aren't that great of valve springs), couple that with the aftermarket cams and the RPM’s that I will be turning and it seemed like a good choice. All along this engine was built to sustain the high RPM’s that I would see while doing some HPDE days and autocrossing at the expense of low and some mid range power which I am fine with due to the 3.73’s it shouldn’t feel like an absolute pig in those power ranges.

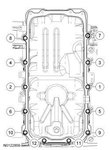
I ran home during lunch and started breaking down the motor as I wanted to start from the beginning in case I forgot something, so I tore the block down and took the heads off the block. I started with putting the oil pump pickup tube spacer on, followed by the pickup tube and windage tray followed by the oil pan.

Parts List
  • Oil Pan gasket/Windage Tray - BR3Z-6701-A
  • Oil Pump Pickup Tube & Gasket - BR3Z-6622-A
  • Moroso Race Oil Pan - 20572

Torque Specs
  • Pickup tube spacer - 17mm - 18 lb-ft
  • Oil Pan pickup tube - 10mm - 89 lb-in + additional 45 degree turn
  • Oil Pan - 10mm - Follow order for tightening oil pan bolts. Torque in 3 steps *NOTE #7 IS A STUD BOLT, NOT JUST A REGULAR OIL PAN BOLT*
  • Stage 1 - 18 lb-in
  • Stage 2 - 89 lb-in
  • Stage 3 - additional 45 degree turn

20774360239_b360ae6d3a_o.jpg

I also turned my attention to the oil pump now and torquing down those bolts. The oil pump has some unique steps to it so be sure to follow the torque sequences for each bolt. See the picture for reference.

20332963334_8fa1f27a86_k_d.jpg

Torque Specs
  • Oil Pump Bolt #1 - 8mm / Oil Pump Stud #2 - 13mm / Oil Pump Bolt #3 8mm / Oil Pump Stud #4 9mm
  • Stage 1 - Hand tighten
  • Stage 2 - Bolt #1 89 lb-in / Stud #2 18 lb-ft / Bolt #3 89 lb-in / Stud #4 177 lb-in
  • Stage 3 - Bolt #1 additional 45 degree turn / Stud 32 additional 75 degree turn / Bolt #3 additional 45 degree turn / Stud #4 additional 60 degree turn
 
2012Boss302 said:
You are an inspiration sir.....
Thank you, I appreciate that! Hopefully people can look at this and not be so intimidated by this. Up until now, the most technological thing I have done to a car was replacing a rear brake caliper so hopefully someone can look at this and can rebuild an engine.
 
Well, today was a productive day despite some setbacks from my stupidity. First let me start off by saying that despite what the service manual says, don't put the oil pan on first. That should be the last thing to go on this way you can ensure that the balancer is installed correctly. Thanks to Eric @ JPC Racing for pointing that out to me when I asked a completely unrelated question.

That being said, let's start off.

Yesterday I got the secondary chains from MPR Racing Engines in Florida. I have to say thank you to Tim and Christina for getting these out ASAP for me and letting me know that they received them the second they came in.

20799828720_f38bac844e_b.jpg

Last night I got the rear main seal plate put on the back of the motor. Using Permatex Anerobic Gasket Maker. I put a bead of this on the motor .According to the service manual, you put the bead on the motor, not on the retainer plate itself. I don't have a picture of this as it was night and I just wanted to get inside and shut it down for the night but the rear main seal is on.

Note: When putting this on, use a continuos bead of gasket maker and do not move the plate sideways when placing the plate on or as per the manual, you stand a greater chance at having the gasket leak. That would be a giant pain in the ass considering the location of the plate.

20672494281_a068d4f7a5_b.jpg

20025586228_c1b9934e0e_b.jpg

Parts list
  • Retainer Plate - BR3Z-6K301-A
  • Retainer Plate Bolts - W714962-SXXXXXX (I don't have the last part of the Part number for the bolts.
  • Permatex Anaerobic Gasket Maker - 51813

Torque Specs
  • Retainer Plate - 10mm - 89lb-in + additional 45 degree turn
  • Follow sequence below

20801093668_0b5a2c1fcc_o.jpg

20801093668_0b5a2c1fcc_o.jpg
 

302 Hi Pro

Boss 302 - Racing Legend to Modern Muscle Car
2,009
441
Southeast
Sean:

Thinking ahead here, How will you prime this engine just prior to start up, or is this a thing of the past with the new Coyote architecture engines?

With this style of oil pump drive, I suspect one could pre-fill the oil filter, then crank the engine over with spark plugs removed to lessen/remove compression? Then install the plugs and fire up the engine for the first time?

Or, is the per-lub applied during the build sufficient enough to protect the internals with a shot of oil in the cylinders prior to start up? I'm interested to know what you have learned about the proper start up procedure for this engine from your engine specialist contacts.

Thanks so much for sharing your build process.
Dave
302 Hi Pro
 

steveespo

Lord knows I'm a Voodoo Child
Moderator
4,030
1,993
Exp. Type
W2W Racing
Exp. Level
10-20 Years
Cookeville TN
TMSBOSS said:
I have not tried this myself but....I am told if you push the throttle pedal to the floor and hold it there while cranking the engine, the engine will turn over but will not start.

You could prime this way.

This in fact does work, fuel pump and ignition deactivates. Did this after changing valve springs, takes about 15 seconds to build pressure.

Another tip when installing parts with sealants or RTV is to get some studs or cut the heads off of long bolts and use them as guide pins, I do this on the rear end gear, intakes and the valve covers, would apply to the front cover and rear seal here as well. No smearing and helps get the other bolts started without having 3 hands.
Steve
 
302 Hi Pro said:
Sean:

Thinking ahead here, How will you prime this engine just prior to start up, or is this a thing of the past with the new Coyote architecture engines?

With this style of oil pump drive, I suspect one could pre-fill the oil filter, then crank the engine over with spark plugs removed to lessen/remove compression? Then install the plugs and fire up the engine for the first time?

Or, is the per-lub applied during the build sufficient enough to protect the internals with a shot of oil in the cylinders prior to start up? I'm interested to know what you have learned about the proper start up procedure for this engine from your engine specialist contacts.

Thanks so much for sharing your build process.
Dave
302 Hi Pro

I don't think the assembly lube would be enough to be honest but either way, I planned on building this and pre-lubing the system the same way. Granted this is a 3V engine but the theory should transfer over to the 5.0. I would rather do it this way so I know that oil has sufficiently made it everywhere before I put the engine in and crank the motor over.

tmcolegr;536466 said:
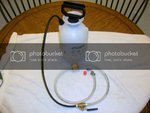
I have assembled an inexpensive pressure tank to prelube this engine - same as everyone else. Insecticide sprayer was purchased from Home Depot along with some misc. fittings & hose. One exception is that I have added an inline filter.

When pressurizing the lubrication systems on our engines via the oil pressure sensor port (because it's convenient) everyone needs to remember that this location is after the oil filter. Therefore if there are any contaminants in our pressure bleeding apparatus they are introduced directly into the engine.

The filter I chose was a NAPA part# 3001. It has a 1/4" inlet & outlet and filter media is 12 microns. Our OEM oil filter is 19 microns. This should keep any contaminants from inadvertently entering the engine and should keep our oil ISO at about a 15/13 which is very clean.

100_1047.jpg

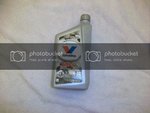
The oil I have chosen to prelube/break in this engine is Valvoline VR1 10W-30 Racing Oil - non synthetic. This oil has a high level of zinc/phosphorus to reduce initial break in wear.
100_1048.jpg

tmcolegr;541019 said:
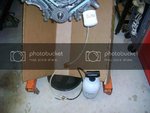
Prelubing the engine.
100_1050.jpg
100_1052.jpg
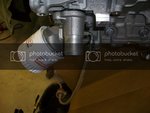
The engine was slowly rotated as it was prelubed to prime the lash adjusters
100_1055.jpg
100_1053.jpg
100_1054.jpg
All lash adjusters primed
100_1056.jpg
100_1057.jpg
One thing that did concern me, but may be perfectly normal, is that the RH chain at times would develop slack and then the tighten back up. After reading through several other threads I assume thats normal??


TMSBOSS said:
I have not tried this myself but....I am told if you push the throttle pedal to the floor and hold it there while cranking the engine, the engine will turn over but will not start.

You could prime this way.

Hmmm in asking some of the techs that are on the Mustang forums, they say that they assemble the engine and just crank it over a couple of times and it shoots the oil through the engine. I'm not 100% comfortable with this to be honest considering what happened with my last engine. Plus, hopefully this way I can see if I have a collapsed lifter or the rear main seal is leaking .... hopefully not though.

steveespo said:
This in fact does work, fuel pump and ignition deactivates. Did this after changing valve springs, takes about 15 seconds to build pressure.

Another tip when installing parts with sealants or RTV is to get some studs or cut the heads off of long bolts and use them as guide pins, I do this on the rear end gear, intakes and the valve covers, would apply to the front cover and rear seal here as well. No smearing and helps get the other bolts started without having 3 hands.
Steve

That is a pretty good idea! The retainer plate has two pins in it so when you put it on the block, you can have it hold there without it moving but I did have to take a couple of seconds to remove some RTV from the bolt holes with a toothpick. That would have stopped it from getting in the bolt holes and it I could literally just bolt it up without any issues.
 
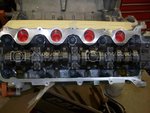
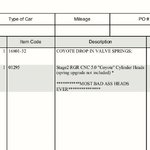
I just want to say, sorry for all of the typos, I am writing this on my Ipad since my laptop broke last January and I don't have the money to go and get a new one just yet. The next thing I did was turn my attention to the heads. As you may know, the Boss heads were no good. They could have been repaired but I felt it was better to pursue a different path with the heads. The problem with the Boss heads is that there really isn't a lot of machining that can really be done to them compared to the GT heads. There just isn't enough meat on the heads where you can do a good head job. Outside of that the Boss heads are very good for stock heads and flow excellently and are capable of creating some very good power numbers as is. That being said, I talked to Steve over at Tasca and he hooked me up with a set of 2015 GT heads and off they went to RGR for their stage 2 head job. Sometimes it is nice to know what kind of product you are getting ;)

20367610534_e780842b90_o.jpg

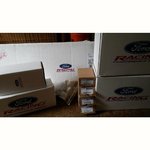
Well, in the meantime I bought a whole bunch of FRPP parts to hurry along the build. Some of these parts JUST came out and Steve didn't even have pricing on some of them just yet but they are as follows:

20980436612_534ebbb279_b.jpg

  • Coyote Camshaft Drive kit - M-6004-A504 - Includes new Primary and Secondary phasers, Boss 302 Primary tensioners, secondary tensioners, primary chains, secondary chains, oil pump bolts, tensioner pins, tensioner arms, camshaft filters, crank sprocket, tensioner hardware, and camshaft bolts
  • Coyote Engine Harness kit - M-12508-M50 - Supposedly with this kit there is no rewiring needed for switching to the Cobra Jet Intakes and throttle bodies. We will see how well that claim is. That being said you need the following VCT actuators for this kit.
  • 2/27/12 or newer VCT solenoids - BR3Z-6M280-D
  • Coyote engine ignition coil kit - M-12029-M50C
  • Cobra Jet Pulse Ring - M-12A227-CJ13
  • Roller Pilot Bearing - M-7600-B
  • Boss 302R Electric steering rack - M-3200-EPAS
  • Boss 302 Engine Oil Cooler - M-6642-B
  • Lash adjuster assembly - M-6500-M50
  • 5.0L Coyote Roller Finger Follower Kit - M-6465-M50
  • Cobra Jet Air Intake - M-9000-M50CJ

The 2015 heads come bare with just valves, valve springs, and keepers so I also needed to get some roller followers along with the lash adjusters. I had the heads shipped to me and got them all ready to be put in. I have to say they are a work of art IMO. Trick Flow Valve Springs, RGR bronze valve guides Ferrea oversized valves, and a nice port work to the intake and exhaust ports along with some bowl work and a whole slew of things I am probably forgetting.

20477811308_c904998778_b.jpg

20937275385_bf5d2892fa_b.jpg


That being said, there have been people noticing that their Cobra jet Intake Manifolds intake runners were much larger in size than the intake ports are on the heads. That will cause a little bit of loss in power than if the ports were matched in size.So I took some painters tape and grabbed my x-acto knife and traced the intake ports on the manifold and transferred that over to some cardboard. Well would you look at that

19810800084_2034950403_b.jpg


20245365620_925f3d403c_b.jpg

Perfect fit! Don't mind me holding the piece on the head, if I had let it go, it would have fallen down the intake port and I really didn't want that to happen.

From this point I wanted to calculate my compression ratio so I needed to know the combustion chamber volume so I grabbed the tools needed (sorry no pictures of this). You need your spark plug as the spark plug takes up a specific volume in the combustion chamber, a piece of plexiglass with a hole cut in the center, some sort of way to measure the liquid going into the Combustion chamber (a syringe works as it has a marked volume on it), some vaseline and some water. The first thing that I did was to level the head so I grabbed a bunch of coffee filters I use to clean parts and folded them up until I got the heads nice and level. What you are doing is taking your water and filling up the combustion chamber with a specified CC's of water. The factory size is 54.5cc's so when you get to this point you take some vaseline and put it around the combustion chamber to seal the chamber off, now take your piece of plexiglass and put it over the combustion chamber. From there you can continue putting water in the combustion chamber. When you start to get to the top of the piece of plexiglass, you stop. Subtract what you have left in the syringe from the volume of the syringe and add up how many times you added water into the combustion chamber ie. if you have a 10ml syringe (although mine was .5ml URGH) and you filled it 5 times and you have 4 ml's of water left in the syringe you have a combustion chamber size of 56 cc's.

Now that I know this I can go ahead and calculate my compression ratio. While there are calculators out there that will do the math for me, I like to do this sort of stuff so I sat down with a pad and pencil and went about calculating the compression ratio myself. While there are a certain number of ways to calculate your compression ratio, I decided use a technique called slicing pi as it seemed the simplest and easiest way to do this.

Bare with me as we are about to embark on a treacherous journey into the world of ...... MATH

When calculating your compression ratio there are 5 variables that we are going to need to find and we are going to need to solve for. In looking at the ways to find your compression ratio I saw this video and it stood out to me as the most detailed and concise way to find your compression ratio. Beware though, it is 20 minutes long but it is very thorough in the explanation. I have also found a love for Jafromobile and his videos now because of this.

http://youtu.be/bWze92nt9OU

Anyway, snap back to reality and math!! Ok, so the variables that we need to solve are as follows:

V1 = Swept volume - Here you are calculating the engine volume based on the bore and stroke of the cylinder.
V2 = Gasket volume
V3 = Piston to deck volume - Here you are calculating the distance between the piston at top dead center and the deck
V4 = Piston volume
V5 = Head combustion chamber volume

Getting my measurements

I know what my bore is based on the proposed measurements brought forth by RGR & JPC. I don't have a dial bore gauge to calculate my actual bore but when I measured it with my dial caliper at the top (I know this is entirely wrong and un scientific but I didn't have the right tools available to me at the time) it measured out 5 times to an average of 3.699 in, so I am confident in their measurements on stroke as well which I know is 3.800.

In order to find the crushed gasket thickness of the gasket I am using I contacted Cometic and asked them for the crushed measurement and they said that it will be .040 as listed on the packaging and all of the crushed thickness' will be listed on the gaskets so my gaskets crushed thickness is .040.

In order to measure my PTD clearance I had to find TDC on the number 1 piston. Out came my dial indicator and stand that I got with the Comp Coyote Camshaft Degree Kit. Unfortunately, I didn't have anyway to securely fasten it to the deck so I had to hold it steady by hand. Not an easy task to do when you are trying to rotate the engine at the same time. Anyway, it ended up taking me about an hour to find TDC and then I spent another 45 minutes making sure that it was true TDC which ended up with me double checking my measurements 8 times. So, I set TDC and grabbed my smallest feeler gauge and went all the way around the entire piston and couldn't get it threw so I knew the gap was at least .004" I checked with Eric over at JPC about this and he said that Rich makes sure he zero decked the engine. Considering I couldn't get a .005 feeler gauge in there nor could I see daylight between th piston and my straight edge I am pretty confident that is the case.

My pistons are a flat top piston with a .70 valve relief cut in them.

Head CC volume using the method outlined above is 57cc's

Shall we get started on the math now?

Now, according to the Hot Rod magazine article listed below the formula for calculating your compression ratio is as follows

Compression Ratio = (V1+V2+V3+V4+V5) / (V2+V3+V4+V5)

http://www.hotrod.com/how-to/engine/ctrp-0505-calculating-engine-compression/

When figuring out the swept volume (displacement in the Hot Rod article), gasket volume, & the piston to deck volume most people will have you follow a formula that looks like this:

(bore/2)^2 x 3.14 (pi) x your variable

Instead of doing that, we are going to be slicing Pi which will divide the circle into 4 equal parts so our equations become MUCH simpler IMO. When we slice pi we come with the number that we multiply everything by .7854

V1

Bore x Bore x Stroke x .7854 = V1
3.700 x 3.700 x 3.800 x .7854 = 40.8580788
V1 = 40.8580788

V2

This one is a little bit tricky. The online calculators seem to use bore of the cylinder rather than the gasket bore size. Using two different measurements will come up with two different compression ratios off by a couple hundredths so I will use the way the online calculators measure gasket volume.

Bore x Bore x compressed gasket thickness x .7854 = V2
3.700 x 3.700 x .040 x .7854 = .43008504
V2 = .43008504

V3

Note: Negative value if the piston protrudes above the deck surface, positive if it is below the deck surface

Bore x Bore x Pistons Distance relative to the deck surface x .7854 = V3
3.700 x 3.700 x .000 x. 7854 = 0
V3 = 0

V4

Because this measurement is in cubic centimeters and we want it to be in cubic inches like the rest of our measurements, we have to multiply this number by .0610237

pistons volume =.70 cc's
.70 x .0610237 = .04271659
V4 = .04271659

V5

Because this measurement is in cubic centimeters and we want it to be in cubic inches like the rest of our measurements, we have to multiply this number by .0610237

Combustion chamber volume = 57 cc's
57 x .0610237 = 3.4783509
V5 = 3.4783509

Now that we have all of our variables, we can go ahead and plug them into our formula above

Compression Ratio = (V1+V2+V3+V4+V5) / (V2+V3+V4+V5)
Compression Ratio = (40.8580788+.43008504+0+.04271659+.4783509) / (.43008504+0+.04271659+.4783509)
Compression Ratio = 44.80923133 / 3.95115253
Compression Ratio = 11.3408001816624
Compression Ratio = 11.34:1

From here we can easily find out our displacement. All we have to do is take V1 (our swept volume of a cylinder) and multiply it by how many cylinders the engine has.

Displacement = V1 x number of cylinders
Displacement = 40.8580788 X 8
Displacement = 326.8646304
Displacement = 327 CI ......... rounded up, always looking for that extra inch right fellas haha

I certainly would have liked to go higher on the compression ratio but stock compression works for me for now. This way I can see what the extra cubic inches and full bolt ons will yield with a Coyote and I'm excited to see what it can do. I know that a Coyote with some big cams can make 577 HP on E85 with 318 CI and a similar setup so I am curious what my entirely different cams and stock compression will do with an extra 9 cubic inches. Plus, down the road when the engine needs to be refreshed I can go a little bit stupid and maybe get that 344ci coyote and run a 12:1 compression ratio and hurt some feelings with it MUWHAHAHAHAHA. I think I will leave this one off here for now.
 
ArizonaBOSS said:
Looks like you will pioneer the 2015 head fitment for us :)

@steveespo @captdistraction

Zero fitment issues to be honest. I am just about to do the writeup on the heads but I check both of them and everything lines up perfectly and nothing appears to interfere even with the stock Boss head gaskets. It was a direct bolton for me.
 
steveespo said:
Ordered the timing set from American Muscle earlier $439 shipped. Thanks for the heads up that they were finally released Sean. Will make assembling my Livernois 5.2 shortblock and Boss heads easier later this year.
Steve

No problems, I should buy some of the specialty tools after the build so if you need them I can always run them over to you.
 
Back to the fun stuff. After I turned my attention away from math and back on putting parts on the car, I put all of the ARP studs back in. I went down to the bottom of the holes because if I turned them half a turn, they were wobbly as shiznit and it wasn't something I was confident in. Studs went back in the engine and out came the Cometic head gaskets for a 11-14 Mustang. After lining up the head gaskets on the heads, it looks like everything lined up and is all set. So in case anyone is wondering. 2015 heads fit on the 11-14 block and with 11-14 head gaskets without issues.

20044873563_738b9aac34_b.jpg

20826773980_564055c8cf_b.jpg

20479066979_31f52cf663_b.jpg

20043253514_b2ae927b72_b.jpg

20665819005_57a28b93dc_b.jpg

Head gaskets got put on the deck and then the heads got put onto the block followed by the ARP washers and ARP nuts. As per ARP instructions I used the ARP assembly lube and put some on the threads of the studs as well as the nuts. It may have been overkill but oh well. I asked around bout the torque procedure at Tim Eichhorn over at MPR Racing Engines told me what he uses for the ARP bolts.

Parts List
  • 2015 Heads - FR3Z-6049-A
  • 2015 Heads - FR3Z-6049-B
  • Cometic 94mm Bore MLS .040" Gasket Right - C5286-040
  • Cometic 94mm Bore LMS .040" Gasket Left - C5287-040
  • ARP Head Studs 11-12 Block - 256-4702

Torque Specs
  • Step 1 - Hand tight
  • Step 2 - 30lb-ft - I waited an hour before continuing on
  • Step 3 - 30lb-ft again
  • Step 4 - 50lb-ft
  • Step 5 - 70lb-ft
  • Step 6 - 90lb-ft
  • Step 7 - 110lb-ft
  • Step 8 - Wait an hour and 110lb-ft again

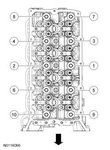
Follow the head stud torquing sequences below for each side

Right Hand

21015929645_cda8ff1139_o_d.jpg


Left Hand

20989710956_3f9e8717c6_o.jpg
 

ArizonaBOSS

Because racecar.
Moderator
8,733
2,735
Arizona, USA
The 2015 heads are significantly less expensive than the BOSS heads, too. Tousley showing $485 + $250 core ($735 total) vs. ~$1300/side for the BOSS heads.

Do you mind sharing what Livernois is charging you for the porting work?
 
For me it was this $3835. Don't forget the 2015 heads come bare so you need the hydrolock lifters and roller followers as well.
 

TMO Supporting Vendors

Latest posts

Buy TMO Apparel

Buy TMO Apparel
Top