The Mustang Forum for Track & Racing Enthusiasts

Taking your Mustang to an open track/HPDE event for the first time? Do you race competitively? This forum is for you! Log in to remove most ads.

  • Welcome to the Ford Mustang forum built for owners of the Mustang GT350, BOSS 302, GT500, and all other S550, S197, SN95, Fox Body and older Mustangs set up for open track days, road racing, and/or autocross. Join our forum, interact with others, share your build, and help us strengthen this community!

Track Tire/Utility Trailer

This site may earn a commission from merchant affiliate links, including eBay, Amazon, and others.

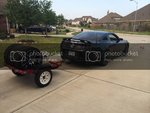
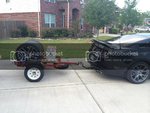
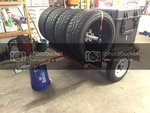
I wanted to start a thread documenting my track tire trailer build. I did alot of research (internet and at the track) looking at other people's trailer setups, so I thought putting a thread together may help someone else down the line.

I'm finally getting a rollbar in the car, which was the main reason for getting a trailer. And with the rollbar, I will no longer be able to fit four tires, tools, and spare parts in the car. So here goes...

I started with Blowfish Racing's hidden hitch kit, which also acts as a rear tow hook, as seen below.
I currently have the hitch installed, but don't have any pictures.
IMAG0794%20Copy_zpshe6hf7xt.jpg

I installed Curt's trailer wiring kit, also from Blowfish Racing.
IMAG0982%20Copy_zpsmw4hnyy6.jpg

The wiring kit required a 12v from the battery, so I ran the power wire (traced red) along an existing wire loom on the passenger side, following it all the way to the glove box.
IMAG0985%20Copy_zpsr712ewcf.jpg

Under the glove box, I used an existing grommet to access the firewall. The grommet had an unused nipple that worked great, because it kept the power wire separate from the existing wires.
IMAG0978%20Copy_zpsy0nevpnm.jpg

The grommet came out behind the passenger fender, which was accessed by removing the rear section of the wheel well. I ran the wire through a gap that was between the firewall and the chassis.
IMAG0974%20Copy_zpsjhwmaa1q.jpg

The gap is right under the battery.
IMAG0977%20Copy_zpso9jmo9jl.jpg

Power wire with the fuse holder.
IMAG0981%20Copy_zpscgvvedt8.jpg

-------------------------------------------------------------------------------------------------

Trailer Assembly.

I went with the 1090lbs capacity utility trailer from Harbor Freight.
IMAG0992%20Copy_zpsocm4ryoi.jpg

I only got this far today, before running out of daylight.
Squaring up the trailer twas time consuming. I didn't have an angle, so I ended up using one of my hard cover college books as an angle ::)
IMAG0994%20Copy_zpsqyf8bh9k.jpg

I should make some more progress tomorrow, weather permitting!
 
Cool. In for updates.
 
Smilieboy said:
Watching this as well. Once I get re balanced from all the work I did this year and the new DD this is on my to do list.

Until I get the full setup (e.g. truck, trailer and a garage) I'll be pulling this trailer around.
 
Made some more progress today. Not as much as I wanted, but still progress.

Installed the springs
IMAG1009%20Copy_zpsw5gld6v8.jpg

The axle went on next.
IMAG1010%20Copy_zpsvxdajrph.jpg

Packed the bearing with grease. Ended up using LUCAS Red N Tacky grease.
This was my first time packing bearings, hope I did it right. The manual says to re-grease the bearings every 2k-3k miles.
Half my tools ended up being covered in grease. Clean up was not fun!
IMAG1011%20Copy_zpsvpzgxoji.jpg

Finally, installed the fenders and a front jack.
IMAG1012%20Copy_zpsvb6jh9tf.jpg

Next up are brake light wiring harness and plywood installation.
 
What size tires are you needing to transport? I recently did the exact same trailer and light kit (routed mine externally) but with Curt hitch ($120 on Amazon). I didn't even think of the excess width with 315s (4). Right now I'm only able to stack 3 wide. :-[ I'll have to add some width to be able to stack 4 wide and be able to do a toolbox (and maybe air tank.

Other fun was licensing and running between license office and HF to get them to sign off even though it was sold as a kit and I had MCO. State of TX says I have to pay nearly $60/yr on my $200 trailer ($191 with 20% coupon). Bastards.

Oh yeah, tows easy of course, but don't worry about backing it up. It aint gonna happen without going sideways.
 
Before I purchased the trailer, I had already made a "floor plan" based on estimated sizes of tires and tool boxes. My plan is to have a toolbox towards the rear of the trailer, 3 fuel jugs in the middle and place two stacks of two tires next to each other towards the front. The plywood base will have about a foot of over hang over the tongue beam, and about five inches on each side in front of the fenders.

With this approach, if I decide to run wider tires, the tire diameter wouldn't change much and the stack height would simply increase, which isn't a big deal. I just have to make sure I have a tall enough pipe for the stacked two tires to go through.

I plan on going to a privately run licensing and registration office for the registration. I've already spoken to them and have all the paperwork, so shouldn't be much of a hassle. Now registration costs I haven't taken into account, hoping they're reasonable ::)

Also, backing up is a big concern for me haha
I can already see myself messing things up at a gas station ;D
 

302 Hi Pro

Boss 302 - Racing Legend to Modern Muscle Car
2,009
441
Southeast
Depending upon the weight of your tool box, you might want to rethink its mounting location. You need to have tounge weight (10%) for the trailer to track nicely behind you.

Good luck with your trailer build.
302 Hi Pro
 
Thanks for the info!
I was actually discussing trailers with a coworker today, and he mentioned the same rule-of-thumb 10% tongue weight. I should be ok though, my portable toolbox, jack, and other spares should be enough to balance it out.

Unfortunately, I made no progress on the trailer today, because of rain. One of the drawbacks of not having a garage. My first event of the season is next weekend, so I better finish everything this coming weekend.

To get a better idea of the setup and measurements, I did a mock-up in the living room ;D

I assembled the Fly Racing locking gas jug frame. Initially, I was going to build my own, but with time constraints and everything, I went with a pre-fabbed frame. I'm pretty impressed with the quality and the hardware, but just like anything else, if someone really wants your stuff, they're going to get it.
IMAG1013%20Copy_zpsxncxvbcb.jpg

Mock-up
IMAG1014%20Copy_zpsh15mt6kr.jpg

IMAG1015%20Copy_zpsazppeeh4.jpg
 
I see you have an additional extension. What length is it, and was it necessary?

I still haven't hooked the trailer to the car to check clearances.

I made very little progress yesterday, It was pretty cold out. Only got to mount the LED lights and ground them. Had to grind some paint off to make bare metal contact... it'll probably start rusting soon ::)
 

DEye

You can't get there from here...
I picked up a HF trailler a few years back, nice little package.
The wheel bearing seemed to be packed with a light grease, clear, very light consistency.
I cleaned it out and put proper wheel bearing grease in its place.

I'll post a project pic later of the final job.
 
DEye said:
I picked up a HF trailler a few years back, nice little package.
The wheel bearing seemed to be packed with a light grease, clear, very light consistency.
I cleaned it out and put proper wheel bearing grease in its place.

I'll post a project pic later of the final job.

How'd you end up packing the inner bearing?
Definitely post some pictures, when you get the chance!

Jabooh1 said:
I do have an extension. Can't remember the length but will measure it tonight. Without it the trailer rubs against the bumper.

Thanks for the heads-up.
Looks like the most standard extension is 8"s. Let me know what you've got. Another item on the shopping list... which never seems to end!
 
I finished the wiring today.
Here are a few pics of the ground connections I had to do, because of the LED lights. Tucked and wire-loomed everything afterwards.

IMAG1023%20Copy_zpszypntrqa.jpg

IMAG1024%20Copy_zpsdepa2wja.jpg

IMAG1025%20Copy_zpsryjsr4d9.jpg

Also picked up some treated plywood. All of the plywood at the store had defects, couldn't find a clean straight sheet.
My original plan was to apply bedliner, but I don't have time to apply it and wait for it to cure. Maybe next month I'll disassemble everything and apply a few coats of bedliner or paint.

Here's the plywood laid out on the trailer.
IMAG1027%20Copy_zpsarini6zt.jpg

Then I placed the toolbox, gas jugs and wheels to check fitment. It's finally looking like something half done!
IMAG1030%20Copy_zpspi5noj13.jpg

IMAG1031%20Copy_zpso3kthkcy.jpg

IMAG1032%20Copy_zpskvdxw66i.jpg

Next is bolting and securing everything in place.
 
6,420
8,327
I hauled my race kart around on one of those for years without issue.
Keep an eye on the bearings, those little tires do a lot of spinning.
As stated I'd move the tool box to the front, or at least over the axle.
Thompson's water seal, poor it on and let it soak in a few times, should do the trick for the wood.
On mine, I located some aluminum channel and went around the edge of the plywood to finish it off and help keep water out of the cut part.
Looks good though.
 
Thanks for the tips!
I think I'm going to end up disassembling in a few months to seal the wood and possibly re-arrange things, depending how the trailer handles.

Today I secured the boards and the tool box, also got registered and tagged the trailer. Tomorrow we're expecting some crazy wintry snow/rain mix. May have to wait until Sunday to mount the fuel jug frame and pipes for the tires.
 

TMO Supporting Vendors

Top