The Mustang Forum for Track & Racing Enthusiasts

Taking your Mustang to an open track/HPDE event for the first time? Do you race competitively? This forum is for you! Log in to remove most ads.

  • Welcome to the Ford Mustang forum built for owners of the Mustang GT350, BOSS 302, GT500, and all other S550, S197, SN95, Fox Body and older Mustangs set up for open track days, road racing, and/or autocross. Join our forum, interact with others, share your build, and help us strengthen this community!

AC: Fix it or junk it?

This site may earn a commission from merchant affiliate links, including eBay, Amazon, and others.

This is how to from Alldata....

Removal and Installation

All vehicles

With the vehicle in NEUTRAL, position it on a hoist.
Recover the refrigerant.
Remove the 8 upper radiator air deflector pin-type retainers and remove the air deflector.

3.7L and 5.0L (4V) vehicles

Remove the Air Cleaner (ACL) housing and ACL (Air Cleaner) inlet pipe.

5.4L (4V) vehicles

Remove the 2 degas bottle bolts and position the degas bottle aside.

All vehicles

Remove the 4 upper radiator bracket bolts and the 2 upper radiator brackets.
To install, tighten to 10 Nm (89 lb-in).
Remove the condenser inlet fitting nut and disconnect the fitting.
Discard the O-ring seal and gasket seal.
To install, tighten to 15 Nm (133 lb-in).
NOTE: The radiator must be positioned rearward to access the 2 upper condenser bolts. Remove the 2 upper condenser bolts.
To install, tighten to 9 Nm (80 lb-in).
Remove the 9 lower radiator air deflector screws and the lower radiator air deflector.
Remove the condenser outlet fitting nut and disconnect the fitting.
Discard the O-ring seal and gasket seal.
To install, tighten to 15 Nm (133 lb-in).
Remove the 2 lower condenser nuts.
To install, tighten to 9 Nm (80 lb-in).

NOTE: The condenser core must be removed from below the vehicle. Remove the condenser core.

To install, reverse the removal procedure.
Install new gasket seals and O-ring seals.
Add the correct amount of clean PAG oil to the refrigerant system.
Evacuate, leak test and charge the refrigerant system.
 

Grant 302

basic and well known psychic
That's just the condenser removal, and that's probably where the bulk of the work is.

Just looked at all the lines on my car and none of them use a the quick disconnect anymore. They're all bolted O-ring connections. Aside from the condenser, you'll have 3 lines and the compressor to remove. The harness to the compressor looks like it will need to be tied out of the way. Two lines to the evap core attach with a single block and would be the hardest to plug. I would find a set of take-off line, cut about the last inch of both and fold/crimp/weld the ends and bolt it back in.

Exploded view of most of the parts to be removed:
$_57.jpg
 

Grant 302

basic and well known psychic

steveespo

Lord knows I'm a Voodoo Child
Moderator
4,019
1,966
Exp. Type
W2W Racing
Exp. Level
10-20 Years
Cookeville TN

Grant 302

basic and well known psychic
steveespo said:
Nice, thanks. I didnt want to pull the evap/eater box to keep the fan for defrosting during wet or humid days. Arizona doesn't worry about that too much.
Steve

Ha! But you've seen his engine bay after a dust storm? I'd worry more about sand in there!
 
Swung by the shop this morning to have the Freon evacuated and recovered. There was almost none in the system which explains the lack of cooling. I was thinking it might have been the clutch since we had to replace to A/C belts last summer but weren't sure the cause. The didn't break but were damaged. A full inspection of the pulleys didn't show any burrs or anything that might be damaging them so wondered if the compressor was possibly seizing up? Not sure how the clutch works but seemed plausible.
 
Black Boss said:
Did you have a Ford dealer evacuate the system?

Look forward to updates on the surgery!
Yes out back of the shop but it's kind of a second home ::) Had the kid's Focus in for new tires the night before and a couple company vehicles last week. It only took about 10 minutes to recover the Freon and oil and he didn't have to stop working on the transmission of the F350 he was under for more than a couple minutes to do it :)

He has an assortment of plugs that he said will fit so I'll let you know what we end up using.
 
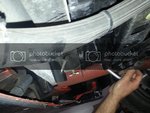
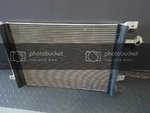
Surgery was successful. It's out. It took us about 2-1/2 hours total. I'll try to relate what I can, but I was more an extra set of hands. Before we started I pulled the radiator cover, air box and intake tube. We ended up putting the front on jack stands and removing the plastic shroud behind the splitter. Had to take out the 6 splitter bolts at the back but not the entire splitter.

20140602_175053_zpsbc3e1d1f.jpg

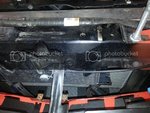
We had to drop the oil cooler to get enough slack in the oil hoses to squeeze the condenser out the bottom.

20140602_181025_zps8ea25c3e.jpg

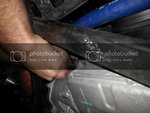
Compressor had several bolts, one a/c line and an electrical connector to remove.

20140602_181245_zps861340ad.jpg

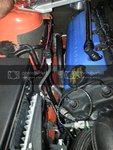
We ended up disconnecting the wiring harness from the PCM and the ground wires off the battery relo kit to gain enough room to fish out this long line.

20140602_184140_zpsd3deaae3.jpg

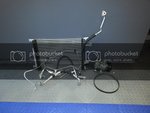
Here are all the parts. I haven't gotten around to weighing them yet, but I would guess 20-25 lbs. total.

20140602_185804_zpsbb1218ba.jpg

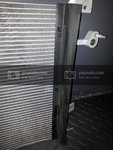
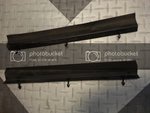
We pulled the rubber gaskets off the condenser and zip tied them to the radiator overlapped by the two larger gaskets that block off airflow so it all goes to the radiator. The push pins weren't long enough to go through the radiator like they did the thinner condenser.

20140602_181820_zpsd95582d6.jpg

20140602_183546_zpsf3b4d862.jpg

20140602_190220_zps64adb238.jpg

I forgot to take a picture after they were installed and don't feel like going back out and pulling the radiator cover right now :p
 
Cool I mean Hot, er nice. :D
 
Hah! Well I started it and it still runs so feeling ok so far :) I found some plugs for the condenser and compressor but need to find two for the firewall still. There is one larger and one smaller hole. Going to swing by the dealer tomorrow and see if the guys that work on the A/C systems regularly have any sitting in their bins from installing a new unit somewhere along the line.
 
Grant 302 said:
I thought the two O-ring plugs looked like two different sizes. Link isn't working for me at the moment.
I stopped by the store and looked at them. They're actually much too small. I'm looking for a couple tapered plastic plugs with a collar that I can just push into the holes. That's what I did on the compressor and condesnser fittings. Basically I need the plastic plugs that come on a new expansion valve, but the dealership didn't have any laying around. They were going to save the ones from a new one the next time they have to replace a unit but not sure when that will be....

The ID on the two holes is 0.611" and 0.286". Something like this? Unfortunately the min qty is 60 each size.....

http://www.mocap.com/plug-cap-tapered.html
 

TMO Supporting Vendors

Buy TMO Apparel

Buy TMO Apparel
Top